Adding Reports for Cash Station
Procedure
- Configure online data gathering. For more details see the Online Data Gathering article. Check if there is data on the open shift in the reports.
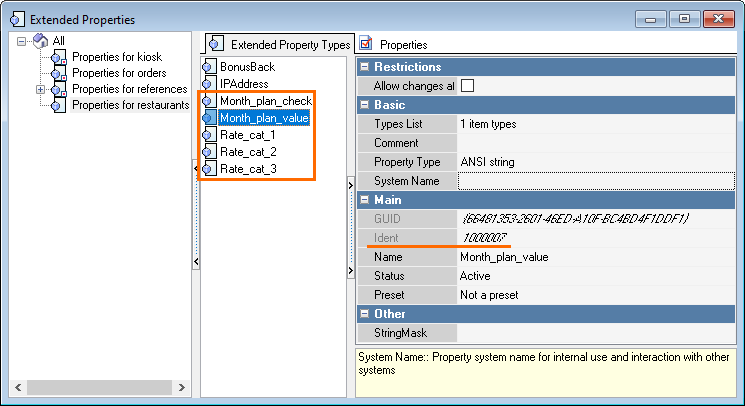
- Go to Options > Customization > Extended properties and create extended properties for the restaurant:
- Click on three dots
 in the end of the Types List line
 - Click the Add reference to Item button
Select the Restaurant on the Class Infos tab and click OK.
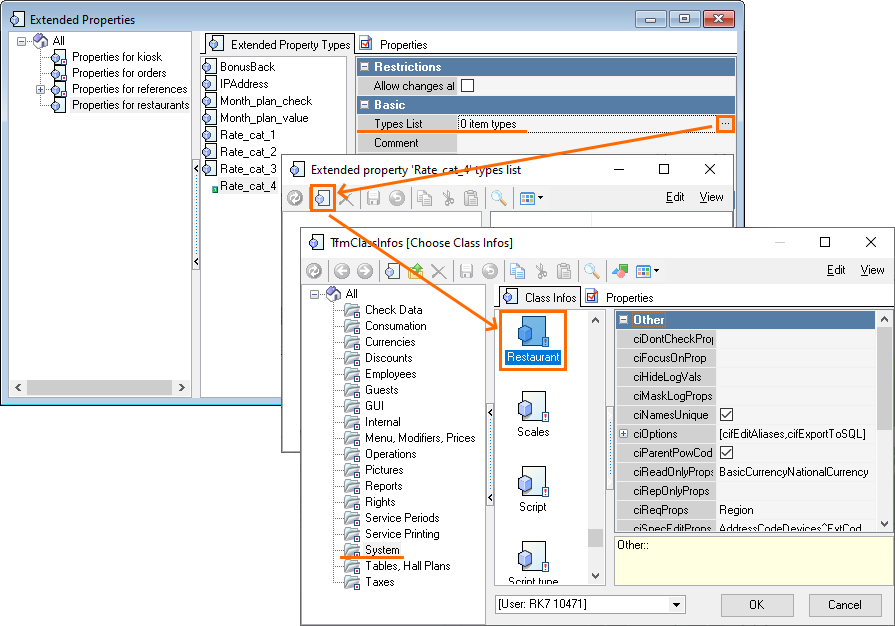
The system name of all extended properties, except IPAddress, can be arbitrary. It is only necessary to know the extended properties ID.
The specified extended properties of the restaurant:
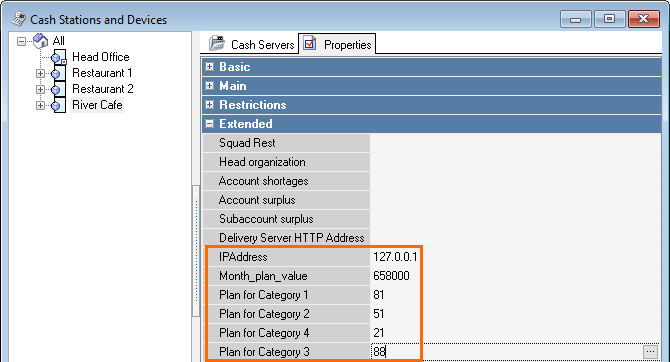
- Click on three dots
Amend the script (\custhtml\sql\script.sql from archive 1):
SET @COUNTFIELD = 1000016; --RESTAURANT'S CHECK COUNT PLAN EXTRA FIELD; ;; Monhly plan of checks SET @AMOUNTFIELD = 1000013; --RESTAURANT'S AMOUNT PLAN EXTRA FIELD; ;; Monthly plan of revenue SET @FOODCLASS = 2 * 256;--CHOSEN FOOD CLASSIFICATION (POTATO/ICECREAM); ;; Dishes classification id. In our example, it is 512. Specify only in the form 256 * Х, where Х = dishes classification id / 256 SET @FOODCAT1 = @FOODCLASS + 1; ;; id of category # 1 in classification SET @FOODCAT2 = @FOODCLASS + 2; ;; id of category # 2 in calssification SET @FOODCAT3 = @FOODCLASS + 3; ;; id of category # 3 in classification SET @FOODCAT4 = @FOODCLASS + 4; ;; id of category # 4 in classification SET @FOODCAT5 = @FOODCLASS + 5; ;; id of category # 5 in classification SET @FOODFIELD1 = 1000014; ;; Plan for category № 1 SET @FOODFIELD2 = 1000015; ;; Plan for category № 2 SET @FOODFIELD3 = 1000018; ;; Plan for category № 3 SET @FOODFIELD4 = 1000019; ;; Plan for category № 4 SET @FOODFIELD5 = 1000020; ;; Plan for category № 5SQLImportant
At the moment, the script is unique for each database, since it is necessary to specify the IDs of categories and extended properties from the r_keeper 7 manager station in the scripts.
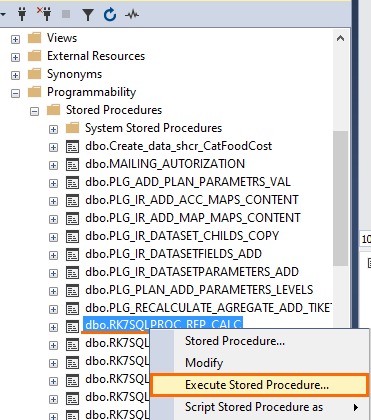
Execute script.sql for the current SQL database. We recommend to use SQL Management Studio.
Important
After executing script.sql, be sure to execute the RK7SQLPROC_REP_CALC stored procedure. This procedure should be added to the scheduler and run every time after the common shift is closed.
- In the manager station, go to Options > OLAP reports > Reporting servers and specify the HTTP port and address in the reference or report server properties. Restart the server to apply the changes.
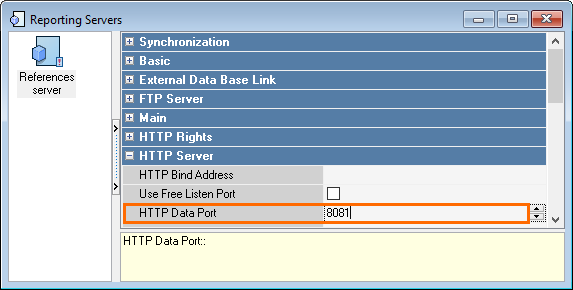
- Open the manager station and fill in the IPAddressextended property, which contains the IP address of the report server. In this way you can change the address of the server.
- In the folder with the report server .exe file, create the /custhtml folder and place the files from archive 1 to it, except for the folder with scripts
In the manager station, the script should be created. This script is linked to the user operation, bound to a button, which is added to the selector;
The script is as follows:procedure ProcessOperation1000489(Parameter: integer); var s:string; begin s:= TRK7Restaurant(RK7.CashGroup.MainParent).genIPAddress; GUI.CmdExec('fsWeb2.exe "https://'+s+':8081/custhtml/overall1.html"'); end;DELPHI- Copy the fsWeb2.exe and *.dll files from archive 2
- When clicking on the created button at the cash station, fsweb2.exe is launched, which demonstrates the reports.
Attached Files