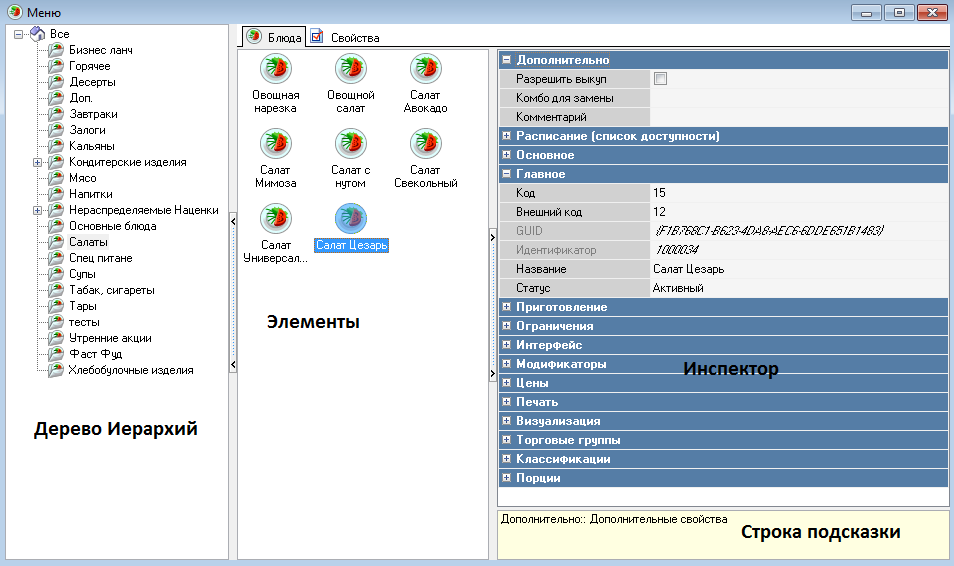
Let's examine the directory window structure based on the Menu directory (reference book).
In the left part, there is a hierarchy tree (in its simplest form, the hierarchy tree can be single-level). The top node All in the hierarchy tree represents the zero level and does not contain any items.
Viewing and modifying properties of an object selected in the hierarchy tree are performed on the Properties tab. If the window size does not allow displaying all properties in the visible area, horizontal/vertical scrollbars will appear on this page to enable scrolling through the properties.
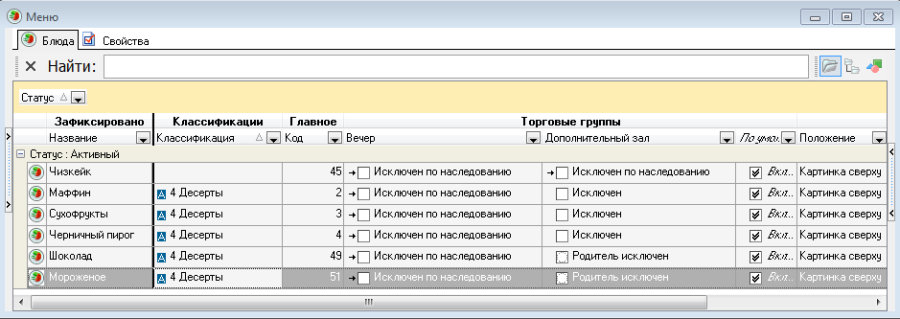
On the "Dishes" page, directory items are created. When an item is selected, its properties are displayed in the Inspector area on the right. To view the contents of each property group, click on the "+" sign. To hide the properties, click on the "-" sign.
As you select each property, a brief description of it appears in the Hint Bar area.
All types of objects and their groups have their own icon, which makes it easier for the user to navigate through the dictionaries when multiple windows are open on the desktop.
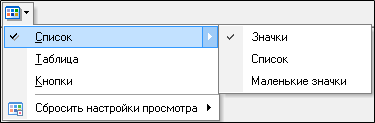
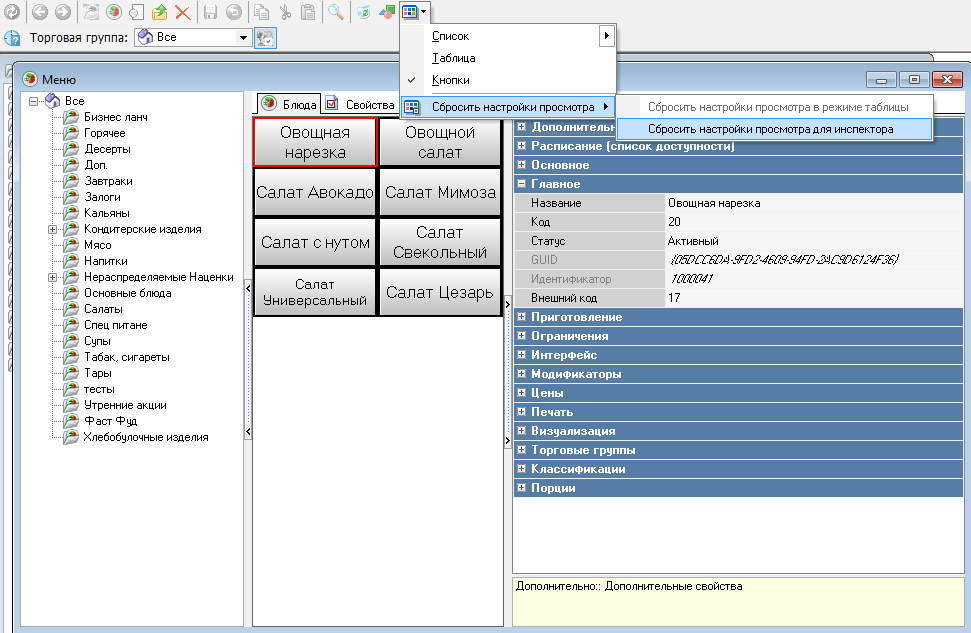
You can customize the display view of items using the button ![]() on the toolbar.
on the toolbar.
 Below, the directory items are presented as buttons.
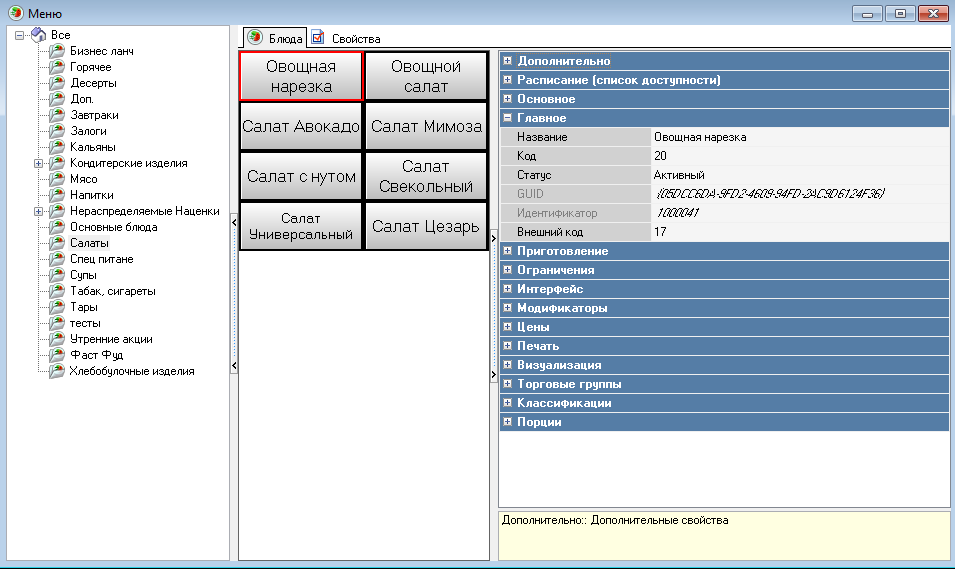
Displaying items as buttons allows you to see how the button looks on the cash register: the position of the label relative to the image (if an image is assigned to the item), background color, and font color.
You can use the toolbar button ![]() to return to the default display settings for the Inspector area and the menu item preview area. To do this, use the Reset View Settings in Table View and Reset View Settings for Inspector commands.
to return to the default display settings for the Inspector area and the menu item preview area. To do this, use the Reset View Settings in Table View and Reset View Settings for Inspector commands.
If the items are presented as a list, you can choose a sorting method for them. To do this, call the pop-up menu from the Items area of the window, the Arrange Items command, and select a sorting method.
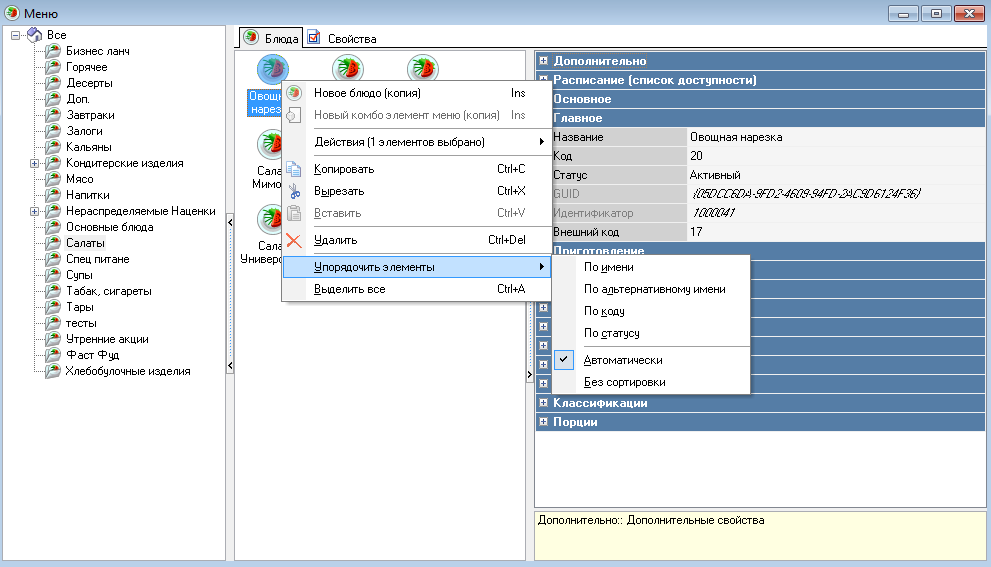
By name – sort objects by name;
By alternative name – sorting objects by alt. name;
By code – sorting objects by code;
By status – sorting objects by status;
Automatic – sorting of objects by name. If the area contains a priority indication, sorting is performed by priority;
No sorting - changes made by the user to the object name in this mode will not result in objects being moved in the Items area.
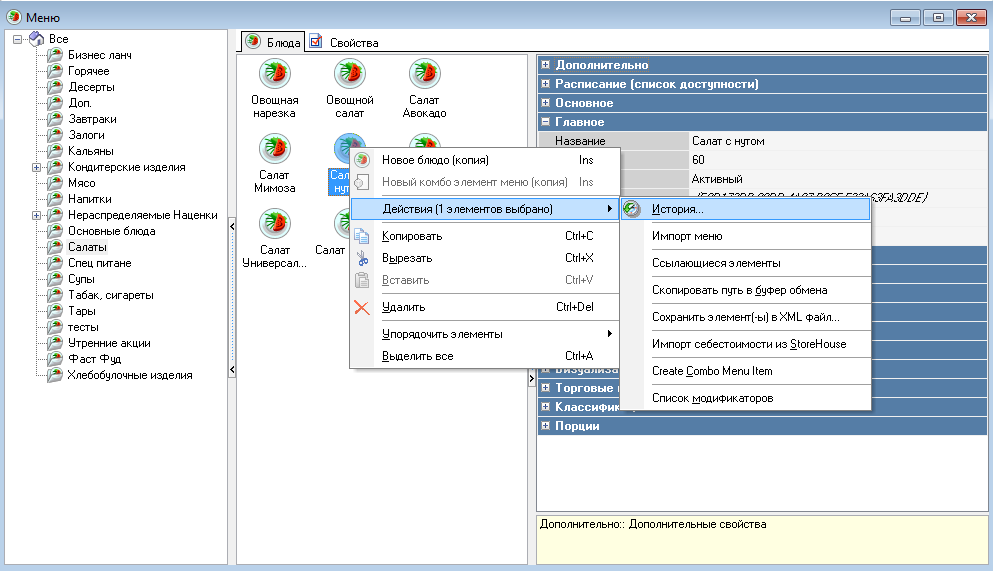
The history of changes to an object can be viewed using the pop-up menu item History (Actions-History), after selecting an item (dish, modifiers, discounts/markups, currencies).
To save only certain operations in the History, you need to check the boxes in the appropriate fields in the reference book (Service – Manager Station – Log Configuration) for the changes that should appear in the history.
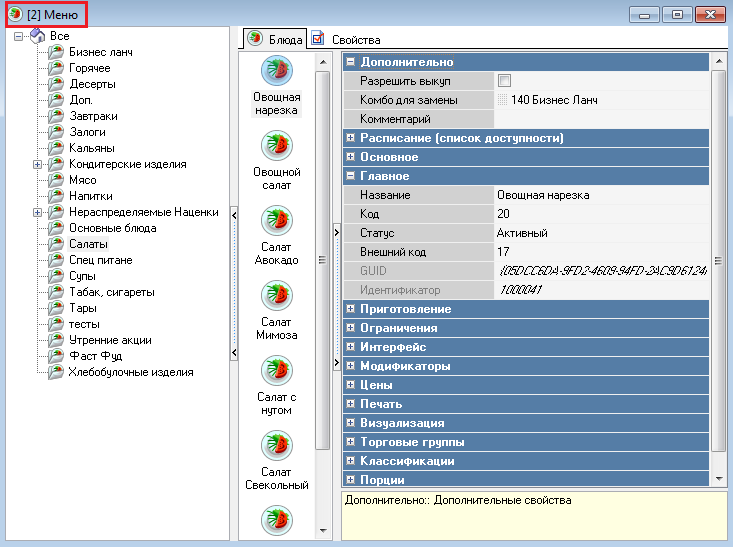
The same directory can be opened in several windows. If a second directory window is opened, the number [2] will be displayed in square brackets next to its name; if a third directory window is opened, the number [3] will be displayed next to its name, etc.
Changes saved in one of the open directory windows are immediately reflected in the others.
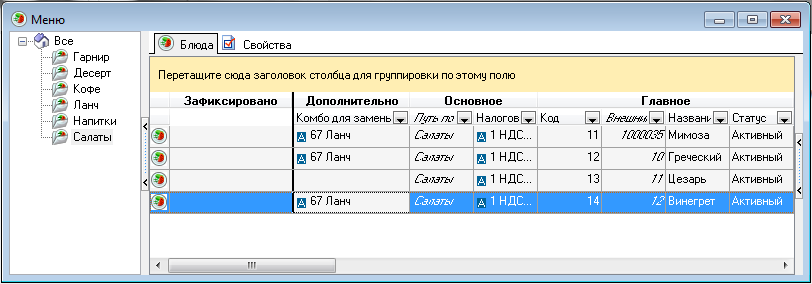
To switch to the Table mode, select Table.

In the table, you can change the column widths in the header area by dragging the borders. Double-clicking the right mouse button on a column border in the header area aligns the column width with the width of the column header.
You can change the order of property names and group names by dragging them. You cannot move a property to another property group.
If any property is not filled in for all items, the column will have a gray background.
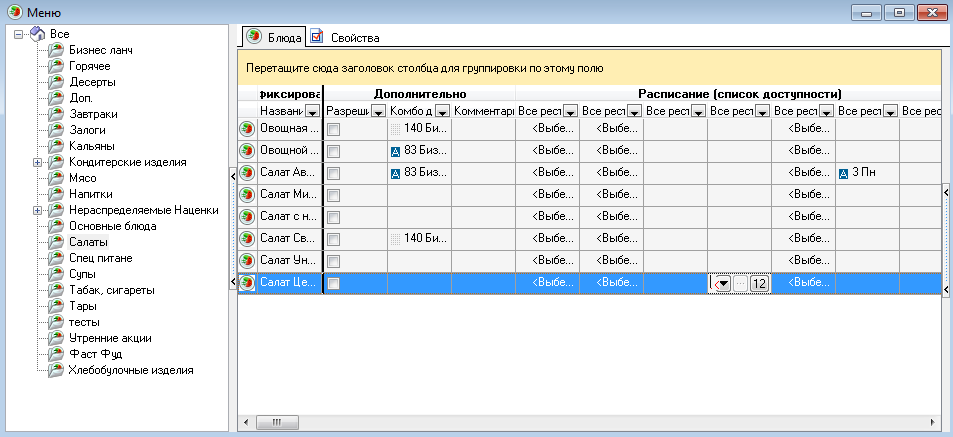
If the items are presented in the form of a table and the Inspector window area is not hidden from view, then the Inspector, Groups, and Columns pages are present in the right pane of the window.

The Inspector page is a list of item properties and their values.
If you need to remove unnecessary properties/property groups from the Items area, you can drag them to the Groups and Columns pages. You should finish dragging when the cursor icon looks like this  or after moving to the Groups and Columns page area.
The Group or Columns pages open automatically, depending on whether you drag a group of properties or an individual property.
To return a property group to the table, drag it from the Groups page to the table header area. If the group can be inserted between others, the cursor will change to green arrows. Finish dragging where you want the group to be inserted.
If you return a group to the table whose properties are all on the Columns page, the group will be empty (the Modifiers group).

A property can be returned from the Columns page to the table only in the group it belongs to or in the Fixed area. If a property can be inserted between others, the cursor also takes the form of green arrows.
The Fixed area of the table (far left) is used to pin properties that will always remain on the screen when scrolling horizontally.
You can move a property to the Fixed area by dragging and dropping.
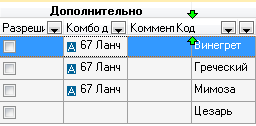
In table mode, you can filter items by left-clicking on a column name. Clicking again will reverse the sort order. The column by which the table is sorted has a triangle icon in the name field. When you change the sort order, the top of the triangle will point downwards.
To set sorting by several columns, select them with the left mouse button while holding down the "Shift" key. To remove sorting by one of the selected columns (without removing sorting by the other columns), select it with the left mouse button while holding down the "Ctrl" key.
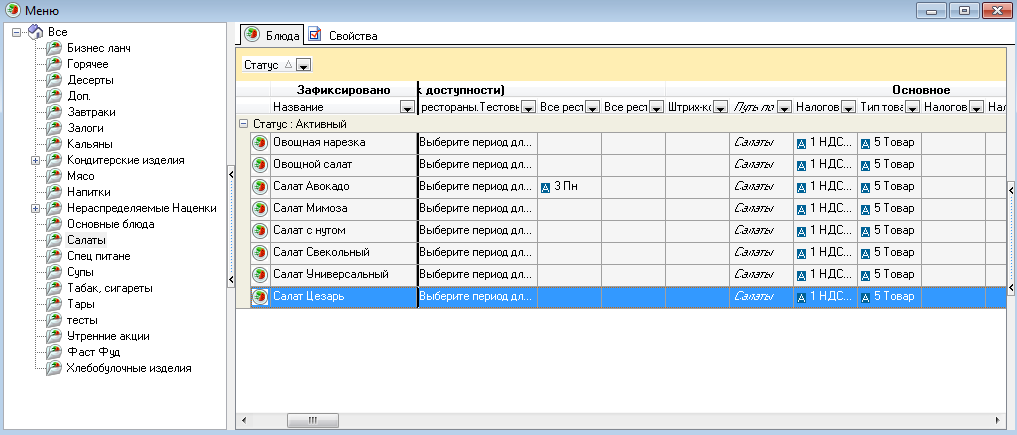
In table mode, you can group items by any property. To do this, drag the name of the property to be grouped to the top of the table with the text "Drag a column header here to group by this field."
Then, in this area, the name of the property by which the items are grouped is displayed.
If you need to group by two or more properties, you can also drag them into the grouping area.
To cancel grouping, drag the property from the grouping area to the table column names area. If the mouse cursor looks like this  when you finish dragging, the property will be placed in its original location. If the mouse cursor looks like this
  when you finish dragging, the property will be inserted between the properties indicated by the green arrows.
The column can be filtered by clicking on the button  in its name. In the list that opens, you can select the desired condition:

All – to display all values;
Empty – displays records for which this property has a value of "empty" (this setting is offered in the list only if the column contains empty property values);
Not Empty – outputs records for which this property has the value "not empty" (this setting, like the previous one, is offered in the list only if the column contains empty property values);
Fragment – to output values containing a text fragment entered in the Filter by Fragment window;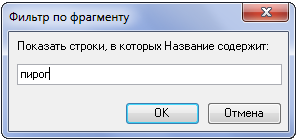 Condition – select by condition.
The filter conditions are configured in the window below. In the condition operation selection fields, you can select one of the following operations:
equal to;
not equal to;
less than;
less than or equal to;
greater than;
greater than or equal to;
contains;
does not contain;
empty;
not empty.

contains – selects values “similar to mask”. At the bottom of the window, when you select this operation, a hint appears:
the symbol "_" - will replace any single symbol in the operation value input window,
the symbol "%" - will replace any number of any symbols in the operation value input window;
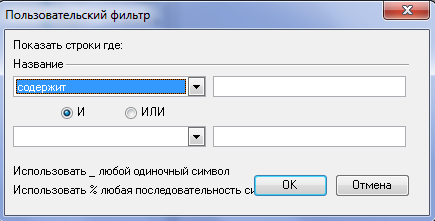
does not contain – select values that should not be displayed on the screen. A hint appears at the bottom of the window when you select this operation;
empty – empty value (when this operation is selected, the operation value field is not filled in);
not empty – not an empty value (when this operation is selected, the operation value field is not filled in).
When assigning two conditions, the AND/OR switch should be set to the desired position.
Click the OK button to set the filter, or the Cancel button to cancel setting the filter.
The arrow on the button  in the column name where the filter is set will turn blue. At the bottom of the window, if a filter is set, the filter conditions and buttons
  ,
,  are displayed.
To remove a filter, select the All setting in the filter settings selection list or click the button  To display a general list of items without clearing the filter settings, uncheck the box at the bottom of the window.
Using the Configure (Set up) button you can call up a window for creating a complex filter.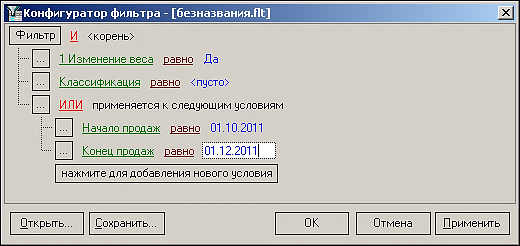
In this window, you can create filters with multi-level conditions. The top level of conditions starts from the Filter node. All conditions and groups of conditions at this level are united by a logical operation near the Filter node. The word "root" indicates the top level of the condition tree.
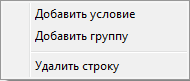
The button  is displayed next to conditions and condition groups. Clicking on it allows you to perform one of the following actions:
The logical operation combining conditions at one level is chosen next to the button of the level above.
The OR operation is applied to the conditions Start of Sales, End of Sales. The AND operation is applied to the conditions Change in Weight, Classification, and the lower-level group (Start of Sales OR End of Sales).
When writing a filter to a string, each level of the filter tree is designated by brackets that highlight groups of conditions.
The figure shows the filter diagram.
(Alt. unit < 104) AND ((Start of Sales = 10/01/2011) OR (End of Sales = 12/01/2011)).
Filters can be saved as files with the .flt extension, and previously created filters can be opened.
After creating a filter, click the "OK" button to apply the filter and close the window, or the "Apply" button to apply the filter without closing the window.
To save the created filter, click the "Save as..." button. To open a previously created filter, use the "Open..." button. To close the window without applying the filter, click the "Cancel" button.
You can export reference data to Excel using the Export, Export to Excel, (Export to XML) command from the pop-up menu called from the table area.
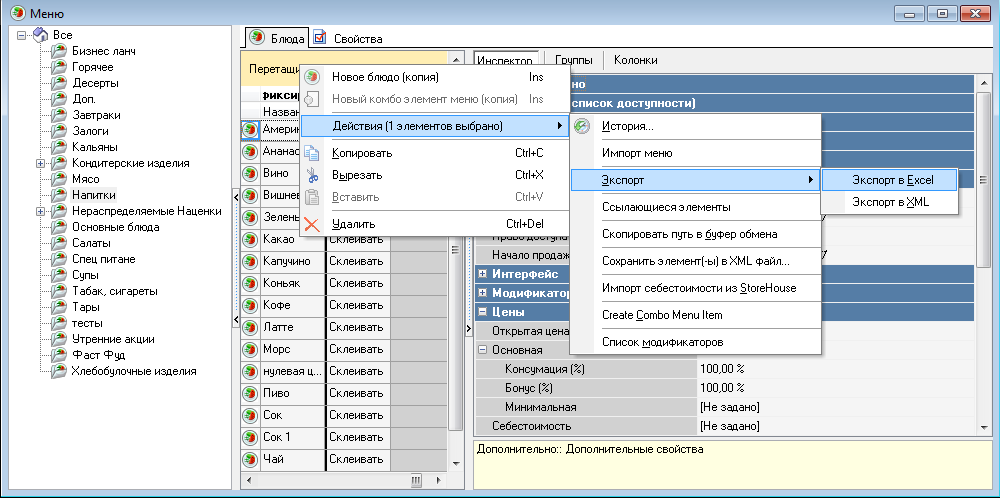
The standard Browse window will prompt you to name the file to export the table. Once you do this, the exported file will automatically open on the screen.
