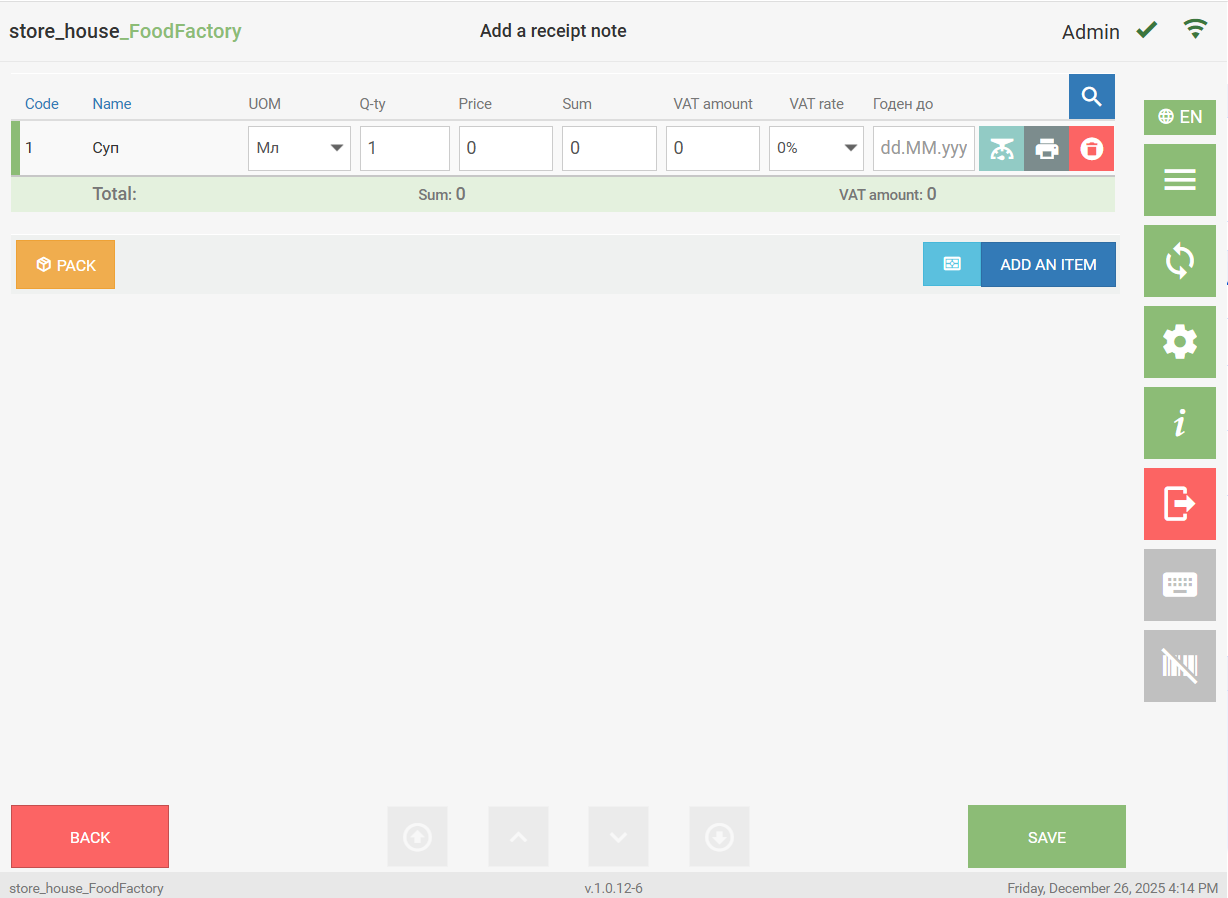
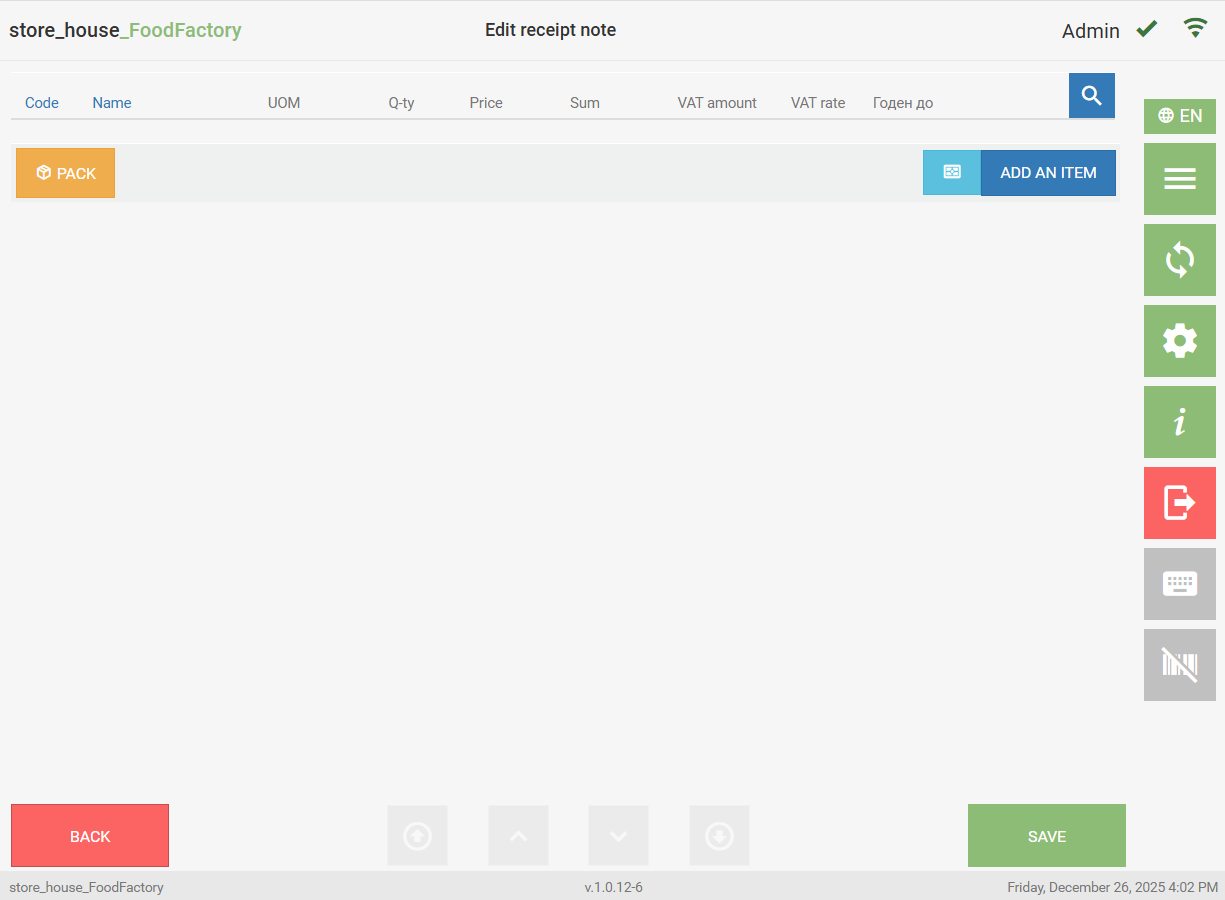
Entering Goods on the Goods Page
To form the contents of a delivery note, on the document Goods page, select the required goods and set their quantity and amounts.
Selecting a Goods Item from a Group
To select a goods item for the document, click the button ![]() .
. The goods search window will open.
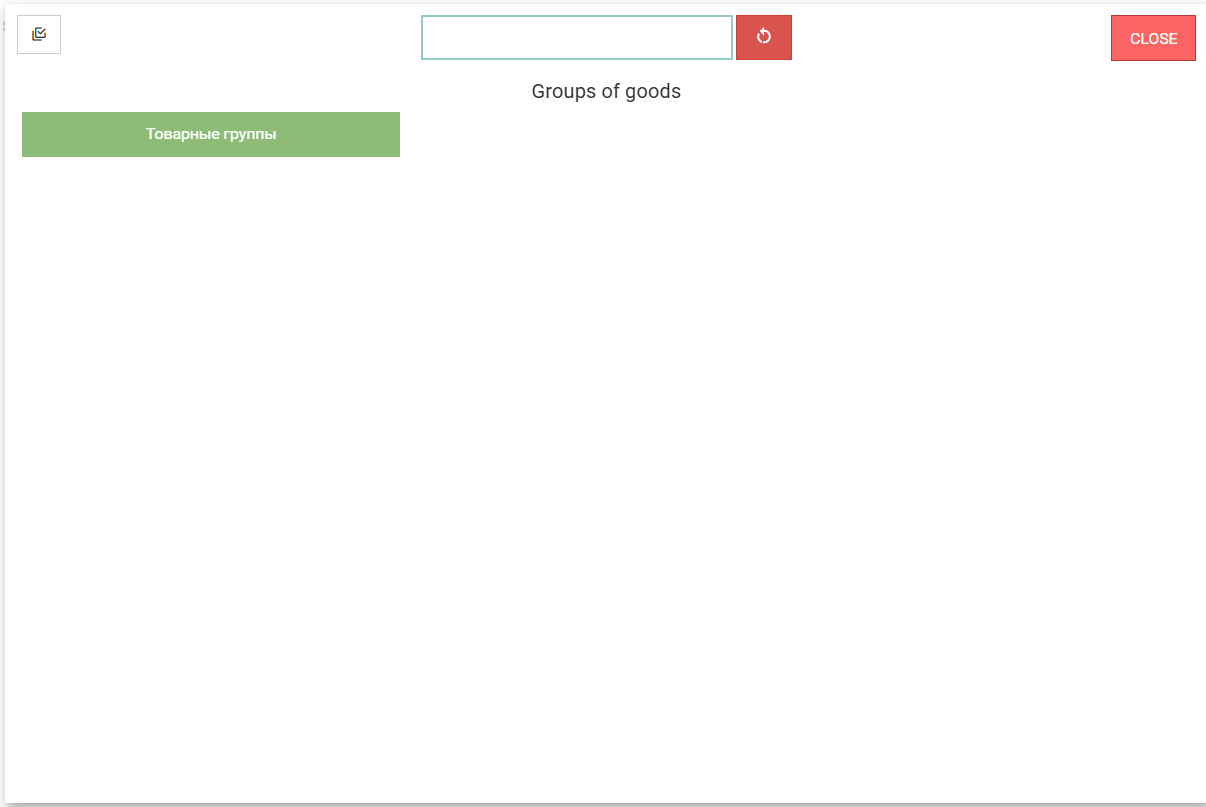 This window displays all r_k StoreHouse Pro goods groups available to this user at the first available level.
The list of available groups is formed in the application settings.
Clicking on a group will open its contents: either groups in the top row, and/or a list of goods in the "Goods" area.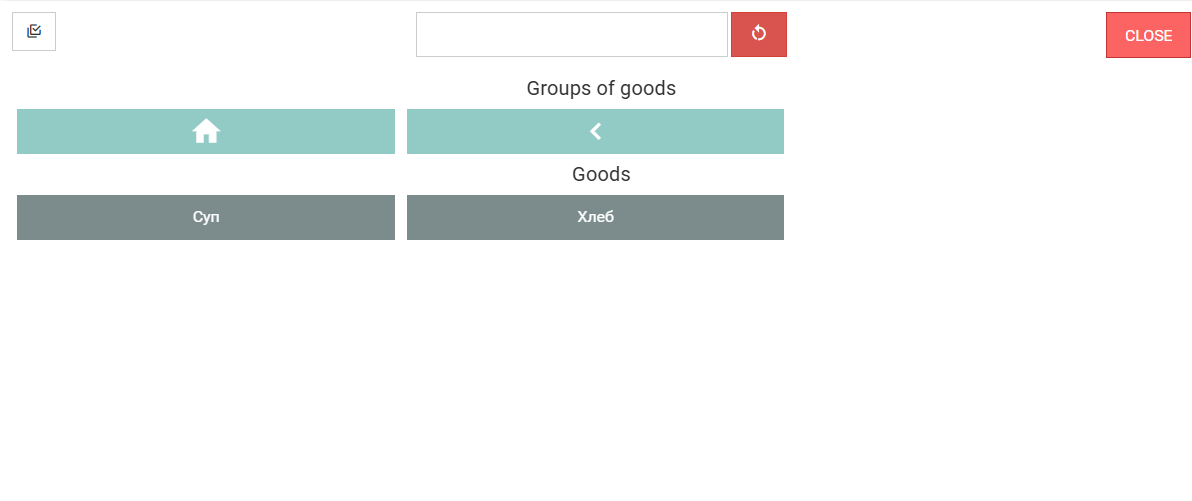 To select a goods item, open the required goods group and select a goods item within it.
To return to the goods group one level up, click the button ![]() , to go to the root goods group, click the button
, to go to the root goods group, click the button ![]() .
.
Searching for a Goods Item
For convenience, you can use the search function. To search for a goods item, enter in the search field: either part of the goods code (from 1 digit) and the search will be performed by code, or part of the goods item name (at least 3 letters) and the search will be performed by name. When matches are found, only the goods groups that contain goods satisfying the search conditions will be displayed in the group list. To select a goods item, open the required group from the found ones and select the goods item.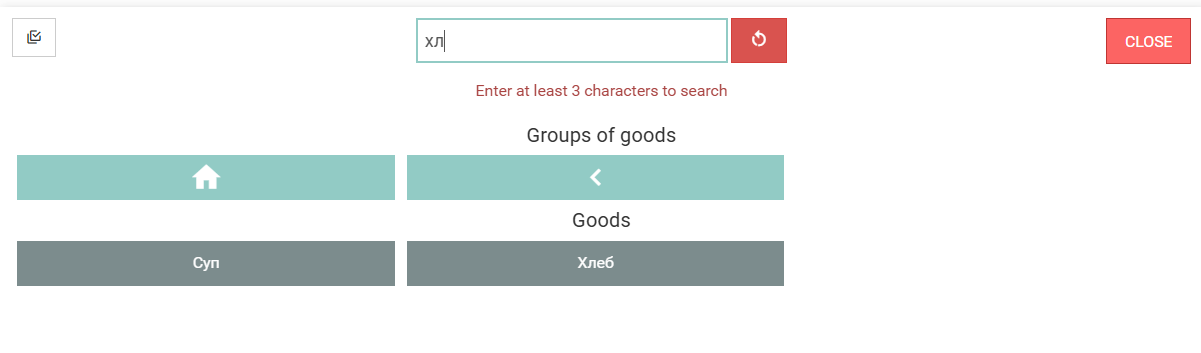
If a single goods item is found using the search, it will be automatically selected for the document on the Goods page.
To clear the search window, click the button ![]() .
.
exit the goods search window, click the "Close" button.
The selected goods item will be displayed in the delivery note row. The Goods Code field will be filled automatically.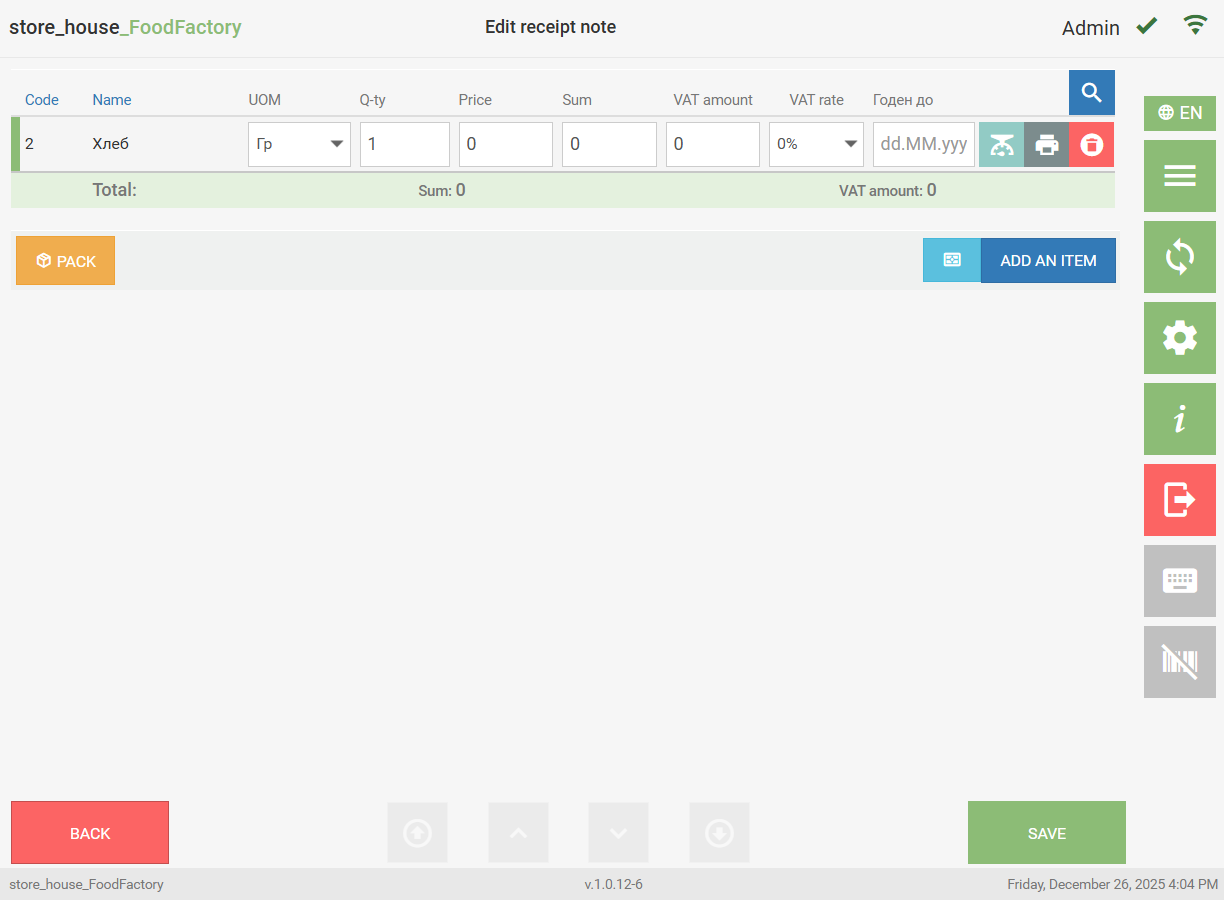 If necessary, you can return to the document title page. To do this, click the "Back" button.
Multi-Selection of Goods
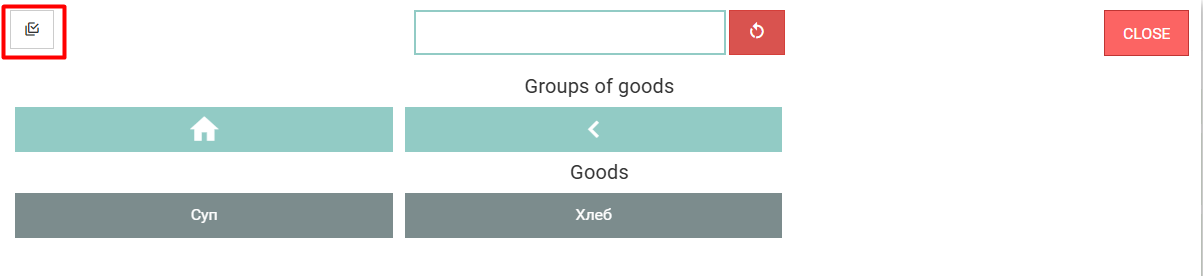
To select several goods from one group or different groups at once, click the "Multi-Selection" button ![]() .
. After this, the "Add" button will appear to the right of the "Multi-Selection" button.
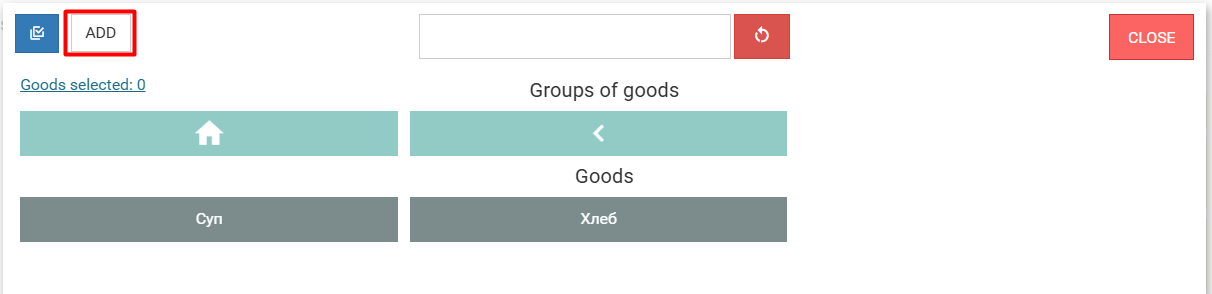 Then select the required goods. You can select from all goods groups; a flag will appear on the selected goods, the "Add" button will turn green, and the number of selected goods will be displayed below it in the "Goods Selected:" line.
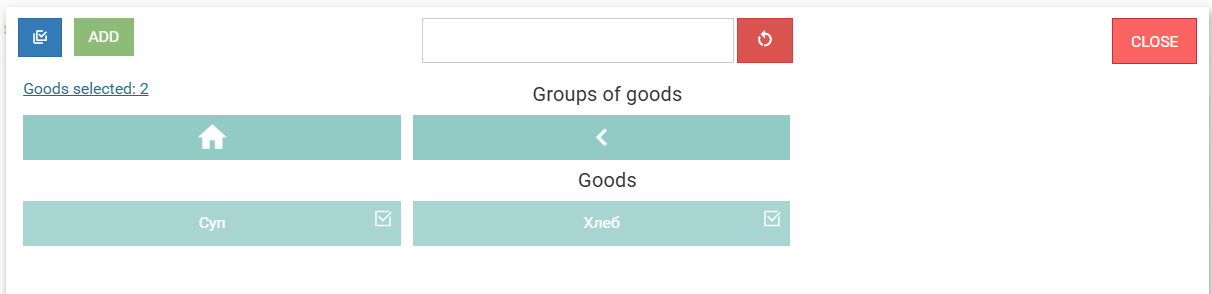 To view the selected goods, click the "Goods Selected:" line; a list of all selected goods will open.
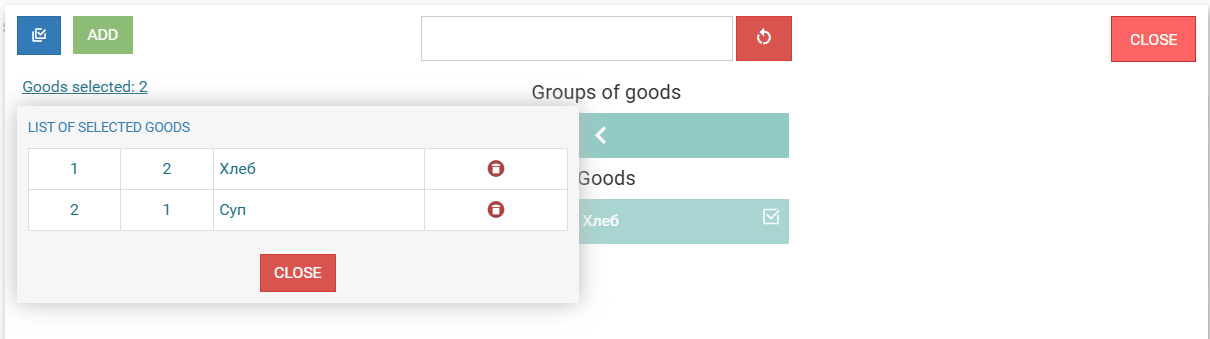 To remove a goods item from the selected list, click the button
![]() ; to close the list, click the "Close" button.
; to close the list, click the "Close" button.
To add all selected goods to the delivery note, click the "Add" button. The goods item is added to the document from the goods list with a quantity of "1", the Goods Code field will be filled automatically.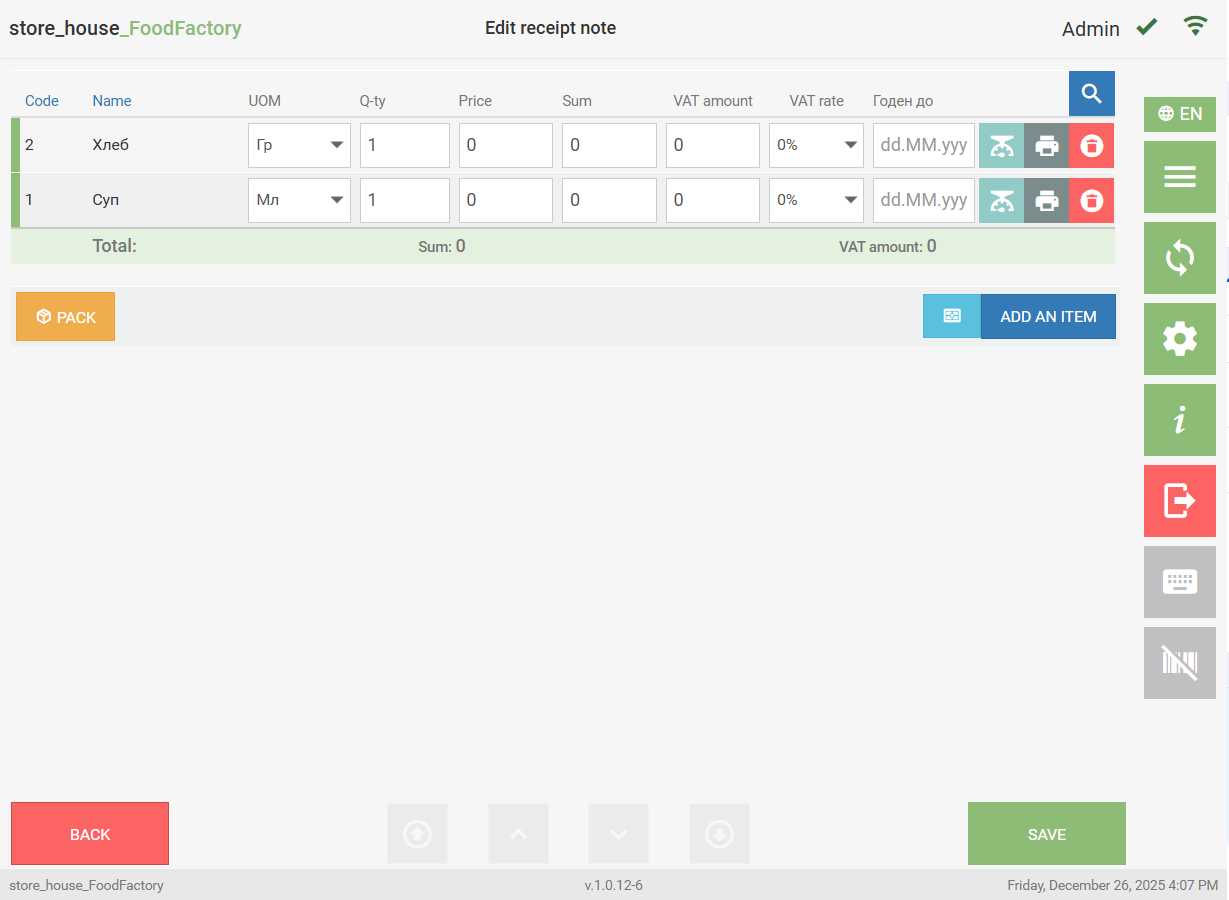
Selecting a Unit of Measurement
The goods item is added to the document from the goods list in the base unit of measurement.
To change the unit of measurement for the selected goods item, open the list of units of measurement (click the button![]() on the right side of the field) and select the required unit of measurement from it.
on the right side of the field) and select the required unit of measurement from it.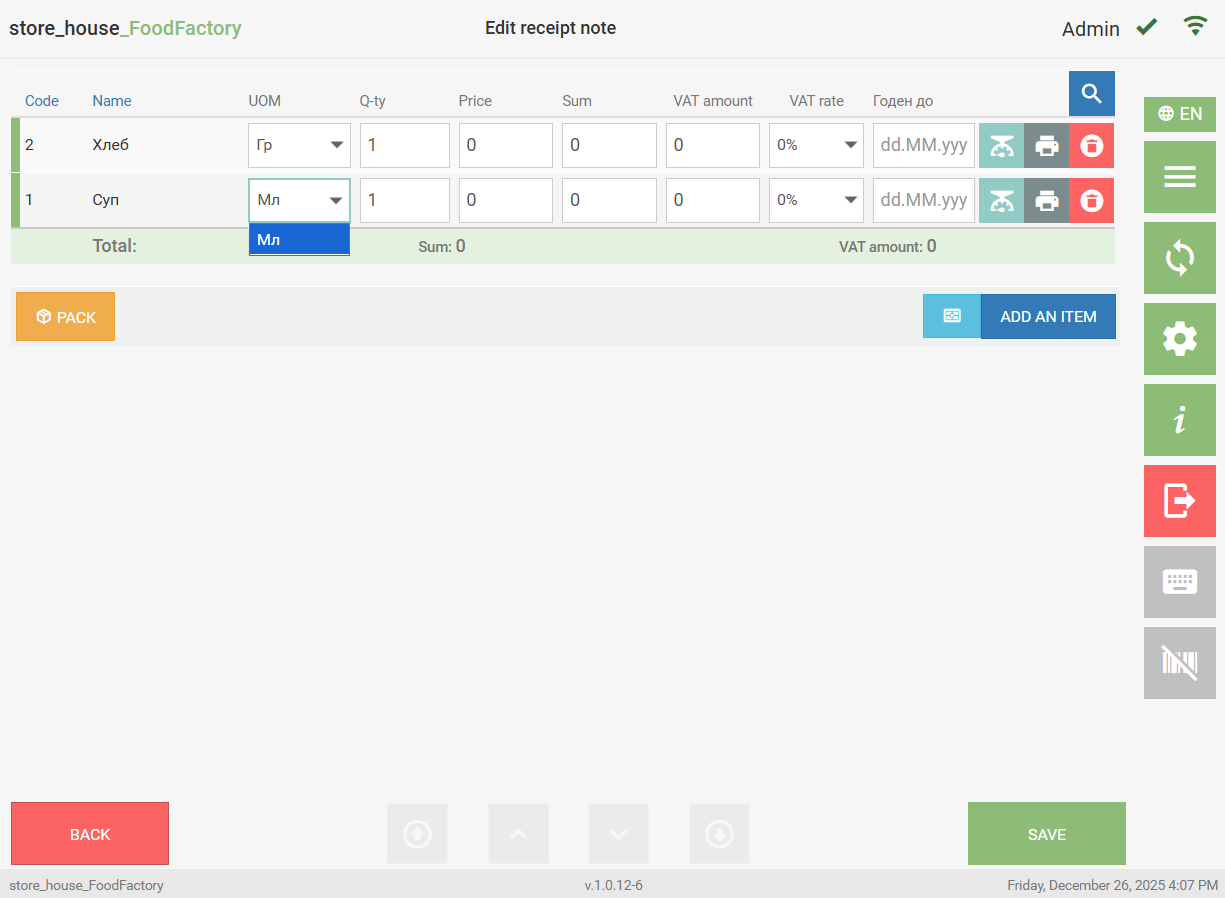 The list for selection only displays those units of measurement that are added to the units of measurement list on the product card in r_k StoreHouse Pro.
After changing the unit of measurement, the goods item quantity will change according to the set coefficient.
Entering Goods Item Quantity, Sum, and VAT Amount
The goods item is added to the document from the goods list with a quantity equal to one.
If necessary, you can change the goods item quantity and fill in the amount fields.
Which price (Price e/t or Price i/t) is used when creating a delivery note is determined in the Settings menu item.
When adding a goods item to a receipt note, the value in the Sum field will be calculated based on the price from the supplier's receipt price list, if available (see r_k StoreHouse Pro User Guide). If there is no price list for the goods item, the price from the goods item properties may be used if the purchase price was filled in the product card. The price of the last receipt may also be used if the user has this permission.
When adding a goods item to an expenditure delivery note, the value in the Sum field will be calculated based on the price from the recipient's expenditure price list, if available (see r_k StoreHouse Pro User Guide). If there is no price list for the goods item, the price from the goods item properties may be used if the sale price was filled in the product card. The price of the last expenditure may also be used if the user has this permission.
When adding a goods item to an internal sale, the value in the Sum field will be calculated based on the sale price if it was filled in the product card. The price of the last expenditure may also be used if the user has this permission.
The Q-ty, Sum, and VAT Amount field values are edited in the same way.
The value is entered using the keyboard by first placing the cursor in the desired field. You can enter a fractional value, for example, 2.521 or 87.25: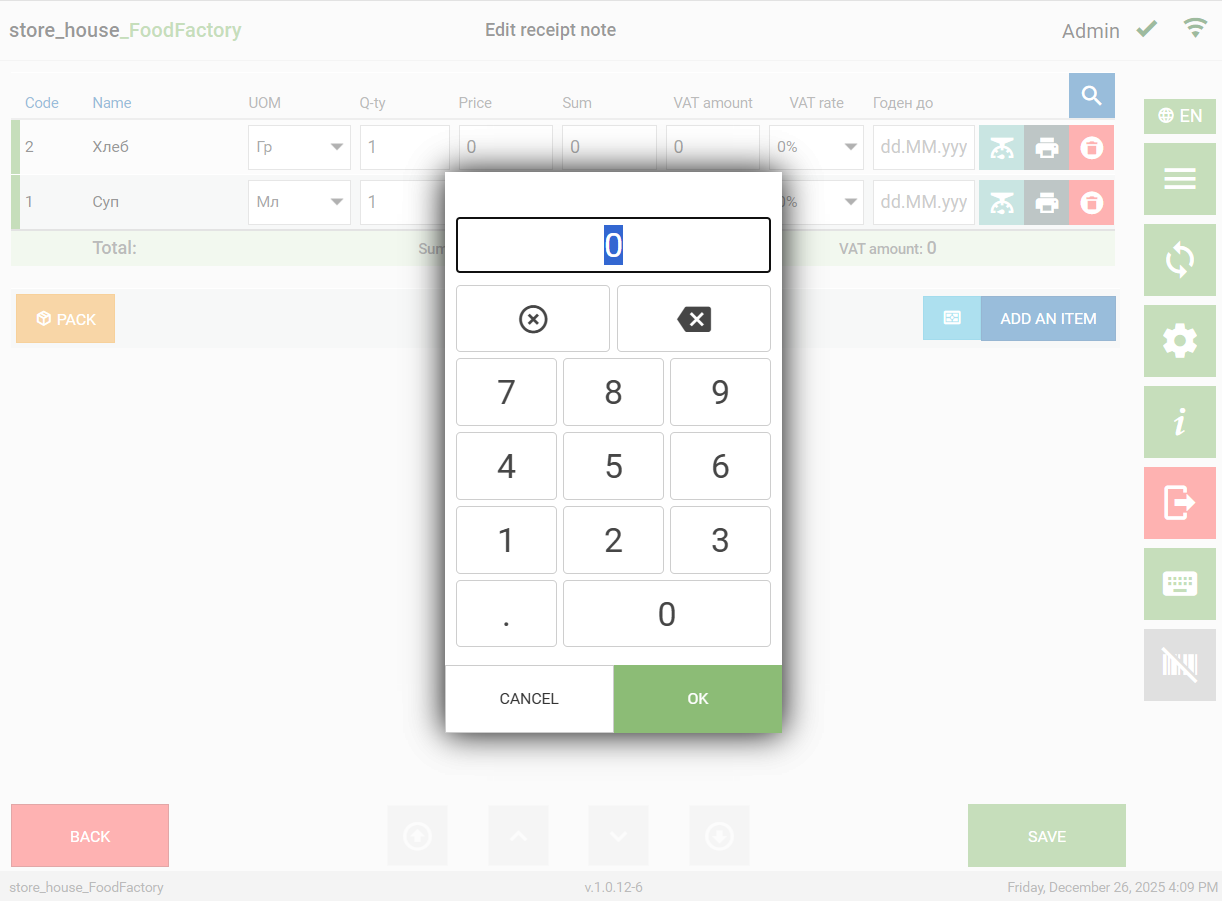
The quantity of a weighted goods item can be changed using scales. To do this, place the goods item on the scales and click the button ![]() . The goods item quantity from the scales will be transferred to the Q-ty field.
. The goods item quantity from the scales will be transferred to the Q-ty field.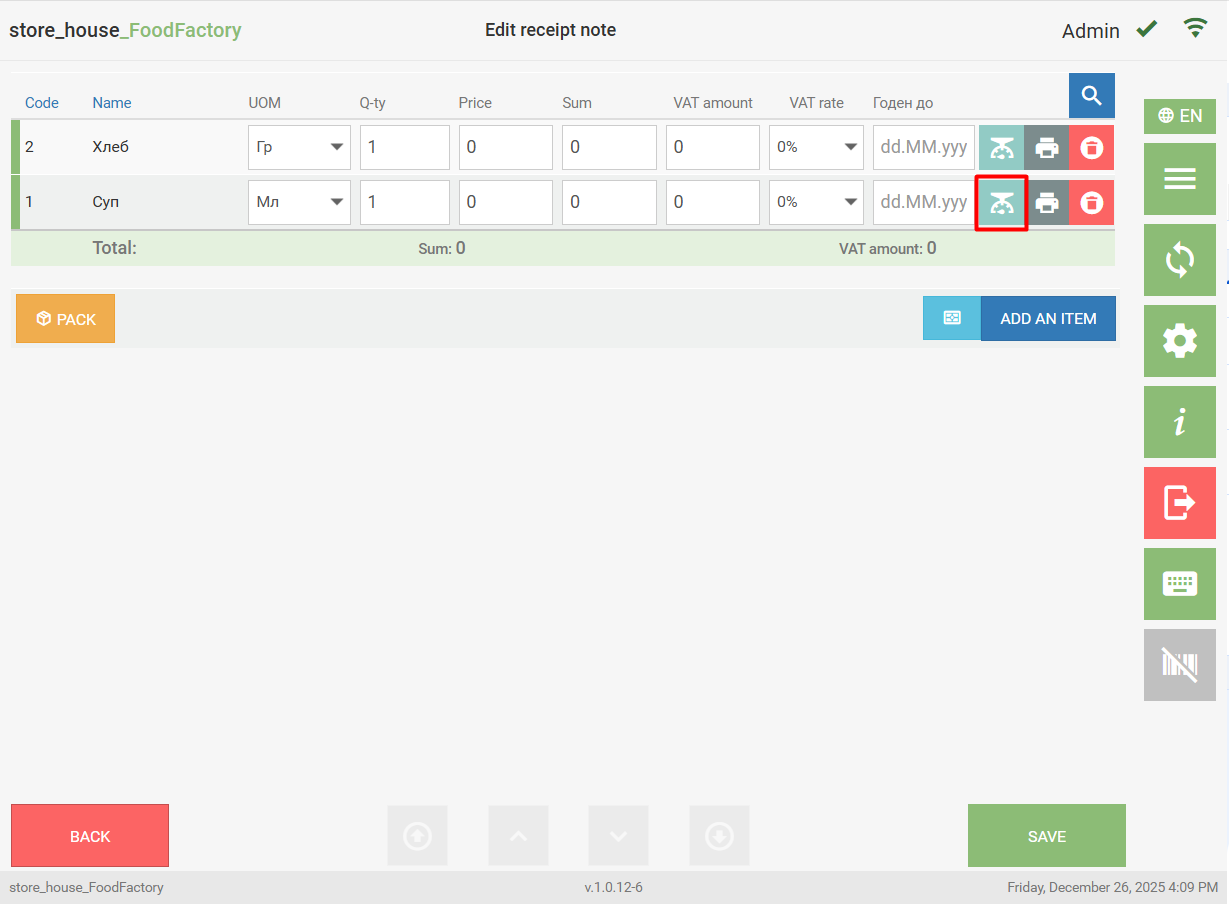
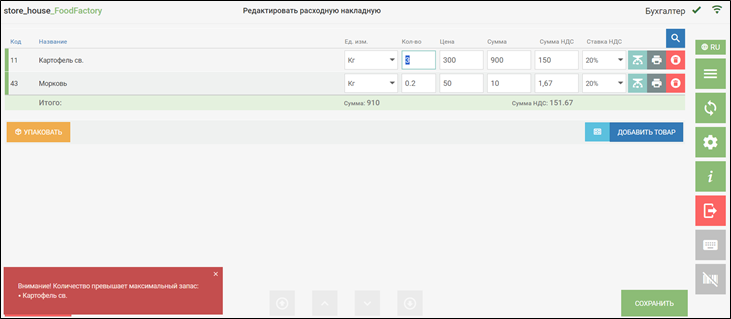
If the document settings have the "Show Warning Message about Weight/Quantity" flag set, quantity input control will be established in the document. On the r_k StoreHouse Pro product card (see the r_k StoreHouse Pro User Guide for details) on the "Stock" tab, you can define the maximum stock of the goods item by departments. It checks not the balance in the departments, but the value specified in the maximum stock.
If a quantity greater than the maximum stock is specified in the document, a warning message will appear. The message appears at the moment of entering the goods item quantity. To continue working with the document, close the message.
Quantity input control in the document is performed when changing the goods item quantity and unit of measurement, as well as when changing the department on the document title.
Selecting the Goods Item VAT Rate
The goods item is added to the document with the VAT rate specified in the price list, if available (see r_k StoreHouse Pro User Guide). If there is no price list for the goods item, the VAT rate will be taken from the product card. The VAT rate specified in the last receipt/expenditure of the goods item may also be used if the user has this permission.
To change the VAT rate, open the list of VAT rates (click the button ![]() on the right side of the field) and select the required VAT rate from it.
on the right side of the field) and select the required VAT rate from it.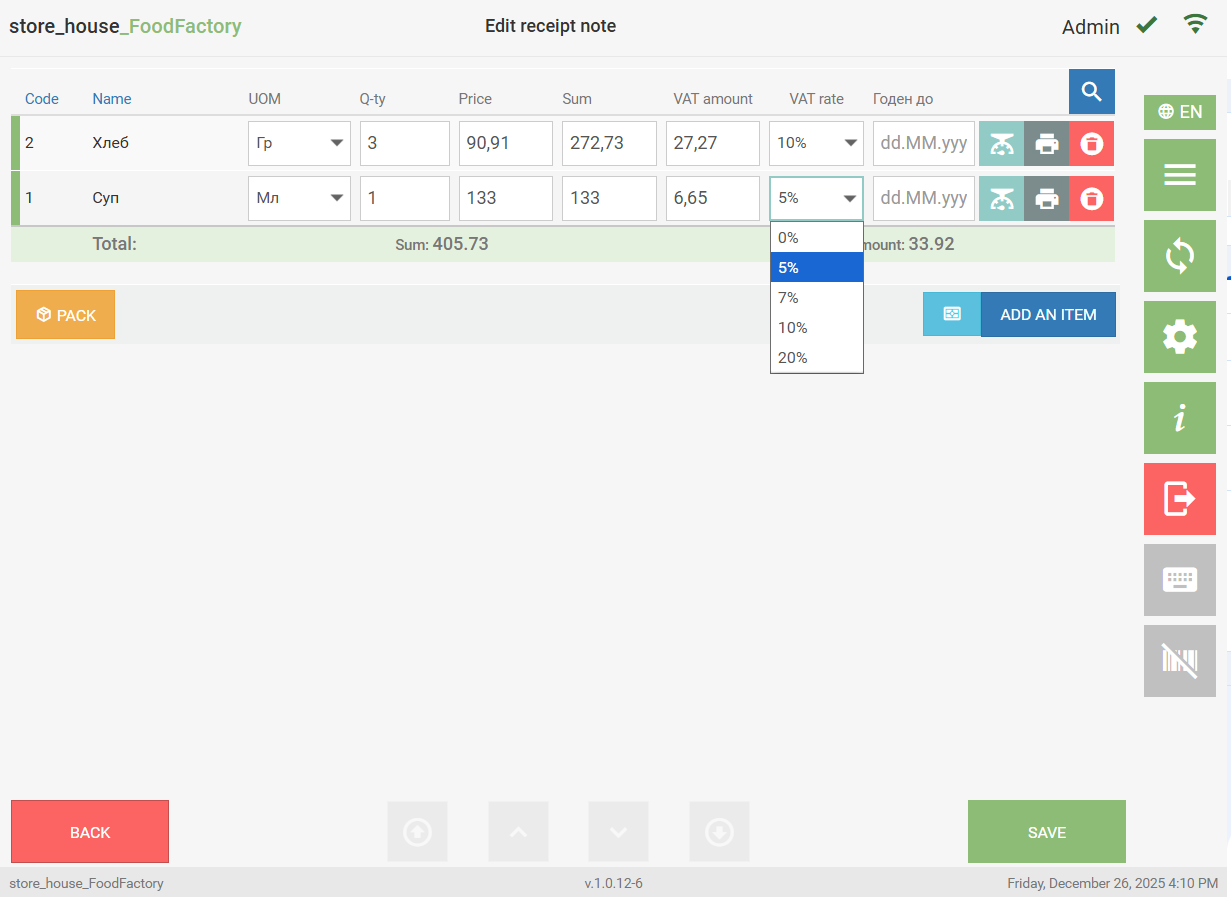
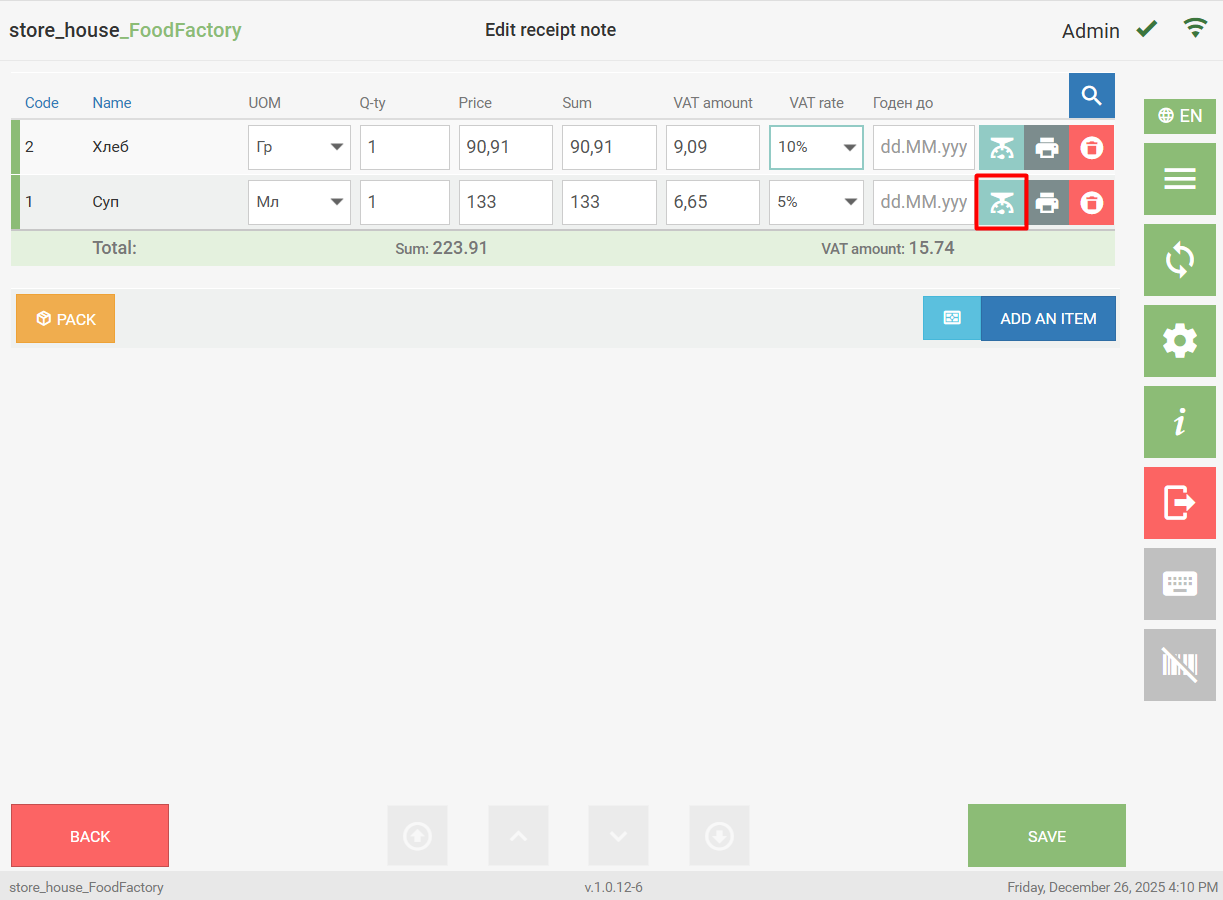
The list for selection displays all VAT rates from the r_k StoreHouse Pro dictionary.
After changing the VAT rate value, the value in the VAT Amount field will be recalculated relative to the Sum field.
- If any two of the three fields are filled, the third field will be calculated automatically.
- If VAT rates and prices including taxes for purchase and sale are set on the product card in r_k StoreHouse Pro, then when selecting such a goods item in receipt and expenditure delivery notes, this data will be automatically inserted.
Goods Item/Dish Image
Starting from version 1.0.10-27, the ability to display a goods item/dish photo/image in delivery notes has been added. Using images, the storekeeper can identify the goods item by its appearance.
To do this, additional settings must be made:
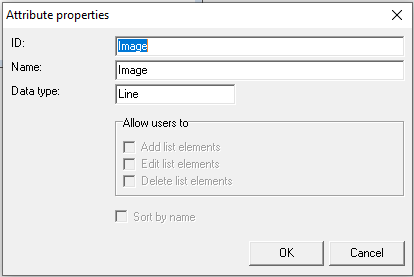
- In the Sdbman application, create an attribute for the goods item with the identifier Image and data type String.
- On the product card in r_k StoreHouse Pro, for the Image attribute, specify the image name in JPG format.

In the FoodFactory settings, specify the path to the images directory. To do this, in the settings, select the Main parameters and in the Goods Images Directory ("Каталог изображений товаров") field, specify the path to the directory with images.
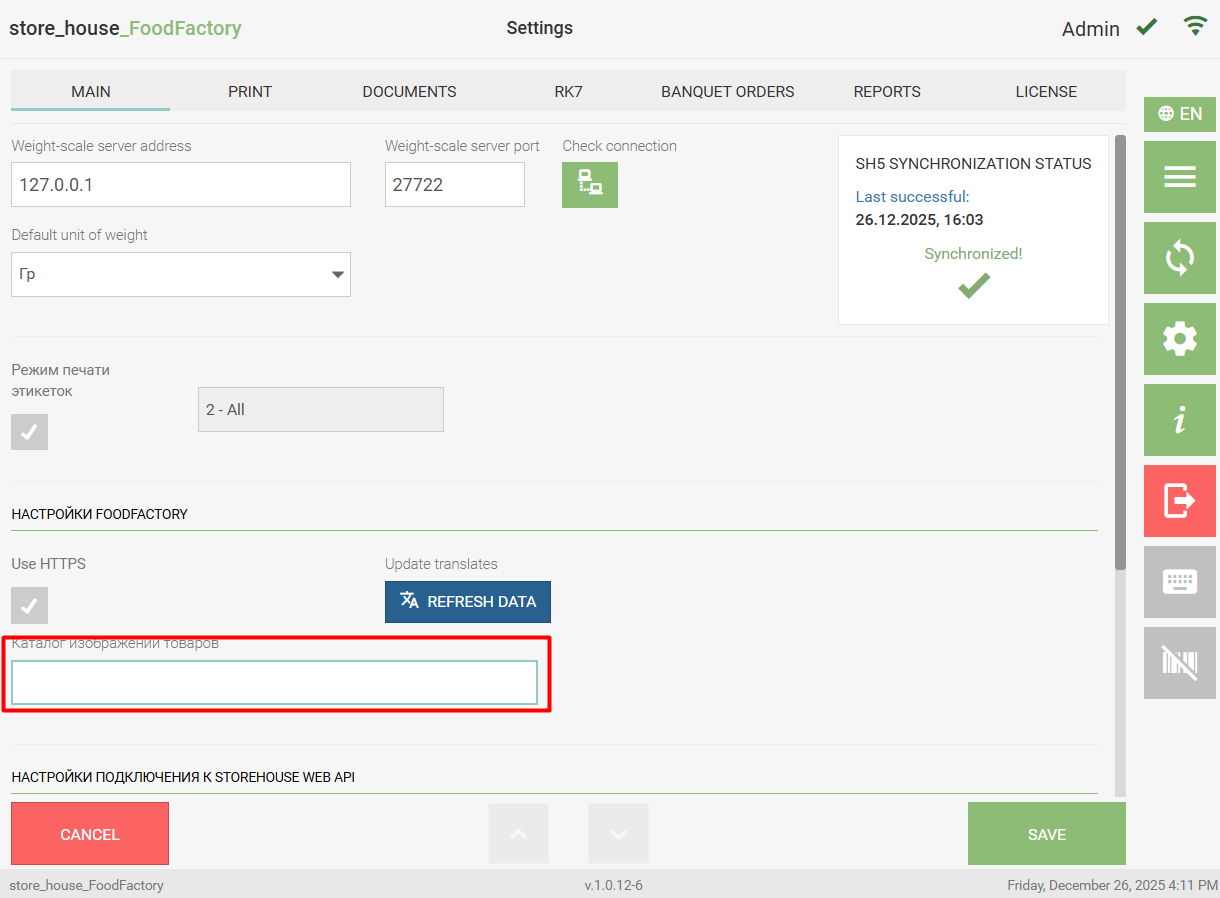

The directory (folder) must be located in the same directory as the FoodFactory server.
The goods item image will be displayed in the FoodFactory application after restarting the FoodFactory server.
- After all settings, a picture icon will appear next to goods for which an image name is specified in delivery notes.
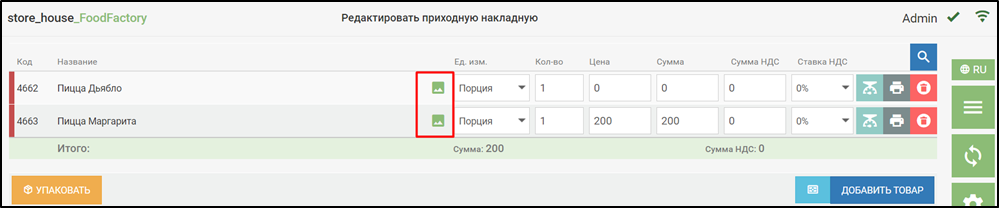 Clicking the picture icon will open the goods item image.
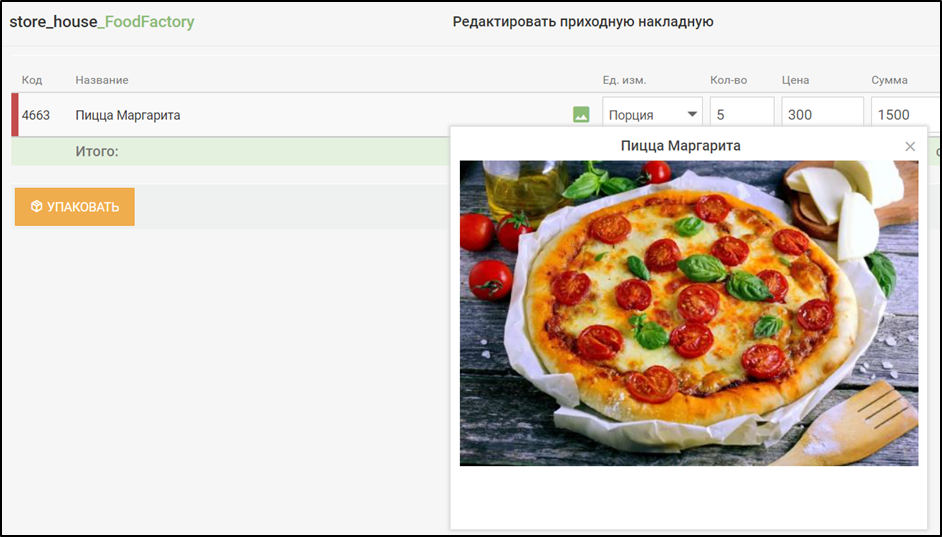
Order of Adding Goods to a Delivery Note
When adding a row with a goods item to a delivery note, the system remembers the sequential number of the record insertion.
While working with the delivery note, you can change the sorting of goods in the list by Code or Name. To do this, click on the Code or Name field.

Delivery Note Specification Attributes
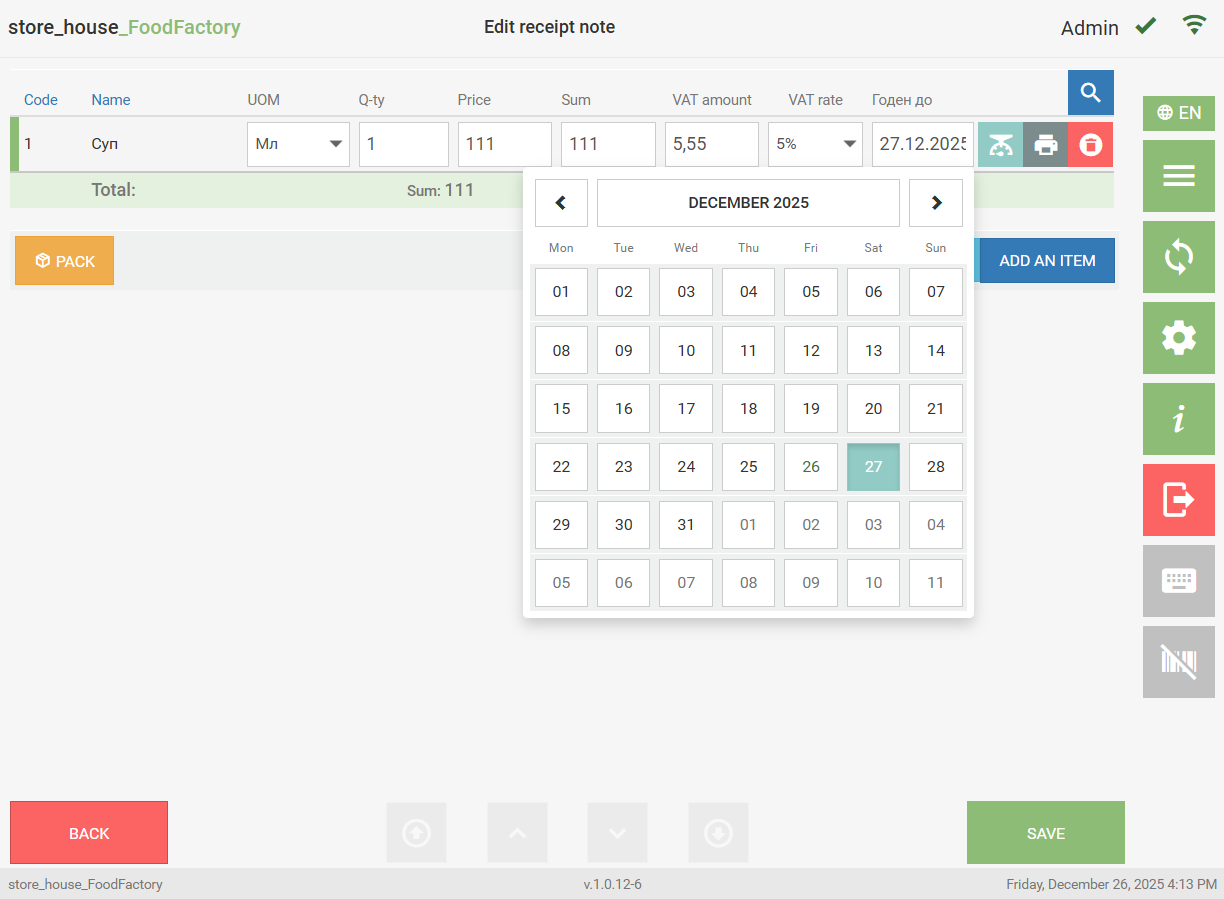
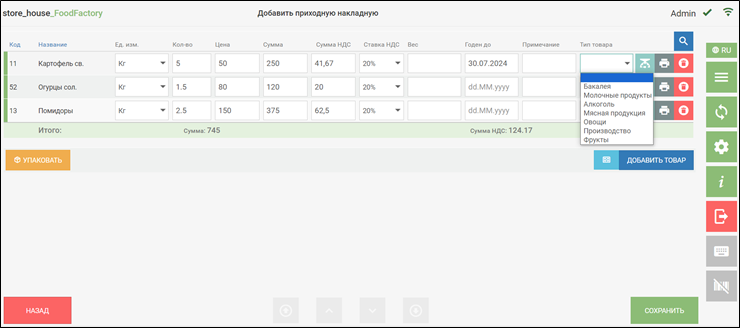
On the goods page of the document, "Delivery Note Specification Attributes" can be added, which are configured in the document settings. The fields "Weight, Expiry Date, Goods Type" are delivery note specification attributes. These fields are not mandatory and are filled in manually.

Example of attribute filling in a document.
For the "Expiry Date" attribute, the "Date" format is selected. To set the Date, click in the "Expiry Date" attribute field. In the opened calendar, select the required date by clicking.
For the "Goods Type" attribute, the "Enumeration" format is selected. To fill this attribute, select a value from the drop-down list.
For the "Note" attribute, the "String" format is selected. This field is text-based. Enter the required value manually.
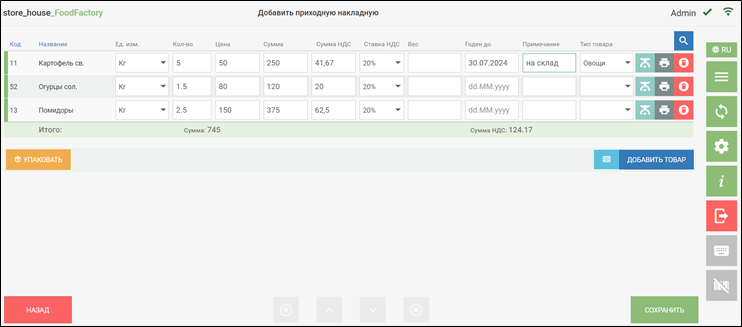
For the "Weight" attribute, the "Floating Point Number" format is selected. You can enter a numerical value in this field and use a comma.