Creating scenes and scripts
- Creating scenes
- List of scenes, deleting scenes
- Creating a script
- Creating the "Splash Screen" mode
- Creating a script for the "User has entered the menu but hasn't ordered anything yet" mode
- Creating a script for the "User adds items to the order" mode
- Creating a script for the "User is ready to place an order (transition to "My order")" mode
- Creating a Recommendations Script
- Adding multiple scenes to one script
- Adding multiple modes to one script
- Activating the script
- List of scripts, deleting scripts
Scenes and scripts are created in the Script Editor.
The transition to the Script Editor occurs from the manager panel, for which you need to click the "Script Editor" button.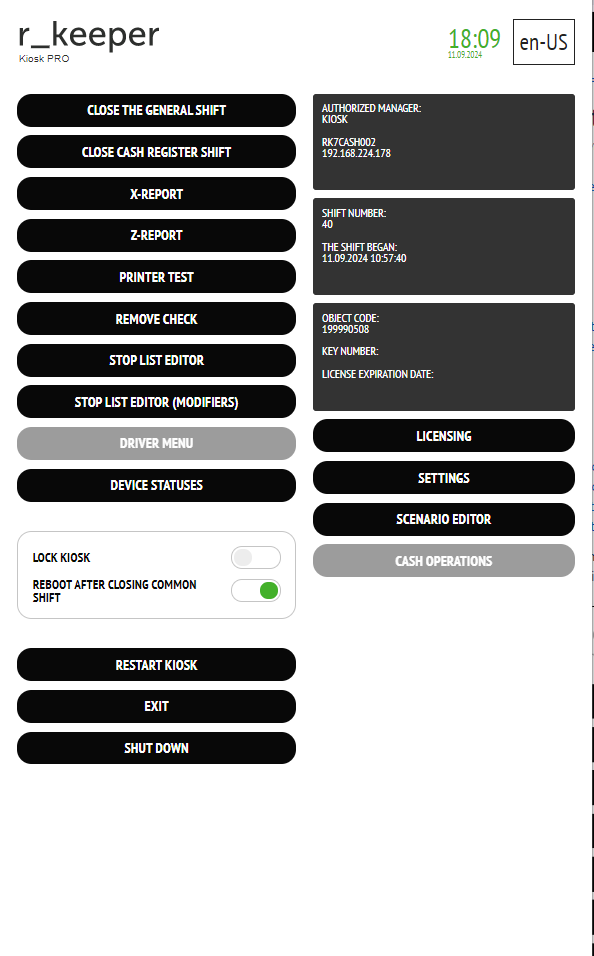
To exit the Script editor, click the "Exit editor" button.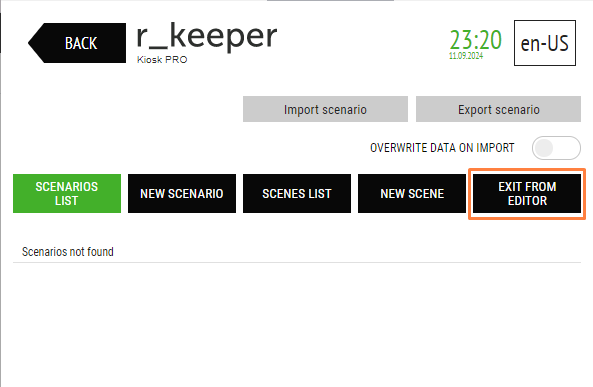
Creating scenes
To create a new scene, go to the "NEW SCENE" section.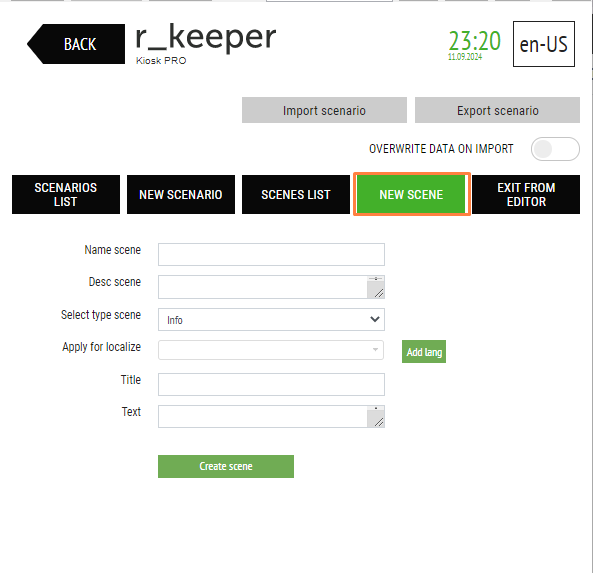
It is possible to create the following scene types: Splash Screen, Gallery and Banner.
Creating the "Splash Screen" scene
Example scene:

Example of filling in the settings:
Scene Title – The title of the scene;
Scene Description – A brief description of the scene;
Select scene type – Splash Screen – scene type;
Screen display time – the time a scene is displayed on screen, in seconds.
Splash Screen position – select one of the values:
- Fill Screen (fills the entire space without distorting the image);
- Stretch (will fill the entire space with distortion of proportions if they do not match the kiosk);
Selector code for link generation — selector code that will be redirected to when clicking on the scene image. If this setting is not filled in, the redirect will be to the main menu of the kiosk.
Select Language - Select one language for which this scene will be displayed, or select "For all language packs" to display the scene for all languages.
File path – The path to the file containing the scene image.
When loading a video file, the following parameter is added:
Play video sound –
![]() - play video sound;
- play video sound;
![]() - do not play video sound.
- do not play video sound.

Add Element - A new element to display in the scene.
Delete – delete an element (if there is more than one element in the scene).![]() - add a new language pack and a file for it.
- add a new language pack and a file for it.![]() - delete language pack and the file for it.
- delete language pack and the file for it.
Create scene — save the created scene and its settings. After the scene has been successfully created, a window will appear: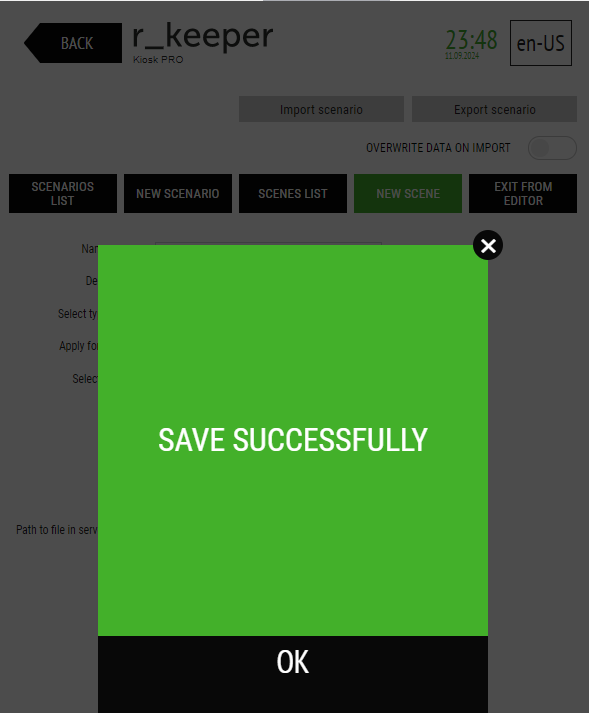
Creating the "Gallery" Scene
Example scene:
Example of filling in the settings:
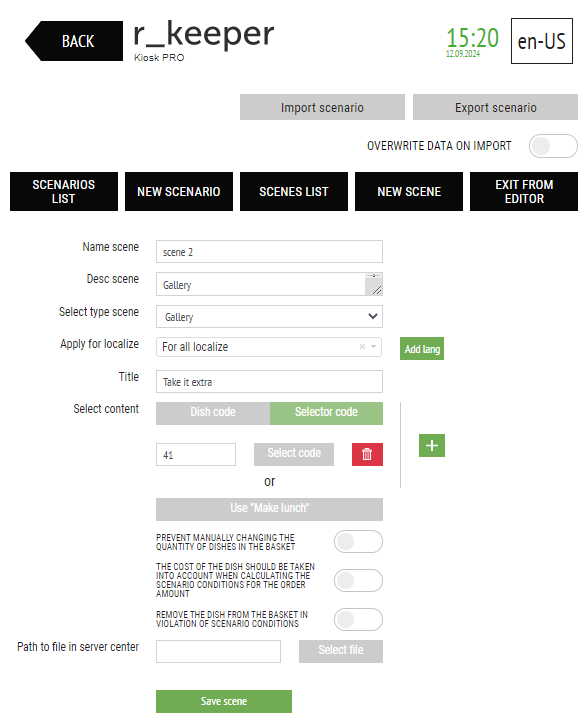
Scene Title – The title of the scene;
Scene Description – A brief description of the scene;
Select scene type – Gallery – scene type;
Select Language – Select one language for which this scene will be displayed, or select "For all language packs" to display the scene for all languages.
Title – Title above the image of the offer (content).
Select content - the dish or selector code to be offered in the pop-up ad is selected from the list provided.
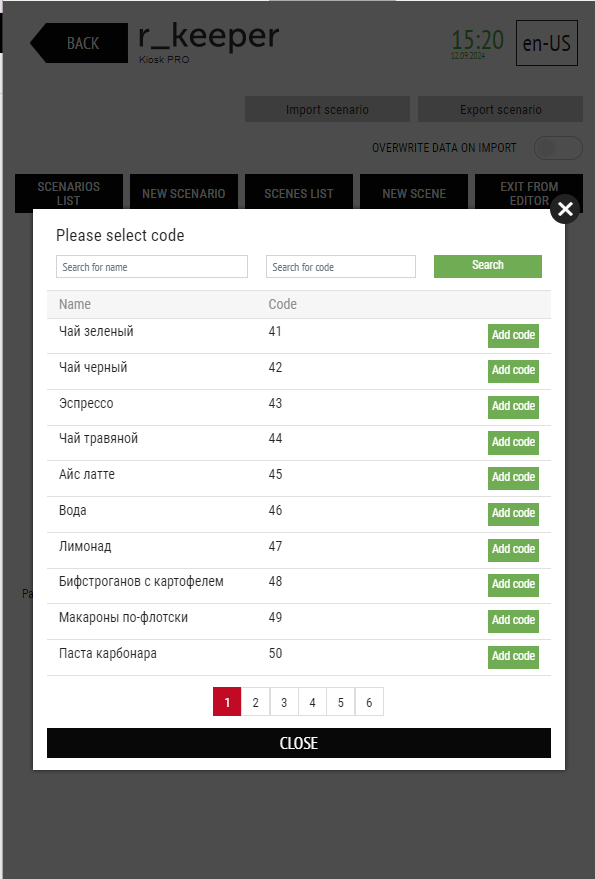
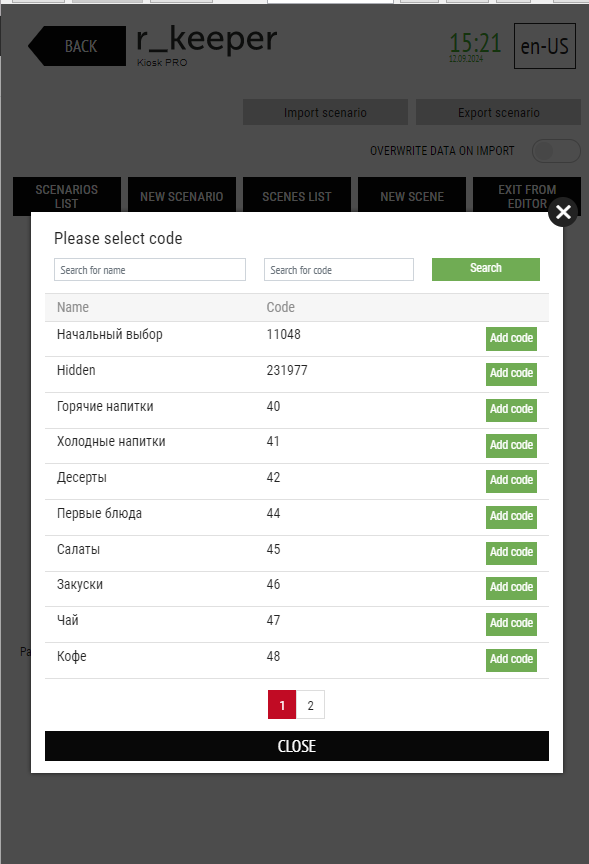
A dish/selector can be found by name (the "Search by name" line) or by code (the "Search by code" line). Only dishes included in the kiosk menu tree are displayed, as well as dishes that are recommended for dishes included in the menu tree.
Use "Build Your Lunch" (displayed when the selector is selected) – a "Build Your Lunch" mechanism that will be offered to guests.
Disable manually changing the number of dishes in the cart –
![]() - Disable manually changing the number of dishes in the cart;
- Disable manually changing the number of dishes in the cart;
![]() - Allow manually changing the number of dishes in the cart.
- Allow manually changing the number of dishes in the cart.
The cost of the dish should be taken into account when calculating the conditions of the script based on the order amount –
![]() - take into account the cost of the dish when calculating the conditions of the script based on the order amount;
- take into account the cost of the dish when calculating the conditions of the script based on the order amount;
![]() - do not take into account the cost of the dish when calculating the conditions of the script based on the order amount.
- do not take into account the cost of the dish when calculating the conditions of the script based on the order amount.
Remove item from cart if script conditions are violated –
![]() - remove a dish from the cart if the script conditions are violated;
- remove a dish from the cart if the script conditions are violated;
![]() - do not remove a dish from the cart if the script conditions are violated.
- do not remove a dish from the cart if the script conditions are violated.
File path – path to the file containing the dish or selector image.
Add Element – A new element to display in the scene.
Delete – delete an item.![]() - add a new language pack and a file for it.
- add a new language pack and a file for it.![]() - delete language pack and the file for it.
- delete language pack and the file for it.
Create Scene – save the created scene and its settings. When editing settings, this button is called “Save Scene”.
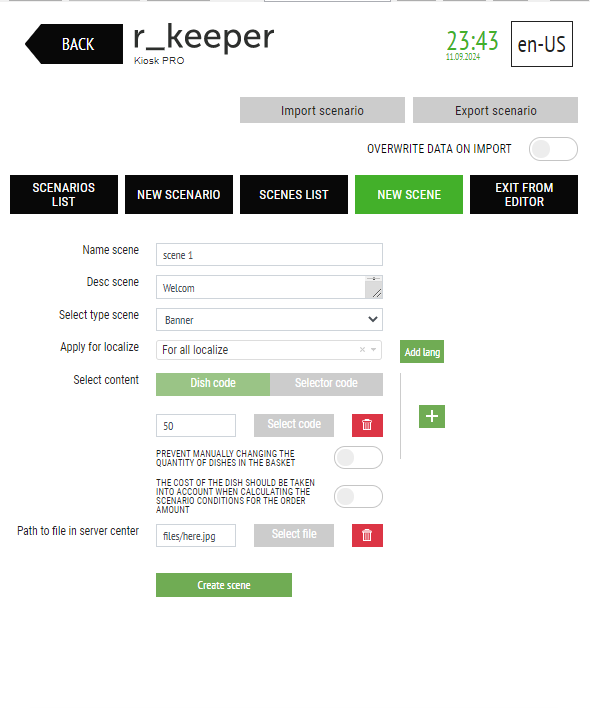
Creating the "Banner" scene
Example scene:
Example of filling in the settings:
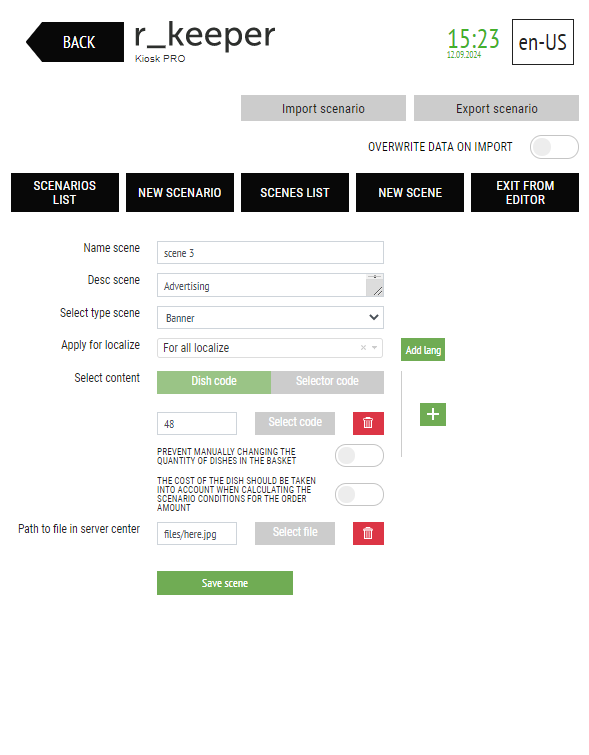
Scene Title – The title of the scene;
Scene Description – A brief description of the scene;
Select scene type – Banner – scene type;
Select Language - Select one language for which this scene will be displayed, or select "For all language packs" to display the scene for all languages.
Select content – the dish or selector code that will be redirected to when clicking on the banner. A dish/selector can be found by name (the "Search by name" line) or by code (the "Search by code" line). Only dishes included in the kiosk menu tree are displayed, as well as dishes that are recommended for dishes included in the menu tree.
Use "Build Your Lunch" (displayed when the selector is selected) – a "Build Your Lunch" mechanism that will be offered to guests.
Disable manually changing the number of dishes in the cart –
![]() - Disable manually changing the number of dishes in the cart;
- Disable manually changing the number of dishes in the cart;
![]() - Allow manually changing the number of dishes in the cart.
- Allow manually changing the number of dishes in the cart.
The cost of the dish should be taken into account when calculating the conditions of the script based on the order amount –
![]() - take into account the cost of the dish when calculating the conditions of the script based on the order amount;
- take into account the cost of the dish when calculating the conditions of the script based on the order amount;
![]() - do not take into account the cost of the dish when calculating the conditions of the script based on the order amount.
- do not take into account the cost of the dish when calculating the conditions of the script based on the order amount.
File path – path to the file containing the dish or selector image.
![]() – add file and content.
– add file and content.
![]() – delete file and content.
– delete file and content.
When adding multiple files, they appear on the screen one by one and are replaced every 5 seconds.
![]() - add a new language pack and a file for it.
- add a new language pack and a file for it.![]() - delete language pack and the file for it.
- delete language pack and the file for it.
Create Scene – save the created scene and its settings. When editing settings, this button is called “Save Scene”.
Creating the "Offer Panel" scene
Example scene:

Example of filling in the settings:
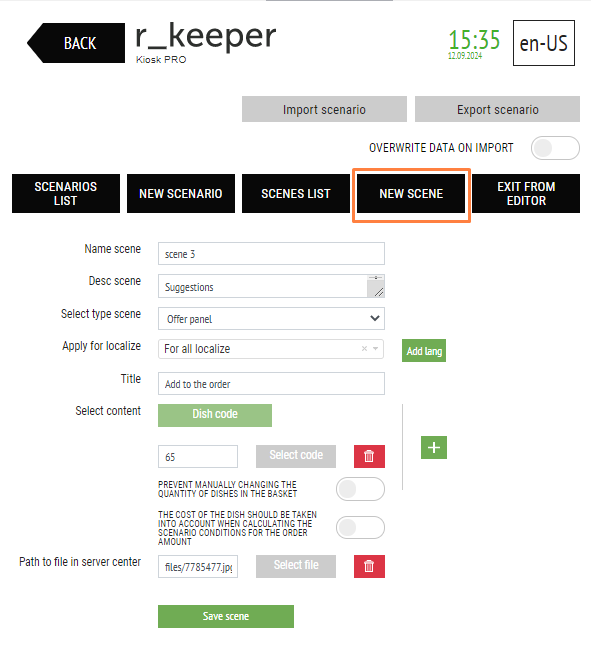
Scene Title – The title of the scene;
Scene Description – A brief description of the scene;
Select scene type – Offer Panel – scene type;
Select Language - Select one language for which this scene will be displayed, or select "For all language packs" to display the scene for all languages.
Title – Title above the image of the offer (content).
Select content - the dish or selector code to be offered in the pop-up ad is selected from the list provided. A dish/selector can be found by name (the "Search by name" line) or by code (the "Search by code" line). Only dishes included in the kiosk menu tree are displayed, as well as dishes that are recommended for dishes included in the menu tree. This field is required.
Disable manual changing the number of dishes in the cart –
![]() - Disable manually changing the number of dishes in the cart;
- Disable manually changing the number of dishes in the cart;
![]() - Allow manually changing the number of dishes in the cart.
- Allow manually changing the number of dishes in the cart.
The cost of the dish should be taken into account when calculating the conditions of the script based on the order amount –
![]() - take into account the cost of the dish when calculating the conditions of the script based on the order amount;
- take into account the cost of the dish when calculating the conditions of the script based on the order amount;
![]() - do not take into account the cost of the dish when calculating the conditions of the script based on the order amount.
- do not take into account the cost of the dish when calculating the conditions of the script based on the order amount.
File path – path to the file containing the dish or selector image.
![]() – add file and content.
– add file and content.
![]() – delete file and content.
– delete file and content.
When adding multiple dishes and files, they are offered on the screen at the same time.
![]() - add a new language pack and a file for it.
- add a new language pack and a file for it.
![]() - delete language pack and the file for it.
- delete language pack and the file for it.
Create Scene – save the created scene and its settings. When editing settings, this button is called “Save Scene”.
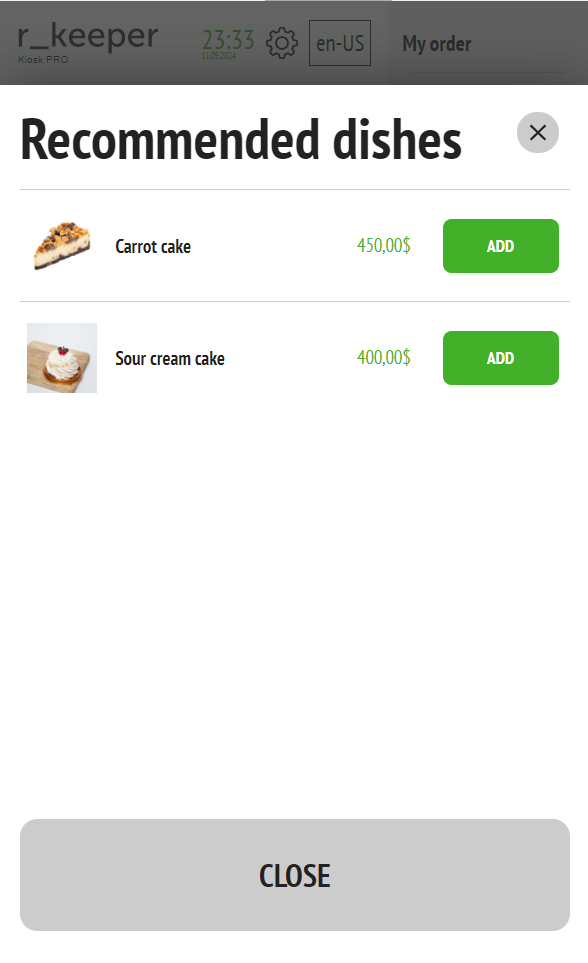
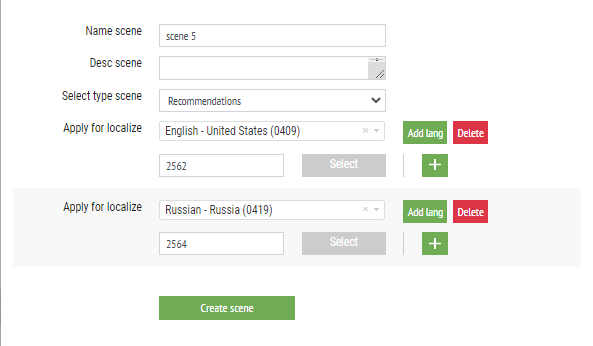
Creating Recommendations Scene
- Create a New Scene with the Recommendations type
- Add the required number of steps by clicking
 to add a new step. In each step, select the required categories to display. Categories are added by code. You can add multiple categories separated by commas without spaces in one step.
 - If you have multiple language packs configured on your kiosk, you can set up a separate chain of steps for each language. To add a new language pack to the scene, click the Add language button.
Selecting "File Path"
To select a file, click on the "Select file" button.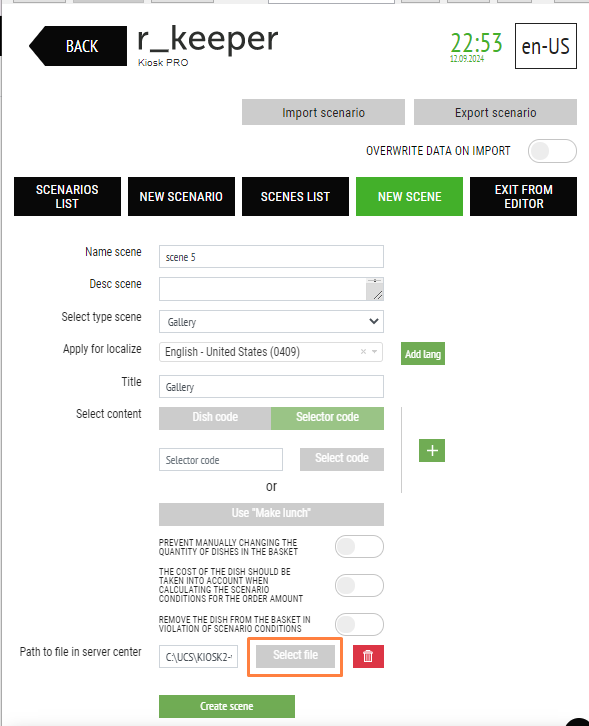
In the window that opens, you need to find (download) and select the file containing the desired image.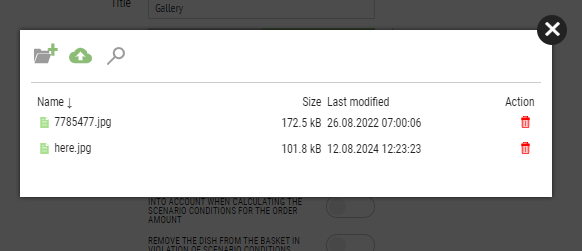
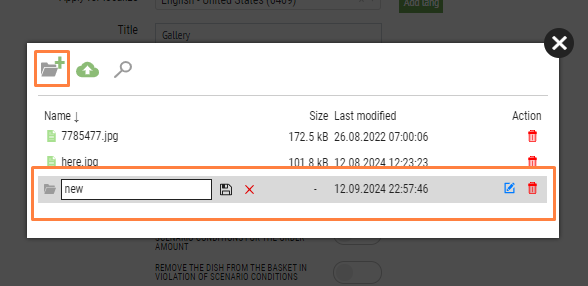
![]() - add a new folder by entering the name and clicking the button
- add a new folder by entering the name and clicking the button ![]() .
.
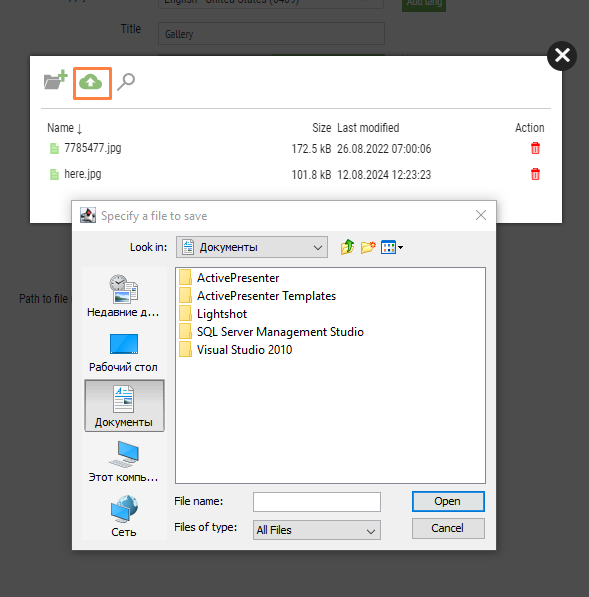
![]() - Upload your file. After selecting the file, it will be placed in the WebData/files folder.
- Upload your file. After selecting the file, it will be placed in the WebData/files folder.
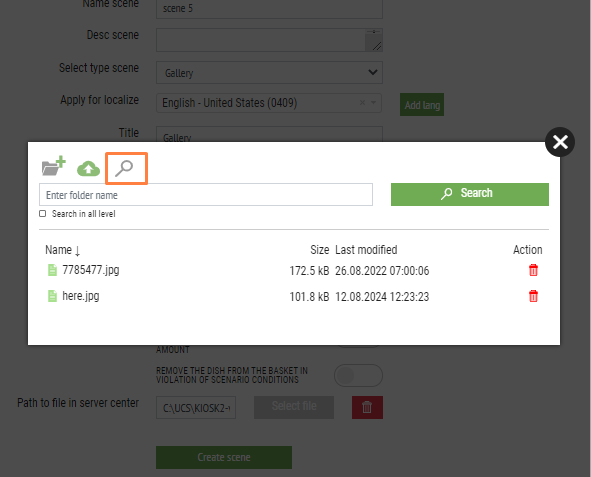
![]() - search for a folder or file by name.
- search for a folder or file by name.
Search at all levels regardless of nesting – check the search in nested folders.
![]() - sort files by name.
- sort files by name.![]() - delete file.
- delete file.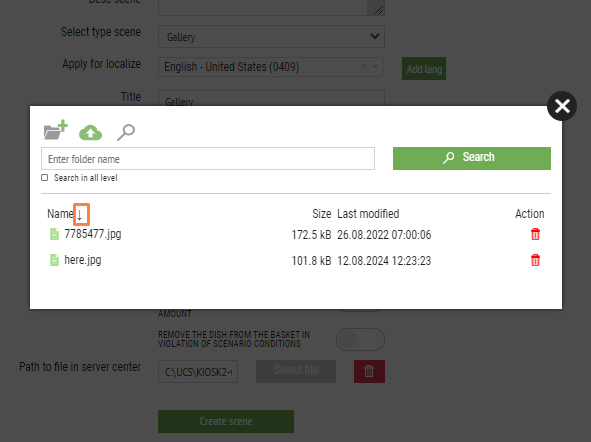
List of scenes, deleting scenes
To access the list of created scenes, you need to go to the "Scene List" section.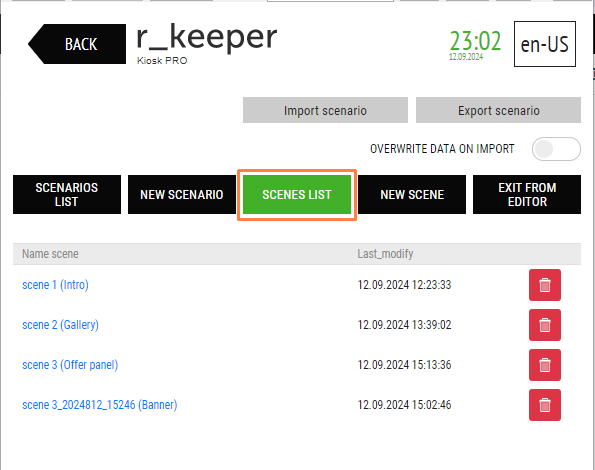
Scene Title – name and type of scene (in brackets);
Last modified – date and time of the last change to the scene (dd.mm.yyyy hh:mm:ss).
To delete a scene, you need to click on the button ![]() in the corresponding line and confirm the action in the window that appears by clicking the “Delete” button.
in the corresponding line and confirm the action in the window that appears by clicking the “Delete” button.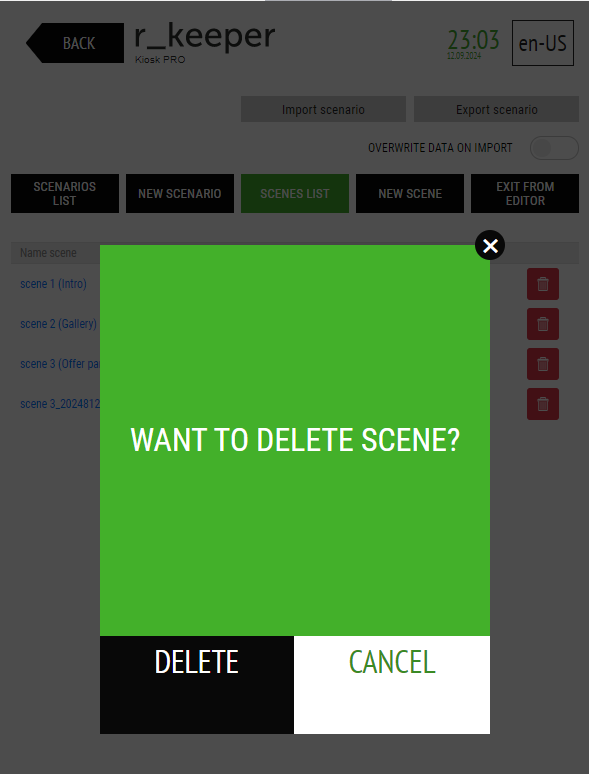
Creating a script
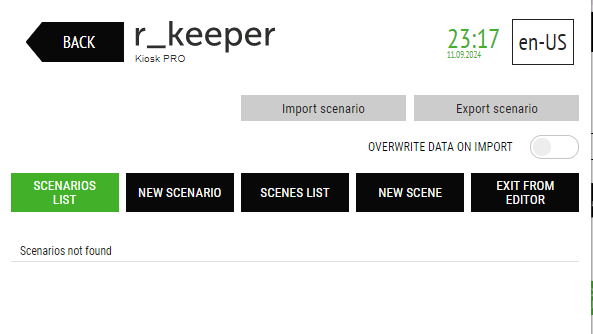
To create a new script, go to the “NEW SCRIPT” section in the Script Editor.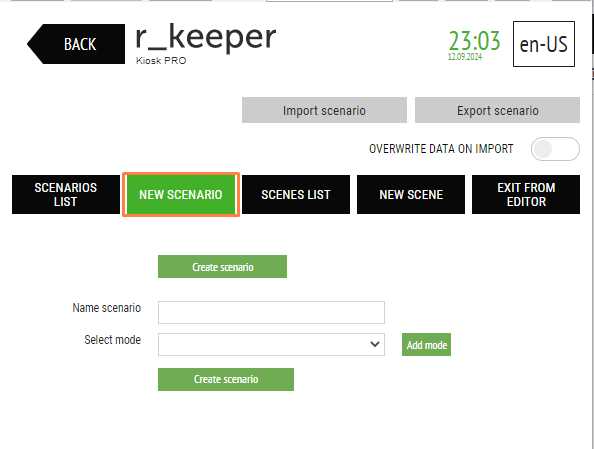
Only one script can be added for each mode.
Creating a Script for "Flash Screen" Mode
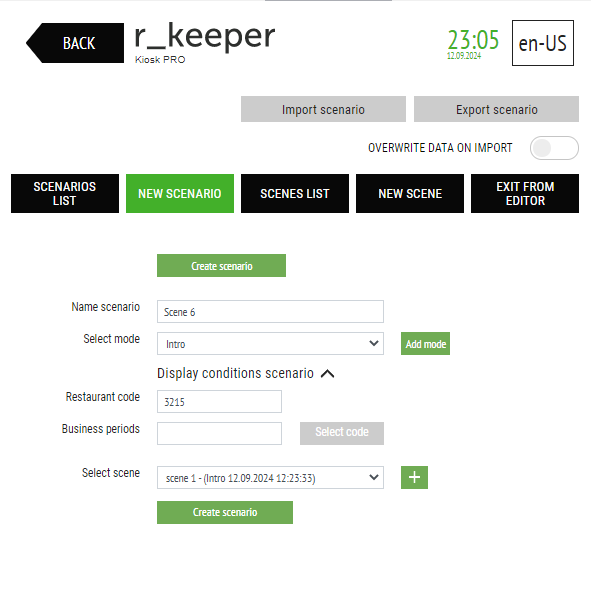
It is necessary to fill in:
- Script Title – Enter the title of the script;
- Select mode – select the mode in which the scene will be displayed: Flash Screen;
Script Display Conditions – Select the conditions for displaying the script (you can select as many conditions as you like, if no conditions are selected, the scene will be played in all restaurants at any time). - Restaurant code where the order is made - enter the code of the restaurant where the order is made; in the form XXXX, you can enter several restaurants, separated by commas;
- Business period — select from the list the code of the business period in which this script will work; to select a business period, you must click the "Select code" button; you can select several business periods. You can find a business period by name (the "Search by name" line) or by code (the "Search by code" line). To exit, click the "Close" button or
 in the upper right corner of the editing window.
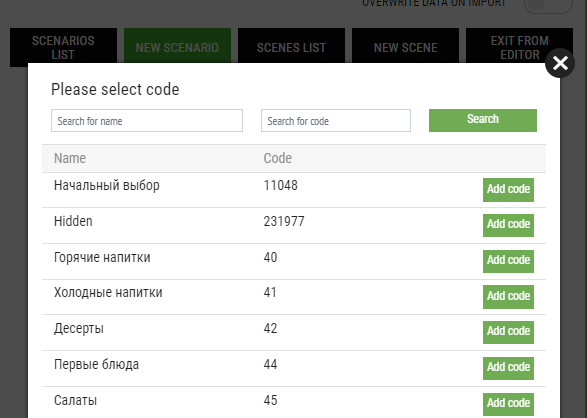
To delete business periods, you can click on the button ![]() or the "Added" button.
or the "Added" button.
Select scene – select a previously created scene with the appropriate scene type (Splash Screen).
Create script – save the created script and its settings.
Creating a script for the "User has entered the menu but hasn't ordered anything yet" mode.
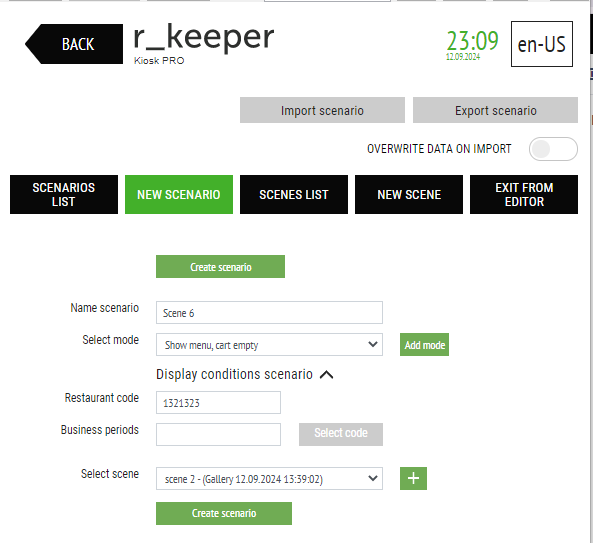
It is necessary to fill in:
- Script Title – Enter the title of the script;
- Select mode – select the mode in which the scene will be displayed: User has entered the menu but hasn't ordered anything yet;
Script Display Conditions – Select the conditions for displaying the script (you can select as many conditions as you like, if no conditions are selected, the scene will be played in all restaurants at any time, when User has entered the menu but hasn't ordered anything yet).
- Restaurant code where the order is made – enter the code of the restaurant where the order is made; in the form XXXX, you can enter several restaurants, separated by commas;
- Business period — select from the list the code of the business period in which this script will work; to select a business period, you must click the "Select code" button; you can select several business periods. You can find a business period by name (the "Search by name" line) or by code (the "Search by code" line). To exit, click the "Close" button or in the upper right corner of the editing window.
To delete business periods, you can click on the button or the "Added" button (in the window with the list of business periods).
- Select scene – select a previously created scene with the appropriate scene type (Gallery).
Create script – save the created script and its settings.
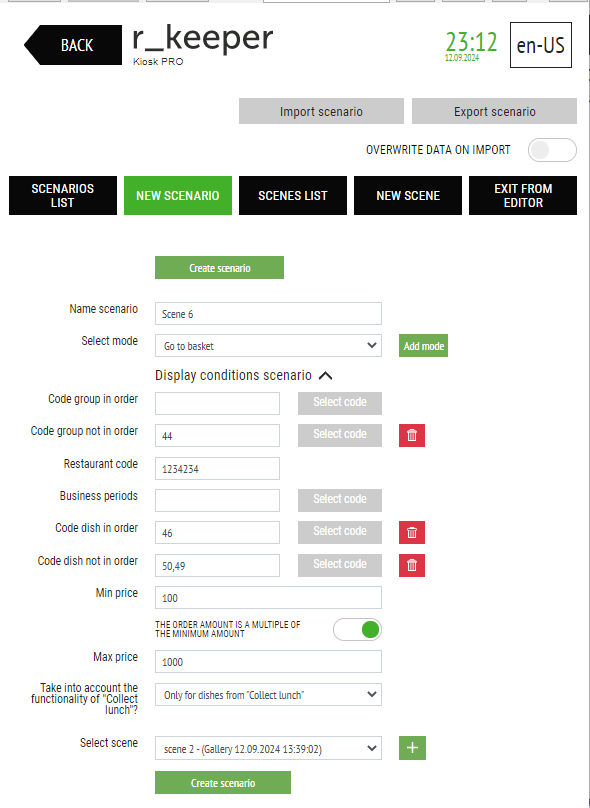
Creating a script for the "User adds items to the order" mode.
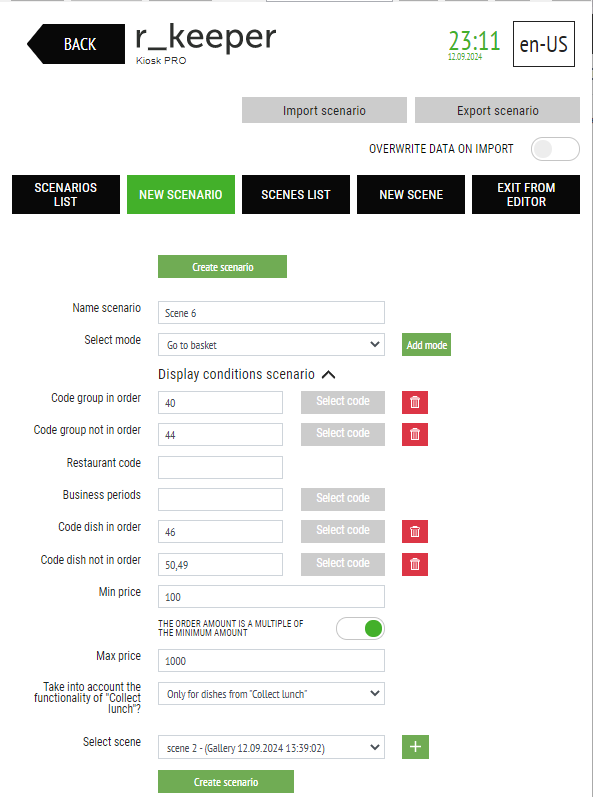
It is necessary to fill in:
- Script Title – Enter the title of the script;
- Select mode – select the mode in which the scene will be displayed: User adds items to the order;
Script Display Conditions – Select the conditions for displaying the script (you can select as many conditions as you like, if no conditions are selected, the scene will be played in all restaurants at any time after each dish selection).
- Code of the last dish added to the order - select from the list the code of the last dish added to the order;
- Selector code of the last dish added to the order - select from the list the code of the parent selector of the last dish added to the order;
- Code of the selector of dishes included in the order - select from the list the code of the parent selector of dishes included in the order;
- Code of the selector of dishes not included in the order - select from the list the code of the parent selector of dishes not included in the order;
- Restaurant code where the order is made - enter the code of the restaurant where the order is made; in the form XXXX, you can enter several restaurants, separated by commas;
- Business period — select the business period code from the list in which this script will work; to select a business period, you must click the "Add code" button; you can select several business periods. You can find a business period by name (the "Search by name" line) or by code (the "Search by code" line). To exit, click the "Close" button or in the upper right corner of the editing window.
To delete business periods, you can click on the button or on the “Added” button (in the window with the list of business periods). - Dish code in the order - select the dish code in the order from the list;
- Code of a dish missing from the order - select from the list the code of a dish missing from the order;
- Minimum order amount – minimum order amount;
- The order amount is divisible by the minimum amount -
![]() - offer a dish when the minimum order amount or a multiple of it is reached.
- offer a dish when the minimum order amount or a multiple of it is reached.
![]() - offer a dish when the minimum amount is reached and each time it increases.
- offer a dish when the minimum amount is reached and each time it increases.
You can use the parameters "Minimum order amount" and "Order amount is divisible by minimum order amount" for promotional offers on orders with a minimum amount, which will lead to an increase in the average check size. When purchasing, for example, for $4.95, the system will offer to buy a hand pie for $0.63 instead of $1.89, then the same hand pie will be offered when purchasing for $9.90, $14.80, etc. At the same time, you can assign another promotional offer when purchasing for $10.90: for example, a burger for $0.89 (depending on the script settings).
- Maximum order amount – maximum order amount;
- Select Scene - Select a previously created scene with the appropriate scene type (Gallery).
Create script – save the created script and its settings.
Creating a script for the "User is ready to place an order (transition to "My order")" mode
It is necessary to fill in:
- Script Title – Enter the title of the script;
- Select mode – select the mode in which the scene will be displayed: User is ready to place an order (transition to "My order").
Script Display Conditions - Select the conditions for displaying the script (you can select as many conditions as you like, if no conditions are selected, the scene will be played in all restaurants at any time when you go to "My Order"). - Code of the selector of dishes included in the order - select from the list the code of dishes included in the order;
- Code for the selector of dishes not included in the order - select from the list the code of dishes not included in the order;
- Restaurant code where the order is made - enter the code of the restaurant where the order is made; in the form XXXX, you can enter several restaurants, separated by commas;
- Business period – select from the list the code of the business period in which this script will work; to select a business period, you must click the "Add code" button; you can select several business periods. You can find a business period by name (the "Search by name" line) or by code (the "Search by code" line). To exit, click the "Close" button or in the upper right corner of the editing window.
- To delete business periods, you can click on the button or click the "Added" button (in the list window).
- Dish code in the order - select the dish code in the order from the list;
- Code of a dish missing from the order - select from the list the code of a dish missing from the order;
- Minimum order amount – minimum order amount;
- Maximum order amount – maximum order amount;
- Select Scene - Select a previously created scene with the appropriate scene type (Gallery).
Create script – save the created script and its settings.
Creating a Recommendations Script
The script is used to set up Recommendation Chains.
- Create a New Script with Recommendation Mode
- Select the category ID of the last dish added to the order and the scene that will be launched when a dish from this category is added to the order. You can select multiple categories for one script.

Adding multiple scenes to one script
You can add several scenes, then they will appear one after another in the order of placement in the script. To add another scene, you need to click the button ![]() . To delete a scene, you need to click on the button
. To delete a scene, you need to click on the button ![]() .
.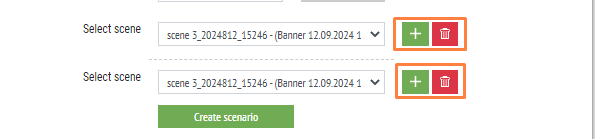
Create script – save the created script and its settings.
Adding multiple modes to one script
It is possible to add several modes to one script. To do this, click the "Add mode" button.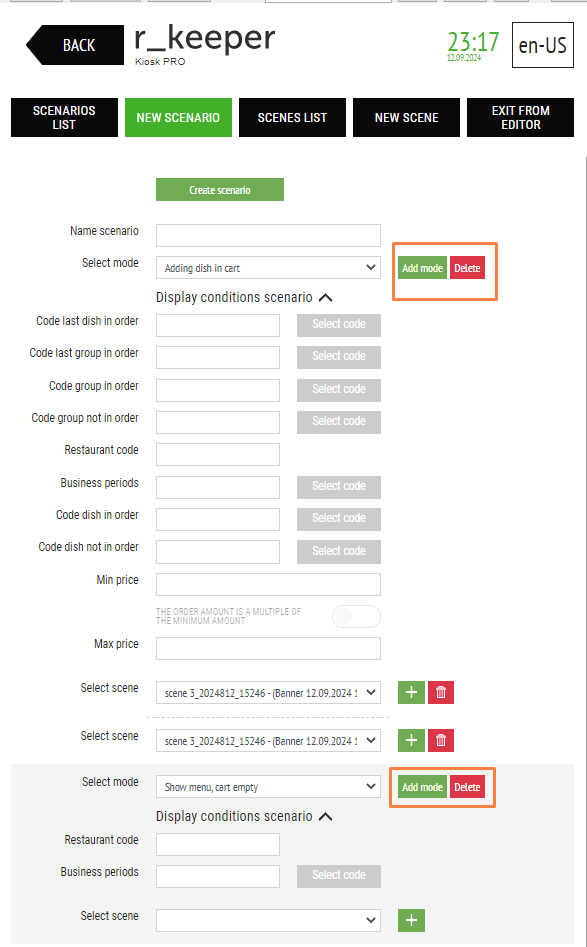
To delete one of the modes, you must click on the "Delete" button.
Activating the script
To activate the script, you need to click on the “Make script active” button,
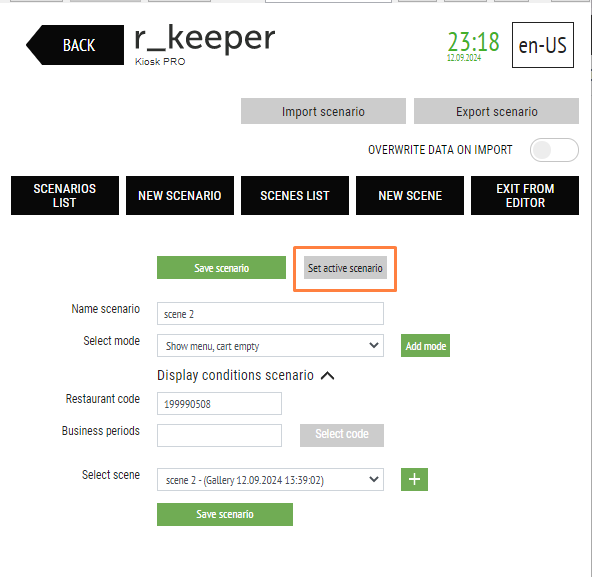
the message “Operation completed successfully!” will appear,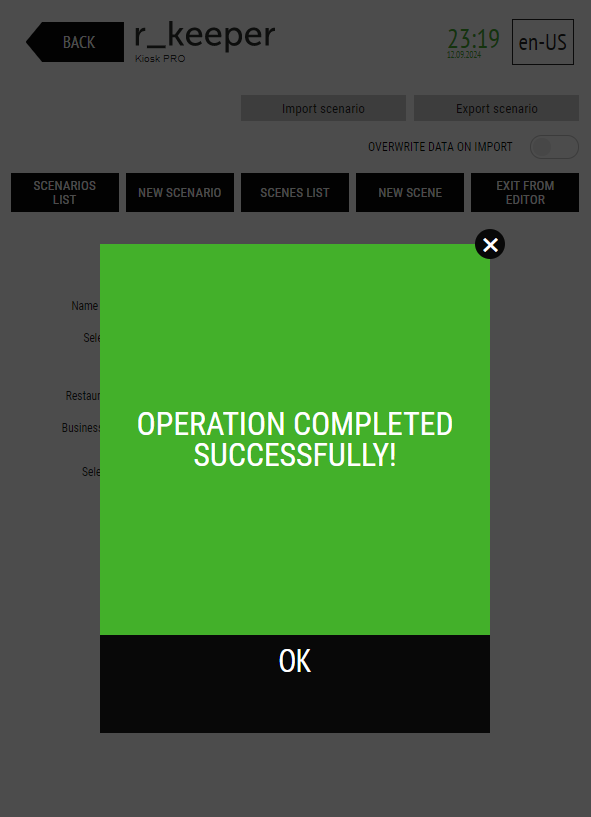
after which this button will be called "Script active".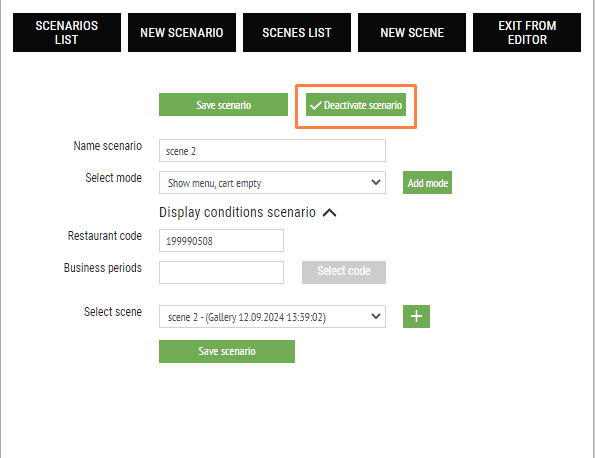
Only one script can be active. That is, when one of the scripts is activated, the other will stop running.
List of scripts, deleting scripts
To go to the list of created scripts, go to the "List of scripts" section.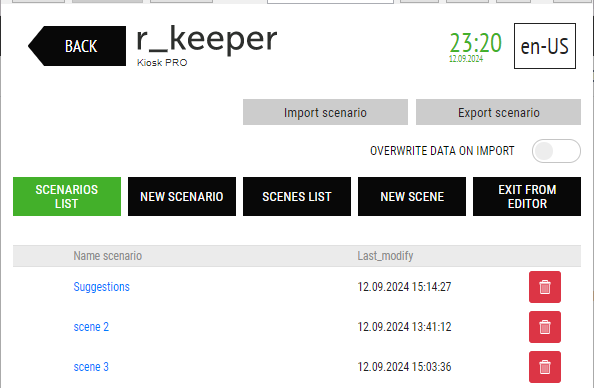
Script Title – Script title;
Last modified – date and time of the last script modification (dd.mm.yyyy hh:mm:ss).
The active script is marked with a sign ![]() .
.
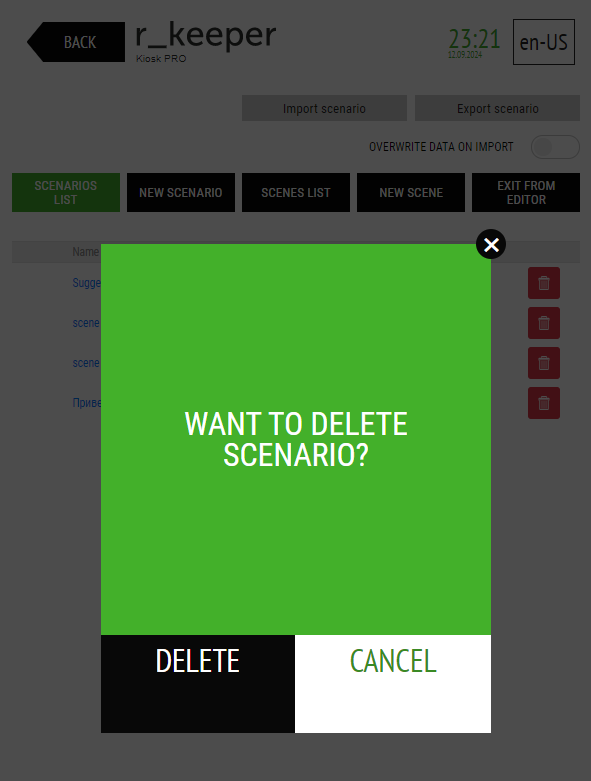
To delete a script, you need to click on the button ![]() in the corresponding line and in the window that appears, confirm the action with the “Delete” button.
in the corresponding line and in the window that appears, confirm the action with the “Delete” button.