...
After the license is activated, the main window of the electronic queue opens.
...
Localization
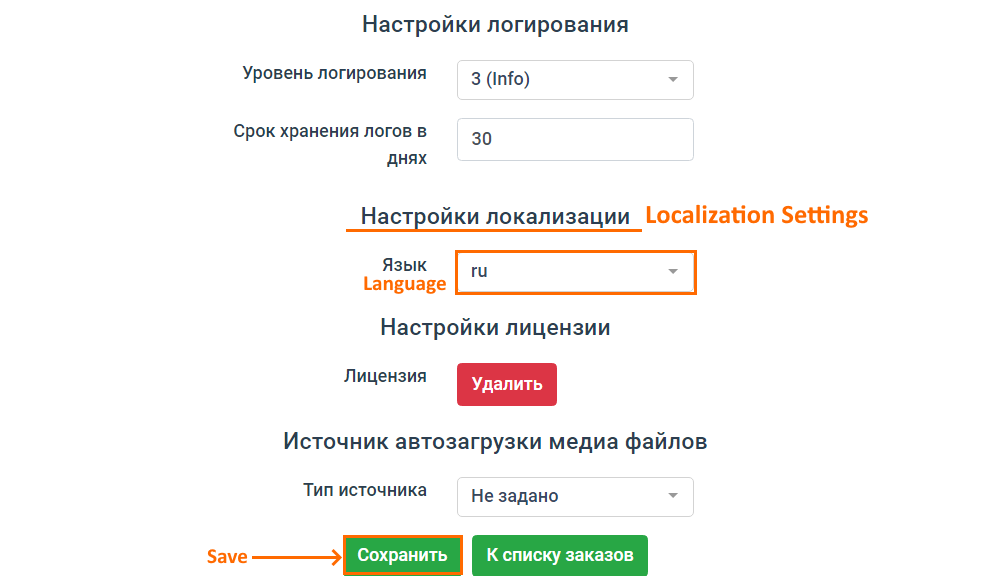
Russian is QMS default language. To change the language, do the following:
- Open the QMS client and go to settings:
- On the Main tab (Основные), scroll down and find the Localization settings (Настройки локализации)
- Select the required language from the drop-down list.
Click Save (Сохранить) in the bottom of the screen.
Communication with KDS Pro
...
KDS Pro Settings
- Go
...
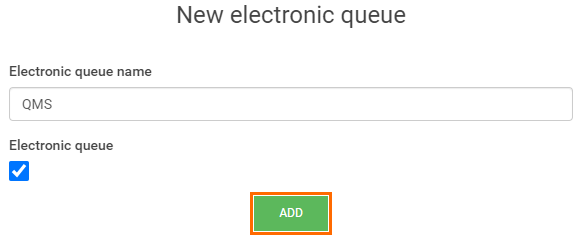
- to https://kds.ucs.ru and create a new client to display QMS orders from KDS Pro
...
- Check the box Electronic queue
...
- , specify the name and click Add
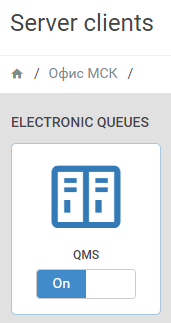
- The created electronic queue will appear in
...
- the Electronic
...
- queues list:
QMS Client Settings
- Open the QMS client and go to settings by clicking in the upper-right corner
...
...
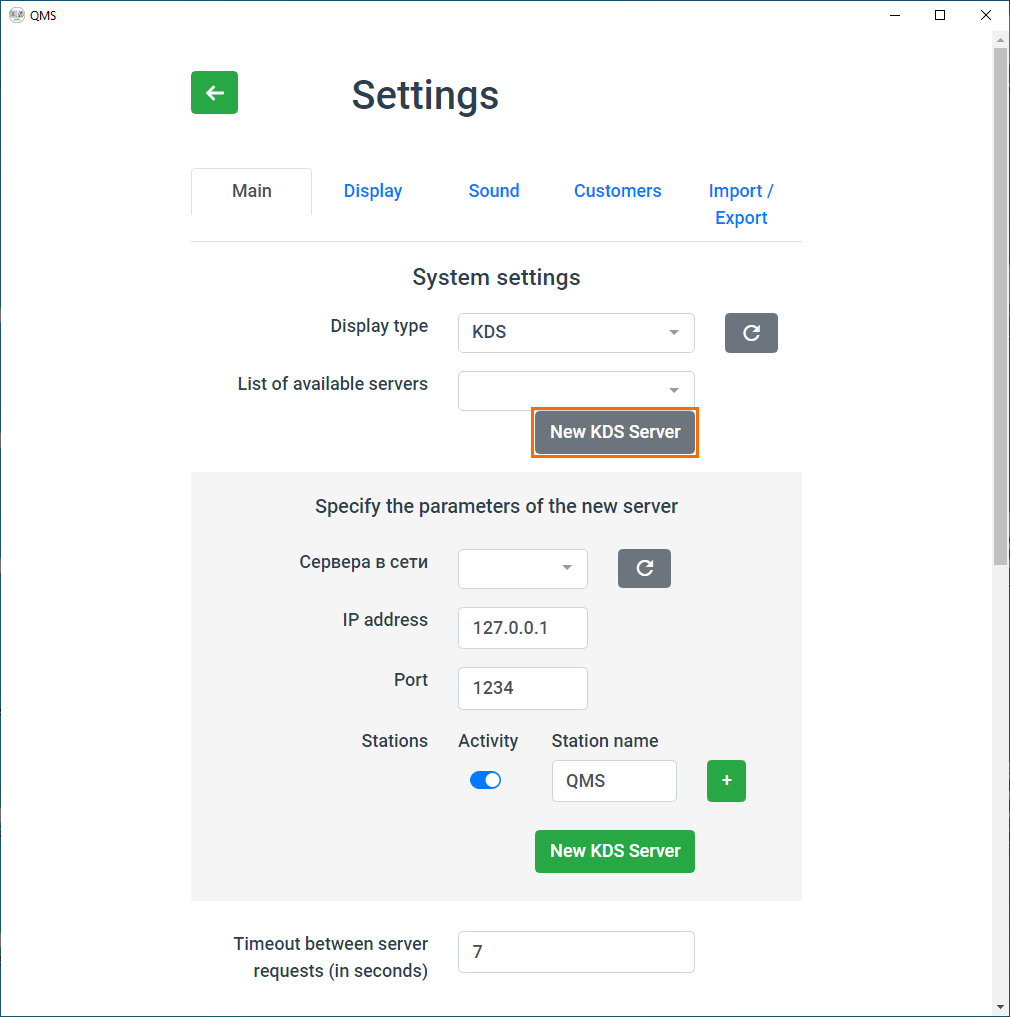
- On the Main tab, click the New KDS
...
- server button.
Specify the IP address, port, and name of the station created in KDS PRO. The station name register should be exactly the same as the name register in KDS PRO.
After that, the server can be selected in the list of available servers. Pay attention to the parameter setting Timeout between requests to the server. The shorter the timeout, the faster the order statuses in QMS will change.
...
Communication with VDU 4+
VDU Settings
...
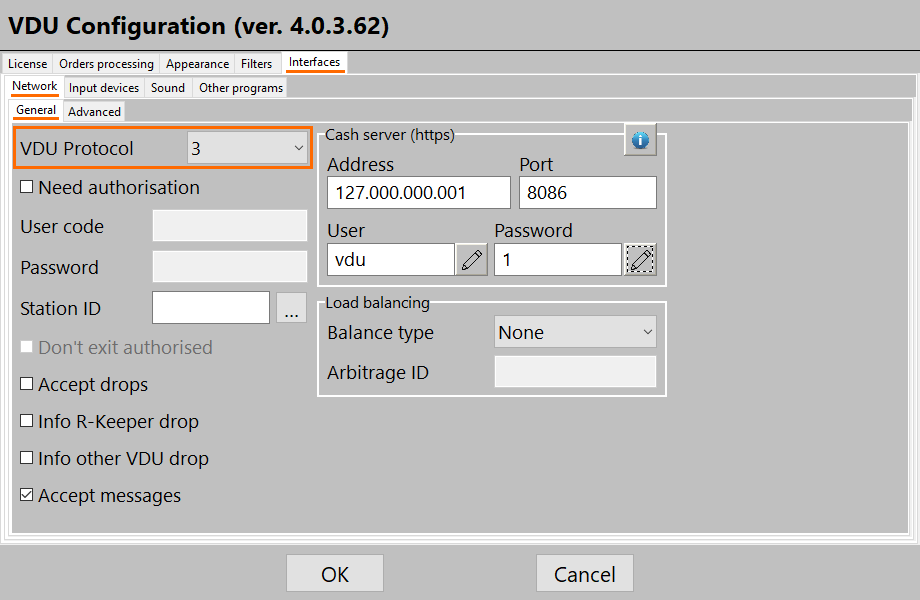
- Go to the VDU settings. Go to the section Interfaces > Network
...
- >
...
- General and select 3 as the VDU
...
- protocol. QMS does not work with version 2 of the protocol.
...
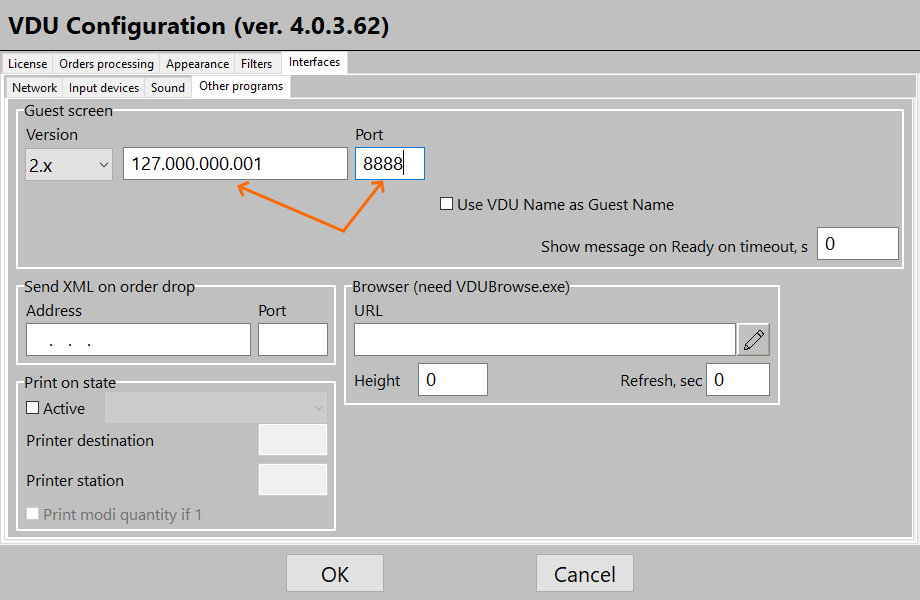
- At one of the VDU stations,
...
- specify the address and port of the QMS server in the settings. The port
...
- should match the data exchange port between the QMS server and the client.
...
- To do this, go to Interfaces > Third-party programs and specify
...
- the
...
- server IP and port. Port 8888 is specified
...
- as an example.
...
QMS Client Settings
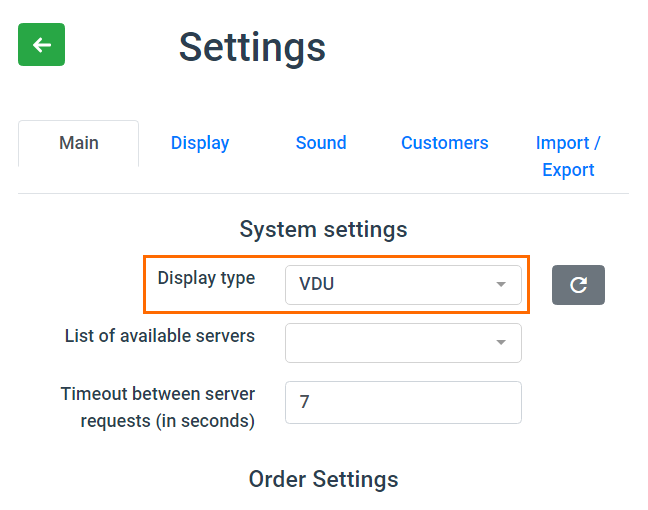
- Open the QMS client settings
...
- In the System settings, select VDU as the Display Type
...
- parameter
...
- In the main QMS settings, the VDU server will appear in the list of available
...
- servers only after the VDU
...
- sends any order to the QMS server.
Configuring
...
Several Clients
You can connect multiple several screens to the QMS system. The settings of all screens will be the same and all displayed orders will be the same. To connect a screen with unique settings, you will need to obtain an additional license and configure a separate QMS server.
Client Authorization
...
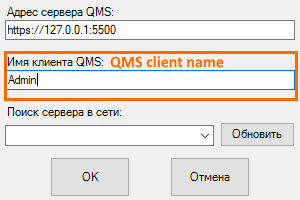
- The first login to QMS is performed automatically from the first connected client. Its default name is Admin.
If you fail to log in,
...
- right-click in the blank space and select QMS client settings (Настройки клиента QMS) and enter the client's name manually
...
- :
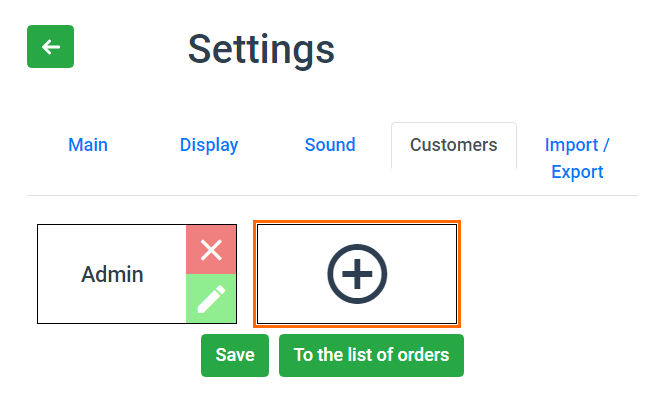
- To access QMS from other clients,
...
- create them
...
- on the Customers tab of the main QMS settings
...
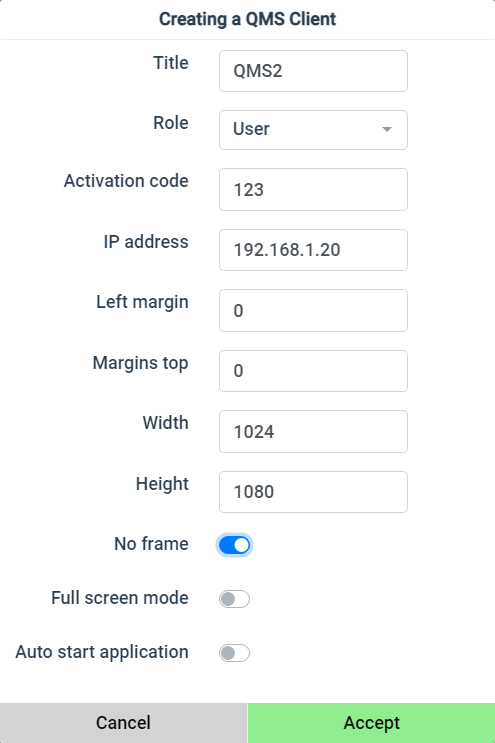
Specify the following parameters:- Title — a unique name
When creating a client, specify:
...
- Screen margins
...
- Auto start settings
- Select the role: Admin or User.
User
...
- has no access to the settings from the main screen of the QMS client
...
- and and cannot open them by right-clicking at the main screen. You can manage the settings of all clients from any client that has the Admin role.
...
- After filling all the nessecary fields and click Accept.
- After filling all the nessecary fields and click Accept.
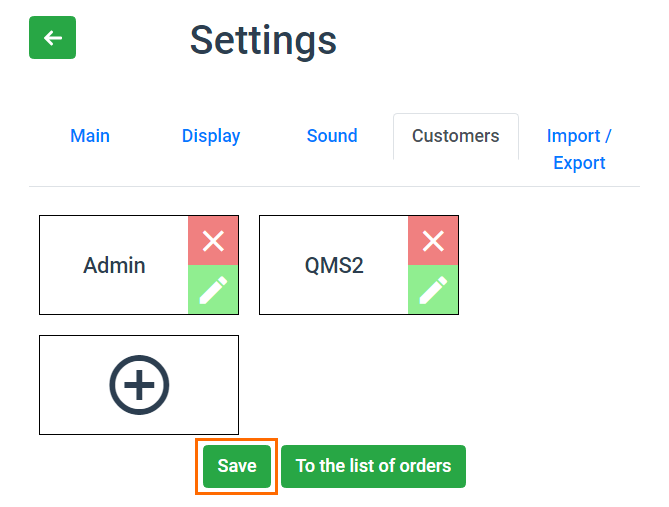
- Click Save
...
To connect the client created in the settings with the ones installed through the installer, you need to perform the activation procedure.
There are two ways to activate the client:
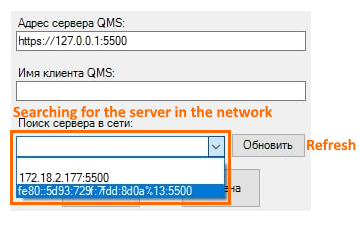
- By IP address
...
- : open the settings by right-clicking in the blank space and specify the clients name or select it from the drop-down list:
- In the client
...
- aettings, specify the activation code that appeared in the client window when you first started it
...
- .
...
Custom Themes
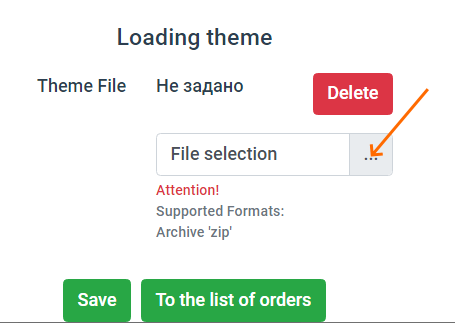
The QMS server supports changing topicsthemes. The theme itself is a regular zip archive. It is used in the settings, in on the "Display" tab.
To change the theme, click the "Select File" button and select :
- Find the Loading theme section in the bottom of the screen
- Click the File selection button and find the archive with the theme
...
- then click the
...
- Apply
...
- button and wait until the progress icon disappears and the page is refreshed.
Different themes may have additional specific settings.


