General
Introduction
In the General Settings section, you can load existing settings, themes, set logging levels, configure the theme, and much more. 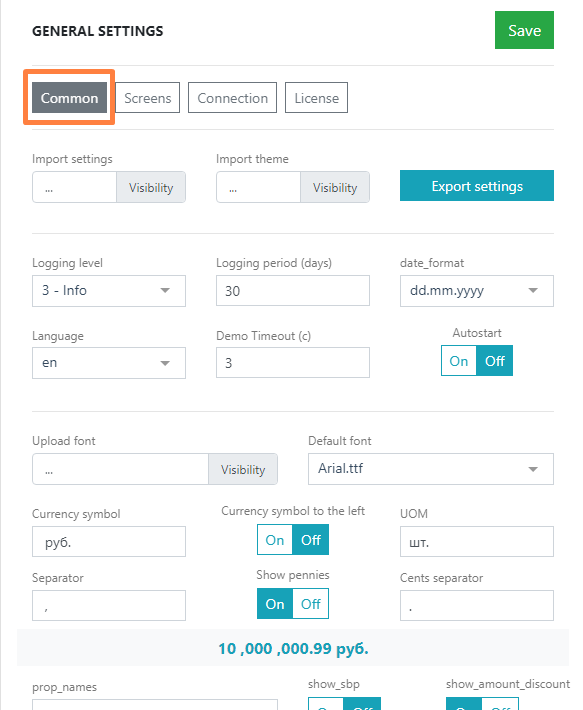
Import and Export of Settings
If you already have a configured r_k GuestScreen environment, you can save the settings from there and import them to a new environment. To do this:
- Open the configured GS environment and go to the General Settings
- Click the Export settings
- Save the file with the *.exp extension to your computer.
- If necessary, transfer the file to another computer on which the new environment is installed.
- Open the new GS environment and go to the General Settings
- Click on the Import settings
- Select the previously saved *.exp
Done, the settings have been imported. You can import a theme from a zip archive in the same way.
Logging
Set comfortable logging settings for the system. To do this, specify values in the fields:
- Log level – select the logging level:
- Error – only errors will be logged.
- Warning – errors and warnings will be logged.
- Info – errors, warnings, and general information will be logged. This level is set by default.
- Debug – system debugging information will be logged.
- Trace – all actions will be logged.
- Logging period – the logging period in days. After this period expires, logs from the previous period will be deleted.
- Date format – select the date format:
- Language – interface language selection
- Demo timeout (sec) – the time for changing pictures in seconds. On the guest screen, in the lower-left corner, there are buttons to enable and disable demo mode.
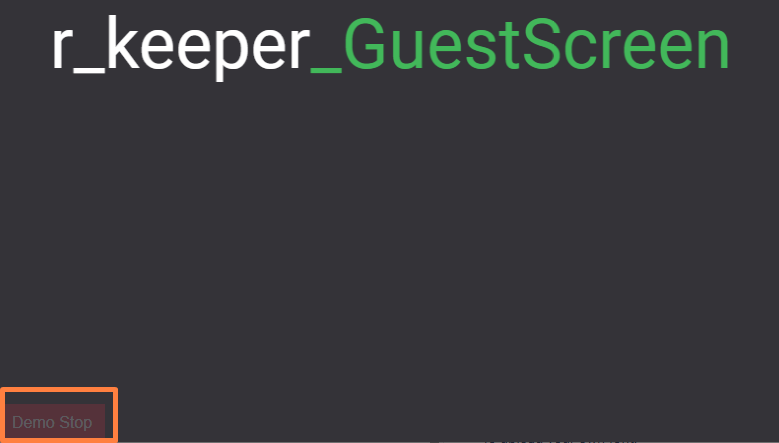
When demo mode is active, orders from the cash register are not displayed on the GuestScreen; this mode is used for viewing scenarios. - Autostart – allows automatic launch of the application at computer startup:
- On – function enabled.
- Off – function disabled.
Font Settings
You can configure the display on the guest screen using fonts. The system settings allow using both preset fonts and uploading your own.
To upload your own font:
- Click on the Upload font field and select the font file.
- After the file is uploaded to the system, click on the Default font
- From the drop-down list, select the font you uploaded.
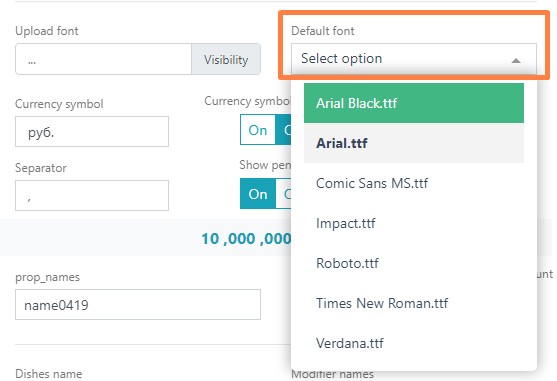
If you want to use one of the standard fonts, click on the Default font field and select the appropriate font.
Next, you need to specify currency and amount display settings. Set the values in the fields:
- Currency symbol – a text field where you can enter a brief designation for the monetary unit for prices and amounts. If this field is not filled, prices and amounts will be displayed without a monetary unit
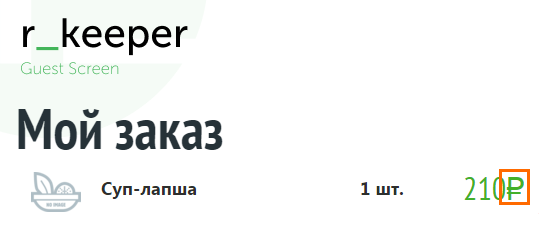
- Currency symbol tothe left – switch for the position of the currency symbol:
- On – the currency will be displayed before the amount.
- Off – the currency will be displayed after the amount.
- Unit of measure (UOM) – a text field where you can enter the name of the unit of measure for dishes; it is displayed next to the dish quantity. If this field is not filled, the quantity will be displayed without a unit of measure
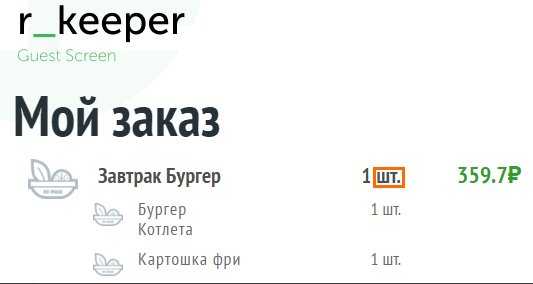
- Separator – a text field where you can enter the symbol that separates thousands in the price. The default is a space, which can be removed
- Show pennies – adds display of cents in the price
- Cents separator – a text field where you can enter the symbol separating cents from dollars. The default is a period.
- Extended property system name – you can specify the system name of an extended property that will be displayed as additional information about the menu item.
To display extended properties on the r_k Guest Screen:
- Go to the r_keeper manager station.
- Go to Settings > Configuration > Extended properties. Create a new or activate a preset extended property. For example, the property Description (RUS) with the system name description0409.
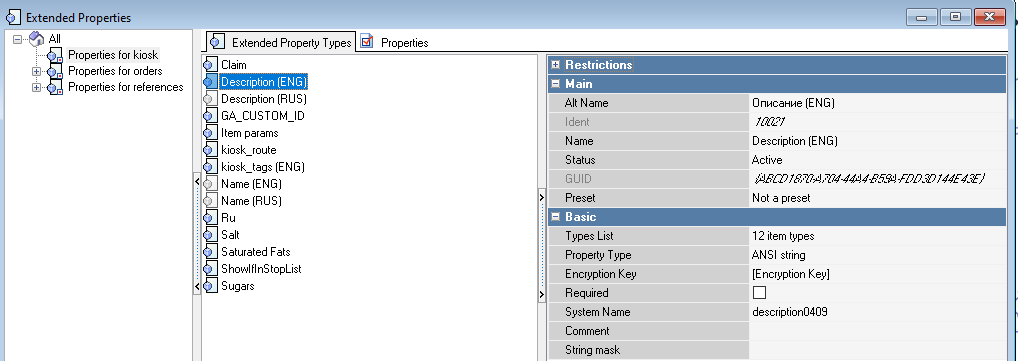
Restart the cash server
A Description (RUS) parameter will appear in the menu item properties where additional information about the menu item can be entered
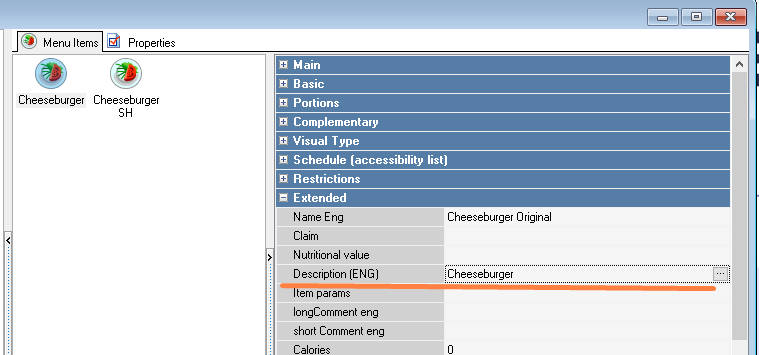
After adding such a menu item to the menu scene, the menu item with the description from the extended property will be displayed on the r_k GuestScreen.
- Show menu item amount with discount – in the activated state, data is displayed with the current state, including amount, discount, and Total amount
If the parameter is disabled – only the Total amount is displayed.
Menu Display Settings
In this block, you can configure the display of menu items on the guest screen.
- Menu item name – selection of dish name display. Options available:
- Name
- Alternative name
- Short name
- Alternative short name
When selecting an alternative or short name, the name will be loaded from r_keeper 7. For correct data display in r_keeper, the data fields for the menu item must be filled.
- Modifier name – selection of modifier name display. Options available:
- Name
- Alternative name
- Short name
- Alternative short name
When selecting an alternative or short name, the name will be loaded from r_keeper 7. For correct data display in r_keeper, the data fields for the modifier must be filled.
- Order category name – selection of order category display. Options available:
- Name
- Alternative name
- Short name
- Alternative short name
When selecting an alternative or short name, the name will be loaded from r_keeper 7. For correct data display in r_keeper, the data fields for the order category must be filled.
Media File Settings
Media files source – selection of the media file upload source. Sources available:
- RK7 source
- Local folders
- FTP server
- HTTP server

Regardless of the source chosen, you need to prepare a folder structure similar to that in Front\media:
- \GuestScreen\Front\media\dishImg – images for menu items
- \GuestScreen\Front\media\fonts – fonts
- \GuestScreen\Front\media\uploads – icons, smileys, background images
- \GuestScreen\Front\media\video – videos.
RK7 Source
When selecting the media file source as an r_keeper station, specify the path to the media file folder in the manager station parameter Path to picture directory.
Local Folders
When selecting the media file source as local folders, specify the path to the local folder from which media files should be uploaded.
FTP Server
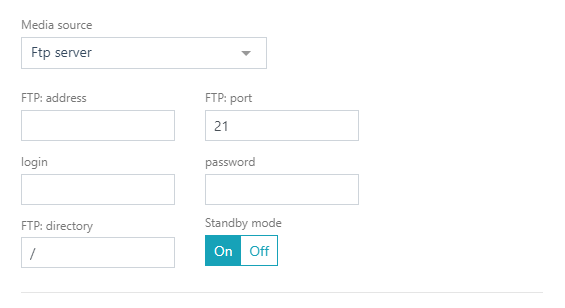
When selecting the media file source as an FTP server, fill in the fields:
- FTP: address – specify the FTP server address.
- FTP: port – specify the server port. Usually 21.
- Login – specify your FTP server login.
- Password – specify your FTP server password.
- FTP: directory – specify the directory to the media file folders on the FTP server.
Media files on the FTP server for Guest Screen should be located in subfolders:
- dishImg – images for menu items.
- fonts – fonts.
- uploads – background images, smileys for voting scenes.
- video – videos.
If everything is configured correctly, all files from the subfolders on the FTP server will be downloaded locally to the identically named folders within the installed Guest Screen program – \GuestScreen\Front\media. Files will be downloaded to local folders after a set time interval. To set this time:
- Go to the Connection
- In the Sync frequency with RK7 (с) field, set the synchronization time in seconds.
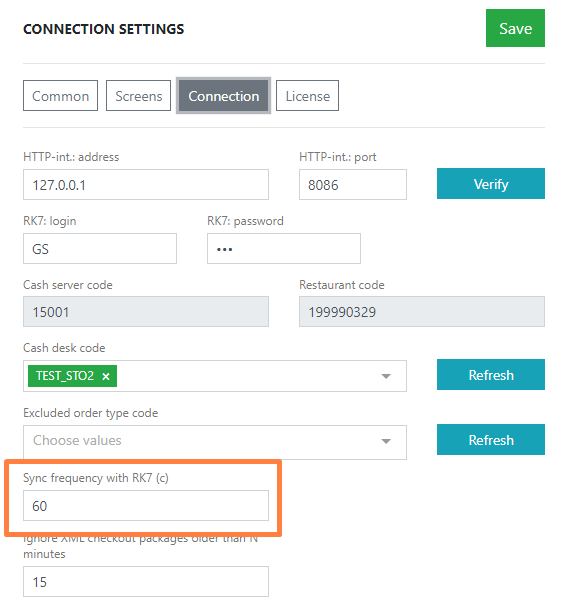
The default is 60 seconds. If necessary, you can increase this interval. It is not possible to set an interval of less than 60 seconds.
Note: the hash sum of media files is not stored. When a file on the FTP server is overwritten, the file in the GS system must also be replaced.
HTTP Server
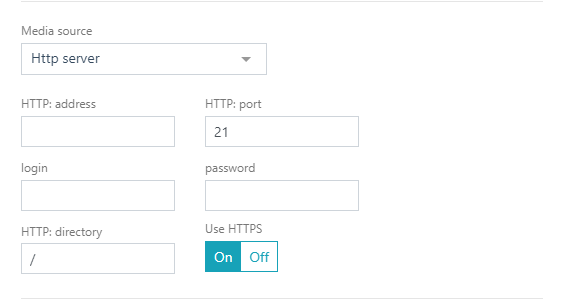
When selecting the media file source as an HTTP server, fill in the fields:
- HTTP: address – specify the HTTP server address.
- HTTP: port – specify the server port. Usually 8080.
- Login – specify your HTTP server login.
- Password – specify your HTTP server password.
- HTTP: directory – specify the directory where media files are located on the HTTP server.
- Toggle the Use HTTPS parameter according to the HTTP server being used.
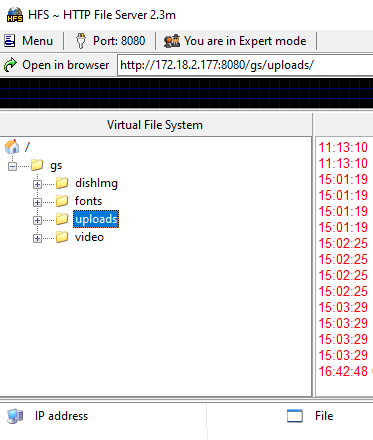
Media files on the HTTP server for Guest Screen should be located in subfolders:
- dishImg – images for menu items.
- fonts – fonts.
- uploads – background images, smileys for voting scenes.
- video – videos.
If everything is configured correctly, all media files from the HTTP server will be downloaded locally to the identically named folders within the installed Guest Screen program – \GuestScreen\Front\media. Files will be downloaded to local folders after a set time interval. To set this time:
- Go to the Connection
- In the Sync frequency with RK7 (с) field, set the synchronization time in seconds.
The default is 60 seconds. If necessary, you can increase this interval. It is not possible to set an interval of less than 60 seconds.
GSGuard Configuration
GSGuard is a service that monitors the state of the GuestScreen service. It restarts the service on command from Centralization or when changing a theme. When this service is enabled, GuestScreen will start automatically.