Banquet Orders Settings
Settings in the Manager Station
To configure banquet orders:
- Open the Manager Station
- Go to Service > Cash Stations and Devices and select the POS server for configuring banquet orders
- Go to the Properties tab
- Find the HTTP Restrictions section and in the XML interface field, select the HTTP Access If such a role does not exist — create it.
- Below, in the HTTP Data Port field, specify a free port. The POS server will be accessible via this port.
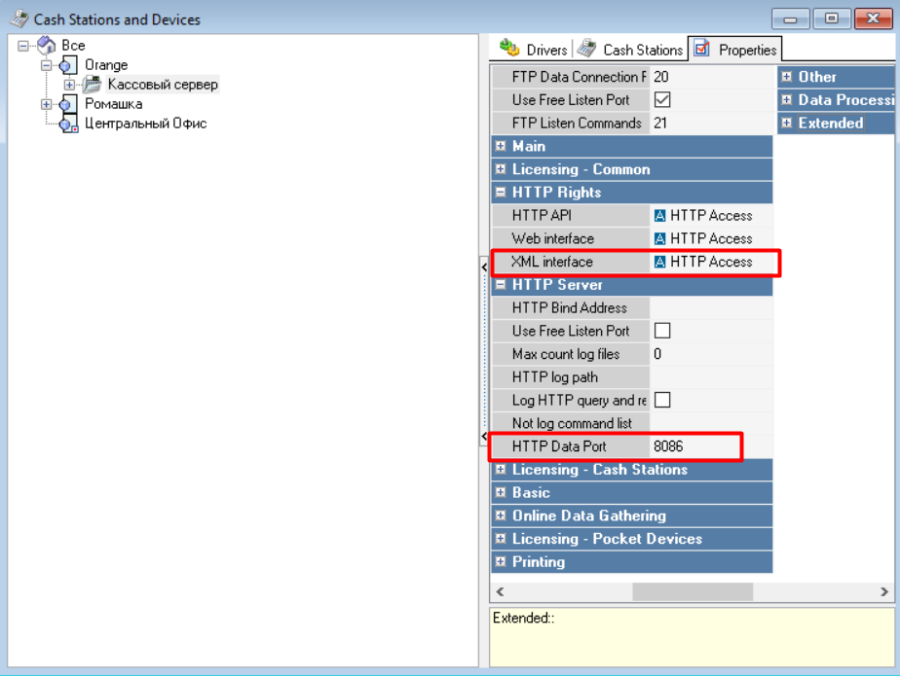
- Save the changes.
- Go to Personnel > Employees and create or select a role and assign it the HTTP Access privilege. For these purposes, the standard role HTTPS or HTTP Access exists. If you don't have them — create them.
Only Latin characters can be used in the username for connection with FoodFactory.
- Save the changes and restart the POS server
Settings in FoodFactory
- Open FoodFactory and go to Settings > XMLINTERFACE
- Fill in the connection settings for the POS server
- POS Server — Network ID of your POS server
- IP Address — IP address of the POS server
- Port — HTTP Data port that you specified in the POS server settings
- Login — username with the XML interface privilege
- Password — password of this user
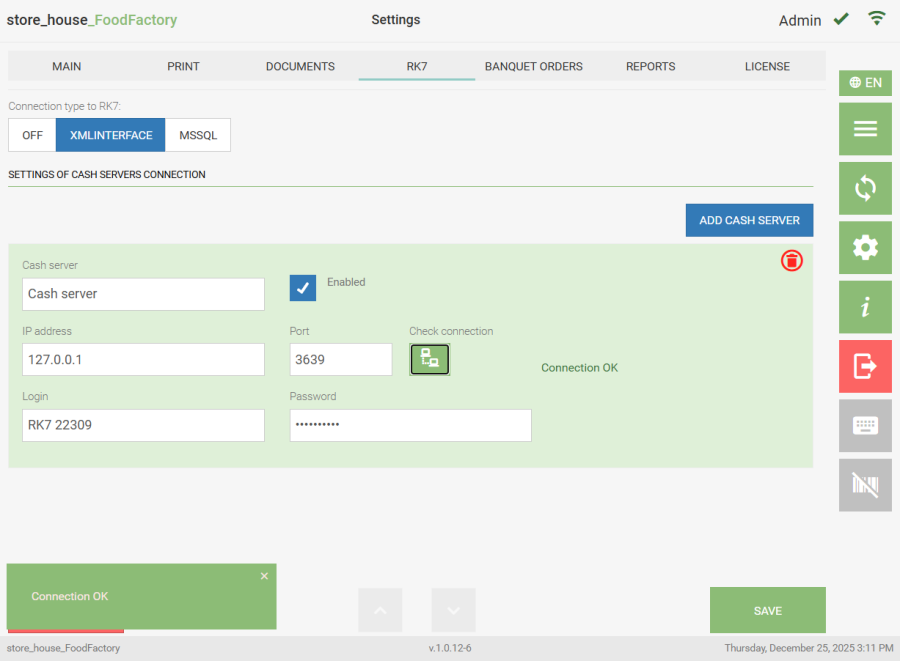
- Click the Save
Working with Banquet Orders
On the "Banquet Orders" tab, you can configure which R-Keeper restaurants will display banquet orders in the list and for which departments the theoretical goods balances will be calculated. 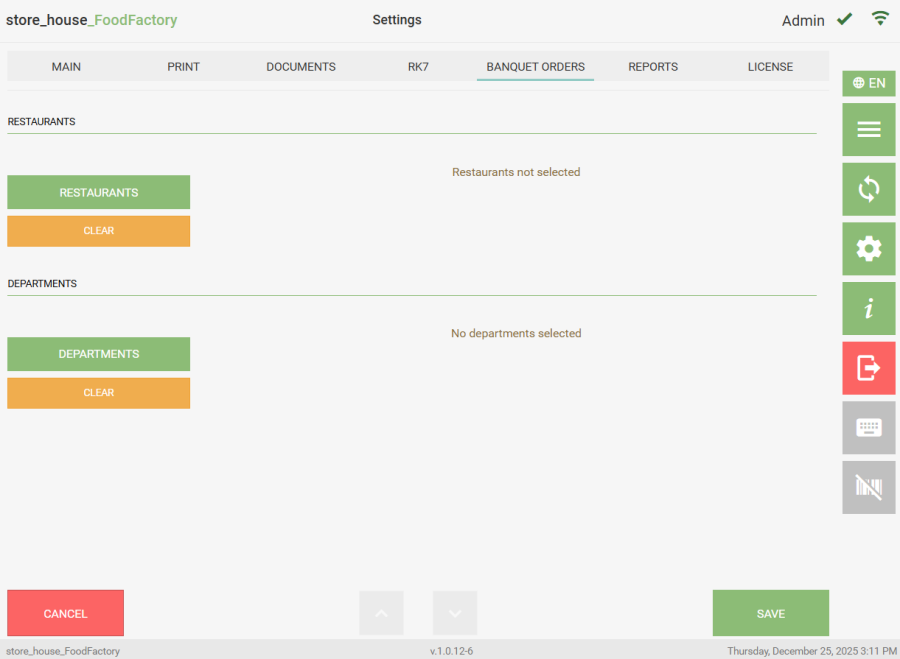
The banquet orders settings window will be unavailable if the mode for receiving data from R-Keeper is disabled on the RK7 tab.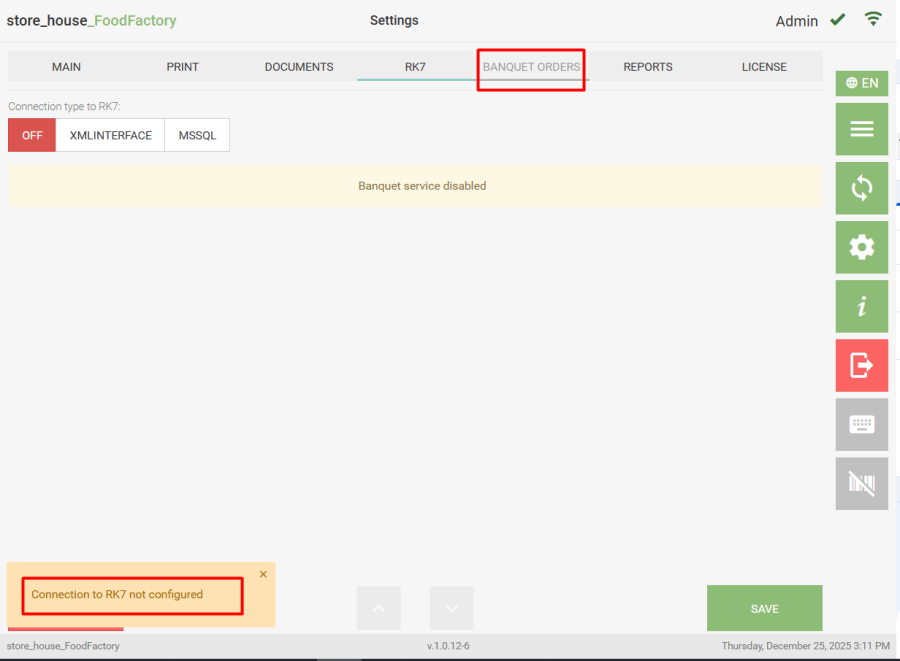
If the banquet orders mode is enabled, but the POS server (or MSSQL server) is unavailable/stopped, then when opening the banquet orders list, an error message will appear in the lower left corner, and accordingly, it will be impossible to make settings in the "Restaurants" area. The figure shows an example of an error when there is no connection with the POS server; Figure 86 shows an example of an error when there is no connection with the MSSQL server.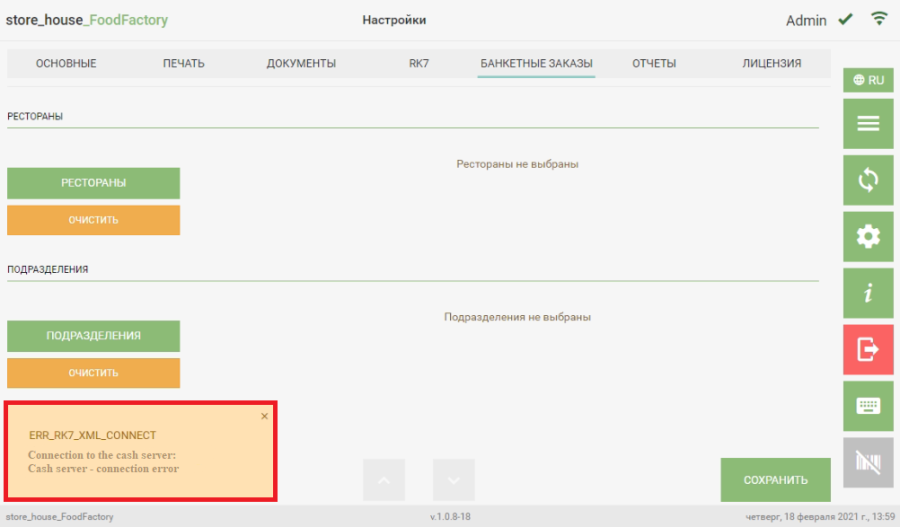
The figure below shows an example of an error when there is no connection with the MSSQL server.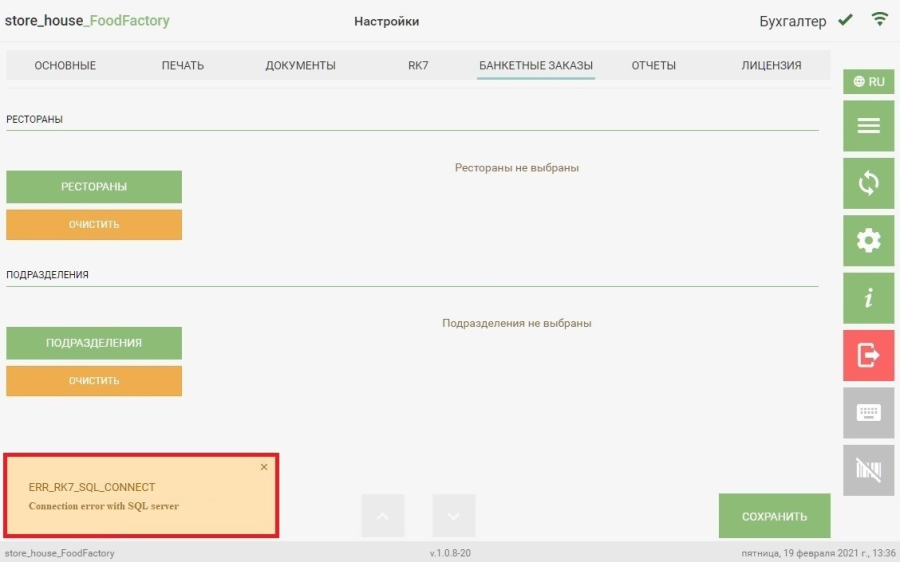
If there are no connection errors, then in the "Restaurants" area, click the button ![]() and in the opened window, select the restaurants (enterprises) that will be displayed in the banquet orders list filter and click the "Add" button.
and in the opened window, select the restaurants (enterprises) that will be displayed in the banquet orders list filter and click the "Add" button. 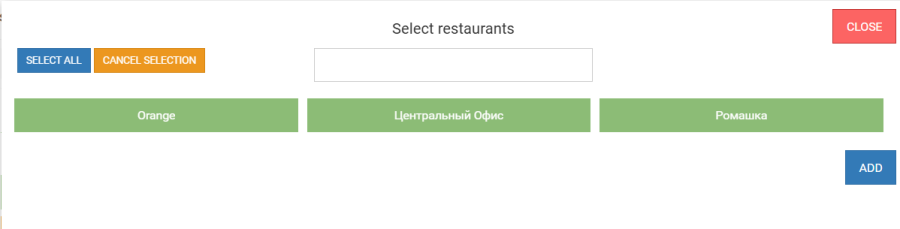 To select all restaurants, click the "Select All" button; to cancel the selection, click the "Cancel Selection" button. To search for a restaurant, enter part of the restaurant name in the search field (at least three letters), after which only the found matches will be displayed in the list. To exit the "Select Restaurants" window, click the "Close" button. The selected restaurants will be displayed in the "Restaurants" field.
 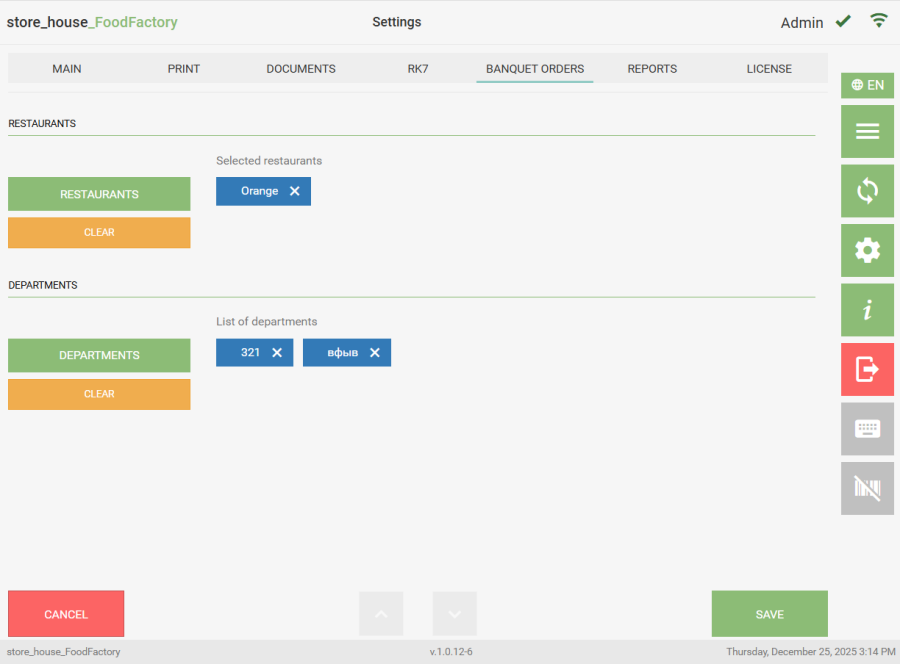 To delete a selected restaurant, click the cross to the right of the restaurant name. To delete all selected restaurants, click "Clear". In the "Departments" area, department selection occurs completely analogously to restaurant selection.
The list of departments may be limited by user permissions. |
If a specific restaurant (enterprise) was selected in the "Restaurants" field, then only those departments that belong to the selected restaurant (enterprise) will be displayed in the department list for selection.
When a selected restaurant is deleted, all selected departments will be automatically deleted along with it.
To save the changes made, click the "Save" button; to cancel saving, click the "Cancel" button.