Tariff creation algorithm
Introduction
To create a new tariff, you need to:
- Enable the Use Tariffing parameter
- Grant employees the appropriate rights
- Set the accounting type
- Create a detailed breakdown with a price
- Link to a virtual or real rated device, such as pool tables, bowling alleys, etc.
Employees' rights
To enable employees to add tariffs to orders, grant them the appropriate rights. To do this:
- Go to the menu Personnel > Employees
- Select the restaurant and the required role
- In the role properties, expand the Cash restrictions section
- Find the Add tarrification to order and Tarrification fields and check the boxes
- Save the changes.
Done, now employees can add tariffs to orders.
Tariff setting
To add a new tariff:
- Create a tariff group
- Create a tariff
- Create a detailing.
Creating a tariff group
- Go to the menu Menu > Tariffs
- Click on the root node All, from the context menu select New Tariff Group
Fill in the main properties: name, status
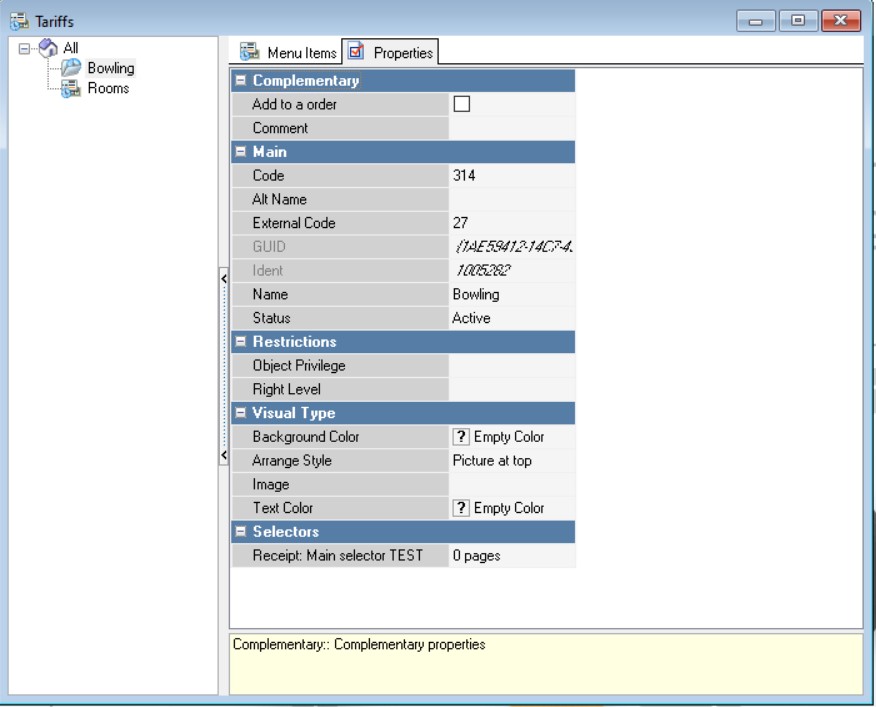
The tariff group properties contain the following groups:
Complementary
- Add to order - not used for tariffication
- Comment - this field allows you to enter any notes regarding the tariff group. The information will not be displayed at the cash register.
Main
- Code — unique code of the directory element in the system. Assigned automatically, but can be changed manually
- Name — name of the element
- Alt Name — name of the element in an alternative language
- Status — status of the directory element.
Restrictions
- Object Privilege — the right to edit an object on the manager station
- Right Level — the right to work with an element on the cash register station.
Visual Type
- Background color — the background color of the button. The color can be selected from the list or from the palette, which is called by double-clicking the left mouse button in the property value area
- Arrange Style — the relative position of the image and text
- Image — selecting an image for the object
- Text color — the color of the text. The color can be selected from the list or from the palette, which is called by double-clicking the left mouse button in the property value area.
Selectors — a custom selector that will be displayed on the screen when this menu group is selected.
- Save the changes.
Done, the tariff group is created. Now you need to create the tariff itself.
Creating a tariff
- Go to the Menu Items tab and right-click on the field. From the context menu, select New Tariff
- Fill in the fields:
- Tariff Name
- Accounting type — select the required type: per hour, per minute, one-time payment

There is no need to change the status yet, as it can only be changed after adding the detail.
Directory of TariffsSchedule (Accessibility List)
The work schedule (availability) of tariffs for each restaurant. The default period is "Always". If the tariff should not work in the restaurant, select the preset period "Never" (the element will also not be imported into the StoreHouse database).
If necessary, you can specify a different period entered in the "Periods" directory, for example, to display from 9 to 11 am.Main
Code – a unique code of the directory element in the system. It is assigned automatically, but can be changed manually;
Name – the name of the directory element;
Alt Name – the name of the element in an alternative language;
Status – the status of the directory element;Tariff
Default limit – the time that will be automatically displayed at the cash register in the "Time limit" field on the tariff restrictions screen. The limit can be changed manually.
No-Charge Time (only for hourly/minute) – the time from the moment the tariff is turned on, during which the tariff amount will be zero (Hour: min). For example, the first 5 minutes are not paid, since the guest must have time to approach the gaming table during this time.
Max. Time (only for hourly/minute) – the time after which the tariff automatically ends. (Hour: min).
The maximum time can also be limited at the station (Time limit), this value must be less than the maximum time in the tariff properties.
Min. Time (only for hourly/minute) – time less than which cannot be paid. After the billing reaches the value specified in the No-Charge Time property, the amount will be calculated for the time specified in this property, even if the actual time of use of the device was less;
Max. amount – the amount upon reaching which the charging is automatically terminated.
The maximum amount can also be limited at the station (Money limit), this value must be less than the maximum amount in the tariff properties.
Min. amount – the amount less than which cannot be charged in this tariff.
If both Min. Time and Min. Amount are specified, the condition with the higher amount will be applied to the payment.
For example, Min. amount is 100 rubles, amount to be paid taking into account Min. Time is 50 rubles. Total amount according to the tariff is 100 rubles, because it is more.Money Round Rule - select the rule by which the final amount for the tariff is rounded (to 1 kopeck, to 1 ruble, to 100 rubles, etc.). The rounding principle is "Up".
Rate Type — tariff type: “Per hour”, “Per minute”, “One-time payment”;
Round to — round the billing time to the number of minutes specified in this property.For example, tariff settings: round up to 5 minutes, time rounding rule - "Up". If the actual game time is 4 minutes, then it is rounded up to 5. The tariff amount is also rounded up to the cost for 5 minutes. If the "Per hour" tariff is selected, then to round up to a full hour, you need to set "Up" and 60 minutes.
Time Round Rule - select the rounding principle for the billing time (Up/Down/Mathematically) up to the number of minutes specified in "Round up to".
Basic
Fiscal group – the relation of the tariff to the fiscal group; for each restaurant you can specify its own fiscal group;
Item kind – when creating a tariff, the field is set to "Service". It is possible to select other item kinds.Classifications – This property allows you to include the tariff in a specific category within the classifications.
If an element does not belong to any category, then in the Classifications directory it will be in the root node of the classifications, but excluded from all its categories. In reports by categories, such elements will be allocated to a separate group without a category.
- Save the changes
Done, the tariff is created. To be able to use it, you need to create tariff rules - details.
Creating a detail
A tariff can have several details. The order of their use is from bottom to top or from right to left.
The first detail created is the default detail, which is the detail that works when other detail levels are not available. Most of its properties cannot be edited.
To create detail:
Select the required tariff and go to the Details tab
Right-click on the field and select New Detail from the context menu.
Fill in the fields:
Name
Status
Price
Fill in the remaining fields if necessary.
Main
- Code — unique code of the directory element in the system. Assigned automatically, but can be changed manually
- Name — name of the element
- Alt Name — name of the element in an alternative language
- Status — status of the directory element.
Basic
- Use tarrif — use the selected tarrif to calculate the cost of the detail. Used for nested rates
- Price — the tariff price per unit of measurement selected in the tariff property Accounting type
- Replace name — the name of the detail will be displayed instead of the tariff name in the receipt. Otherwise, the name of the detail is added to the tariff name
- Bonus Percent — a percentage of the item price that is used to calculate bonuses. Used in loyalty programs
- Consummation percentage — percentage of the item price that is used to calculate сonsummation. A consummator can only be assigned to a completed tarification
- Max Duration — the maximum duration of the detailing operation. After its completion, the detailing changes
- Turn off tariffing — turn off tariffing after the end of the detailing period.
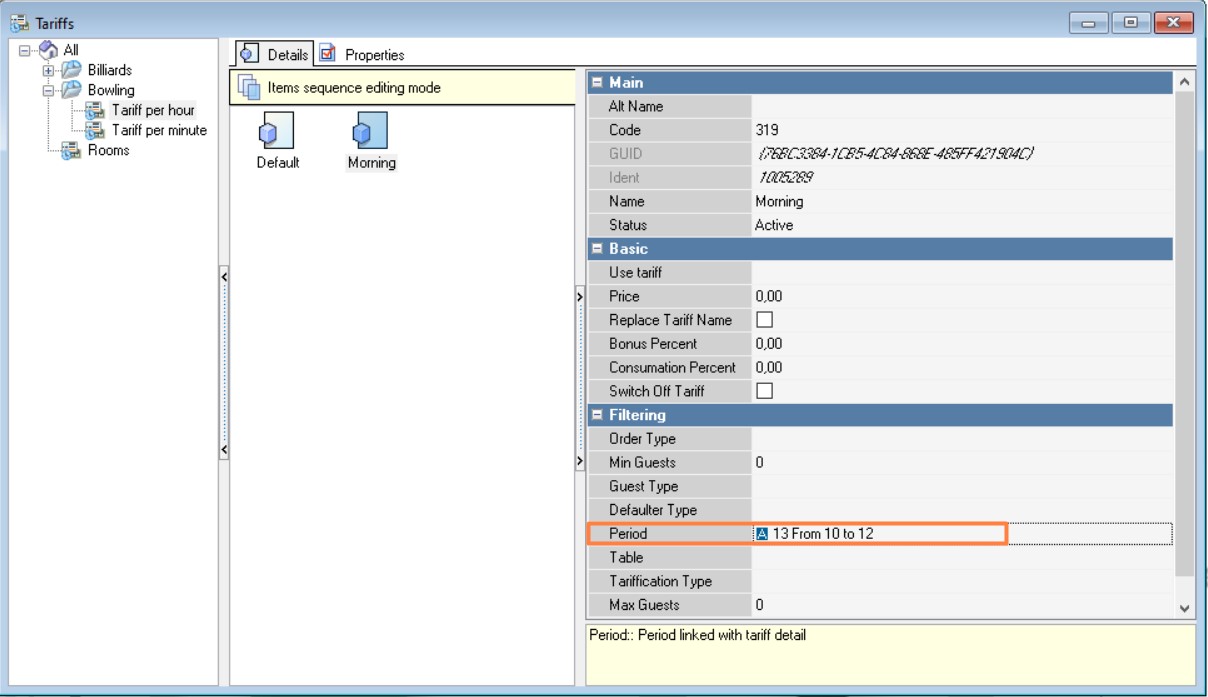
Filtering is an additional condition for tariff detailing. All fields can be left blank.
- Order type
- Min. No. of Guests — the minimum number of guests for the tariff to work
- Guest Type — guest type of tariff details
- Type of defaulters — type of defaulters of tariff details
- Period — the period when this tariff is valid. You can create your own period using the Periods directory
- Table — the table on which the tariff applies
- Tariff Type
- Max. Guests — the maximum number of guests for the tariff detailing to work
- Order category
- Save the changes
Done, the detailing is created. Now you need to return to the tariff and transfer it to the Active status.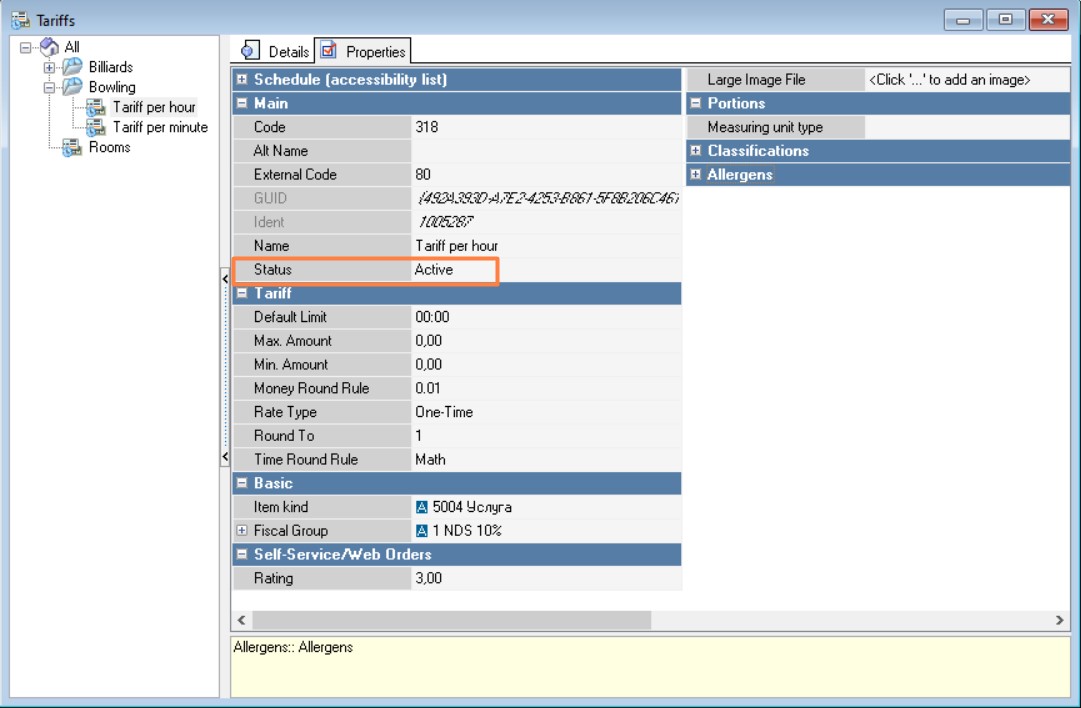
Creating a rated device
After creating a tariff, it must be linked to the device. To do this:
- Go to Settings > Tables & Rooms > Hall Plans & Tables
- Select the desired restaurant and hall
- Go to the Rated Devices tab
- Right-click on the devices field and select New Rated Device
Fill in the fields:
Name — the name of the device, for example "Track 1"
Status — select Active
Maximum number of guests that can be at this device
Tariff — select one of the previously created tariffs.
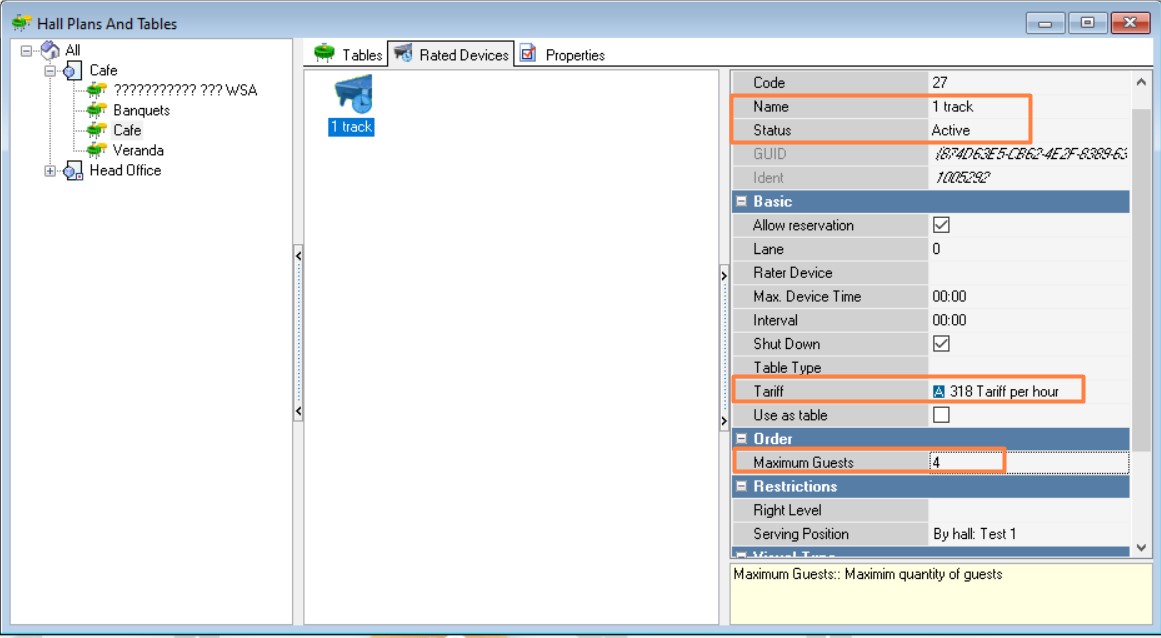
- The device being charged can be virtual or real. In the second case, it is pre-configured by technical specialists.
- An order can be created for the created device as for a regular table. The Regular table field does not affect anything.
- Save the changes.
Done, the tariff has been created and linked to the device. Now you can place an order for it. For information on working with tariffs at the cash register, read the article Working with tariffs.