Installing PostgreSQL on Windows
This article is about installing PostgreSQL. Setting up a connection with r_keeper 7 is described in a separate article.
Installing PostgreSQL
- Download the installer from the website: https://www.postgresql.org/download/windows/.
At the time of this writing, the latest version of the PostgreSQL database is 13.3. We used a 64-bit platform, therefore, we downloaded the version for Windows x86-64.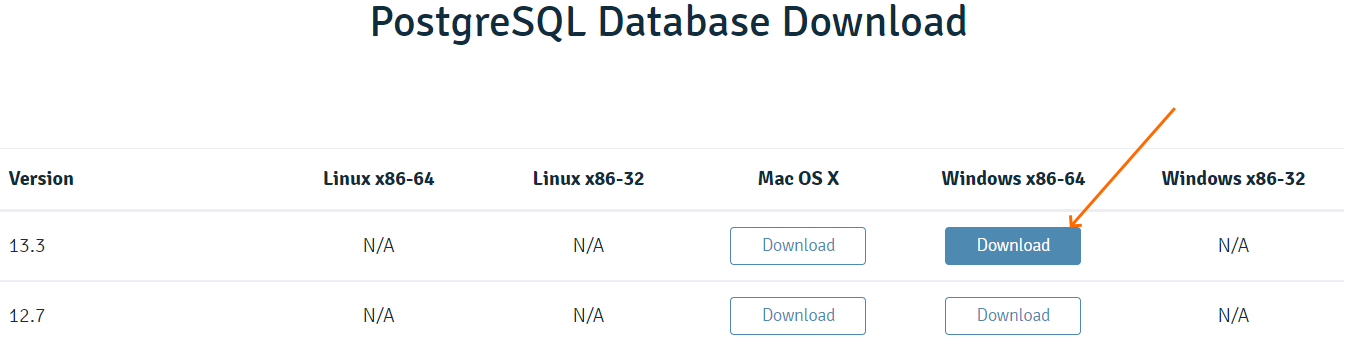
- Run the .exe file and walk through the basic installation steps.
Almost all steps already have pre-filled values. They do not need to be changed unless necessary:- Specify the installation path.
The location of the server is of no importance unless there are specific reasons for the change. - Specify the database components.
All the components are selected by default. - Choose a path for the stored data.
The location of the database doesn't matter either. - Choose a password for the postgres superuser.
For example, postgres. - Select the port for the installed PostgreSQL server copy.
By default: 5432. - Select the database localization. By default, it is the Default locale.
In the future, when using Unicode, the localization will not matter for the stored data. But the names depend on the localization, for example, the days of the week and months.
- Specify the installation path.
- The installer will offer to look at the selected parameters.
- Check them and start the installation.
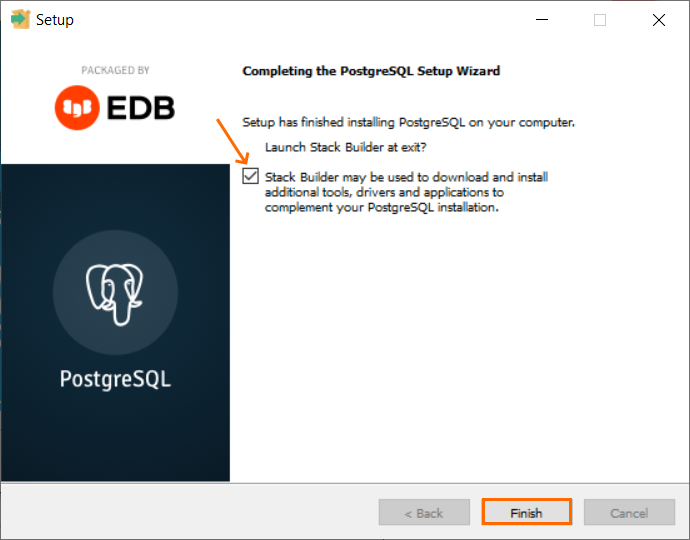
- There is no need to run Stack Builder yet. Uncheck the box and click Finish.
Starting pgAdmin
- In the PostgreSQL 13 folder, select and run the pgAdmin 4 application

- A launch window will appear

- Set a password for the admin panel, for example, postgres.
- Click the OK button.

It will connect to the server using the password specified during installation. Then one pre-installed postgres database will appear.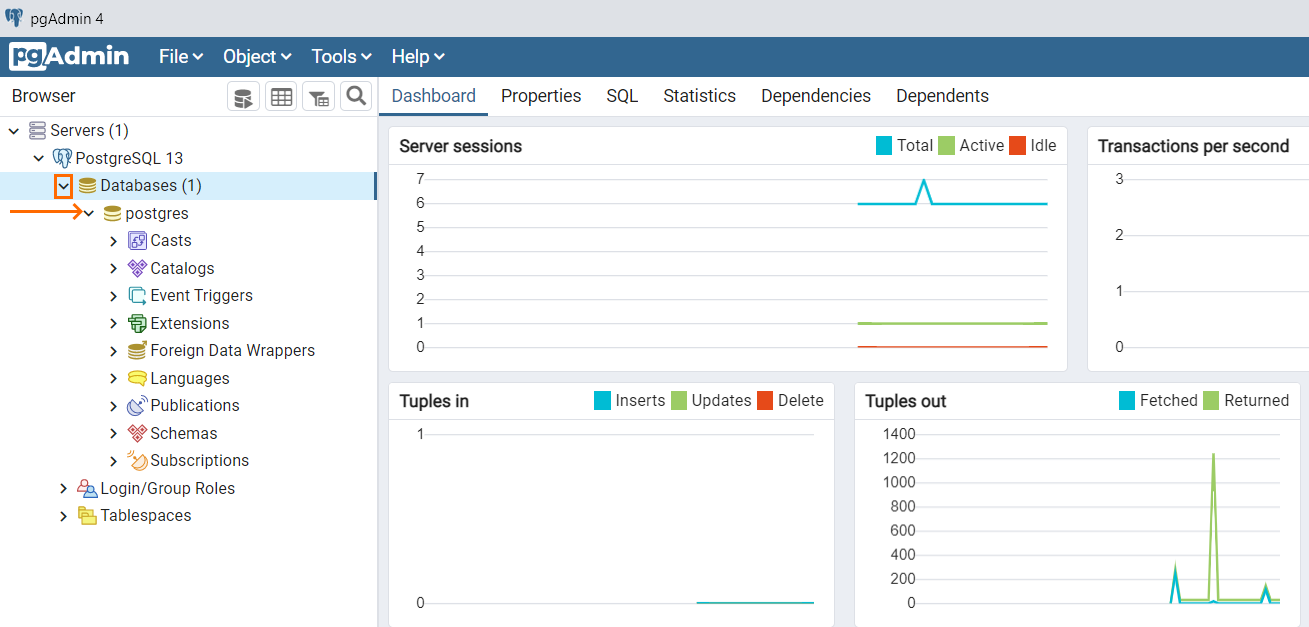
- Create your database.
Database creation
- Select the standard postgres database and right click on it.
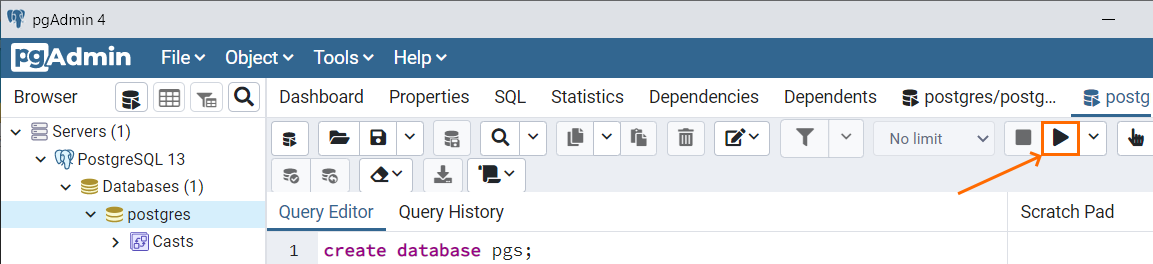
- In the context menu, click on the Query Tool item.

A field for entering the SQL code will open in the central part of the program. In this field, enter the following code with the name of the new database:
create database pgs;SQL- Click on the execute code button
 .
.
After that, you will see a message that the pgs database has been created.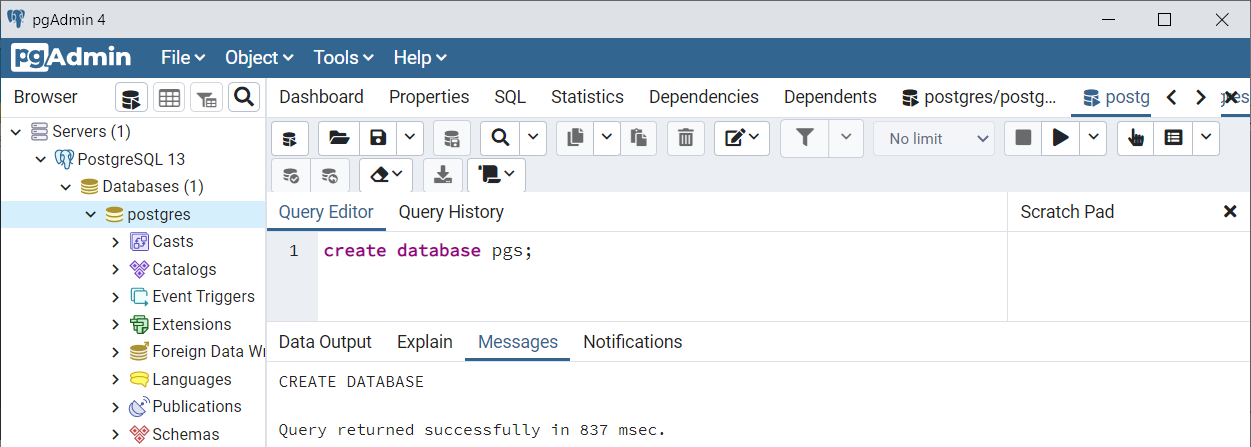
- To see it, right-click on the Databases node and select Refresh... in the context menu.
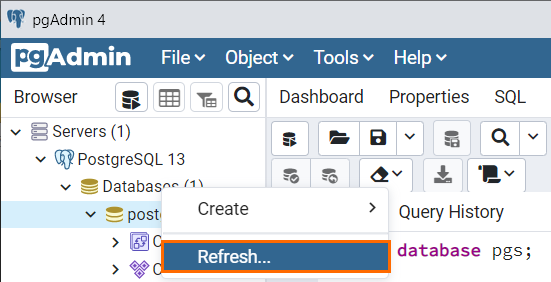
The list will be updated and the created database will appear. - By default, the database is inactive, so its icon is grayed out
 .
.
To connect to it, just click on it and open its node.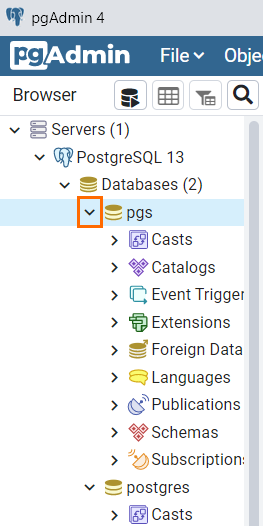
- Create users to work with the database:
- Select the created pgs database and right-click on it
- In the context menu, click on the Query Tool item
Enter the following code:
create user username password 'pgspgs'; grant all on database pgs to username; alter user username with createrole;SQLThis will create a username user with full access to the pgs database and the right to create roles.
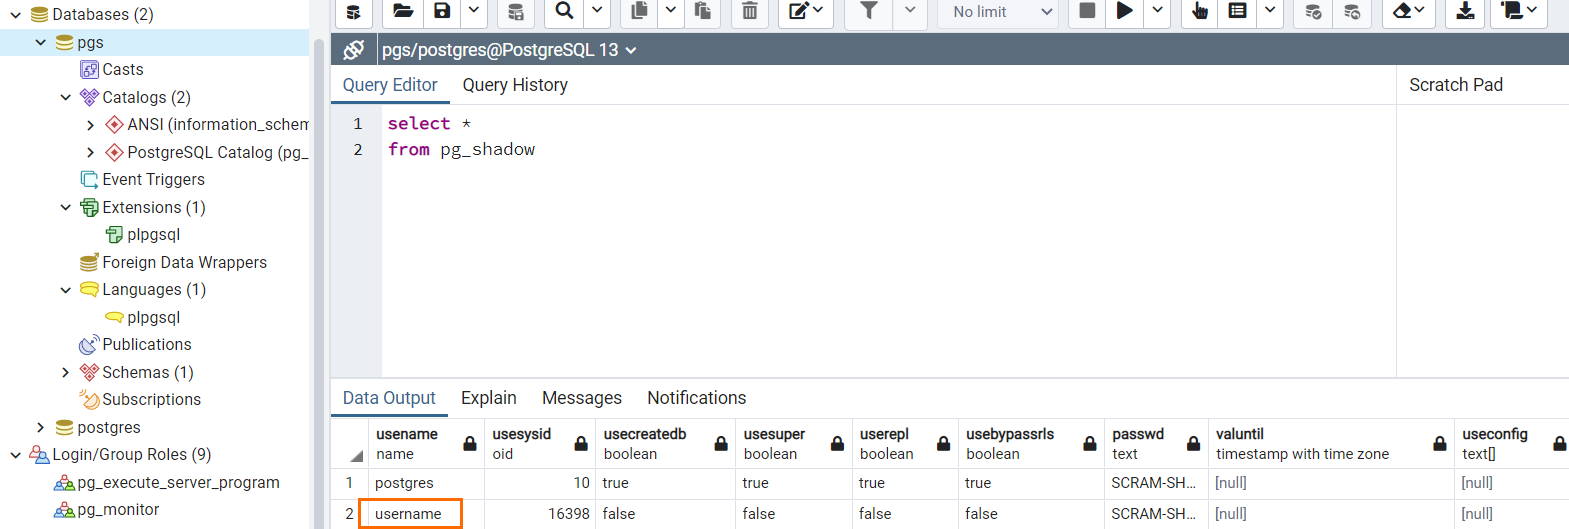
To test the user creation in pgAdmin 4, type the following command in the Query Tool:
select * from pg_shadowSQLA list of all users will appear:
- When closing pgAdmin 4, save your changes to the existing or new folder
- Go to the instructions for setting up r_keeper connection with PostgreSQL database.