
Setting up an item for sale 0.5 portion
To sell half a portion of an item:
- Create an item in the standard way
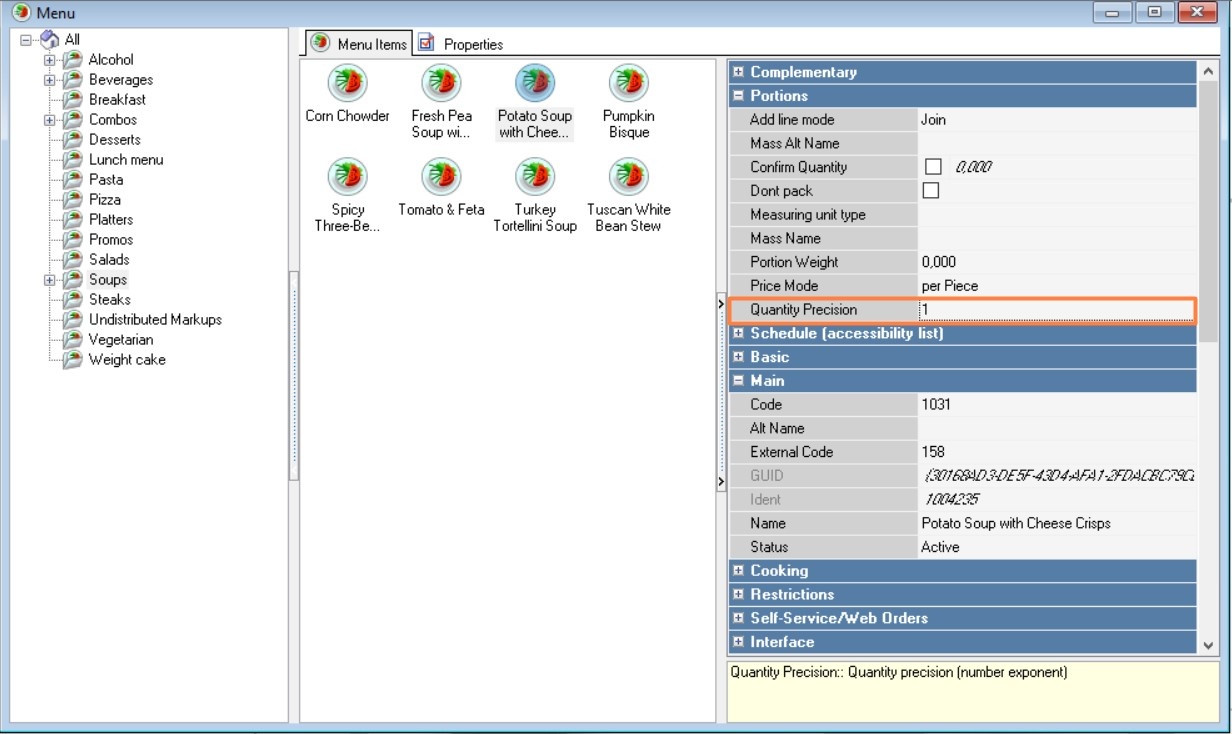
In the items properties, expand the Portions section and find the Precision for quantities field. Specify the value 1.
Menu item with an open price
The price of the item can be entered at the cash register during the ordering process. For example, this method can be used when selling an item that is not on the menu, or a certificate with an arbitrary denomination.
To configure:
- Create the item in the standard way.
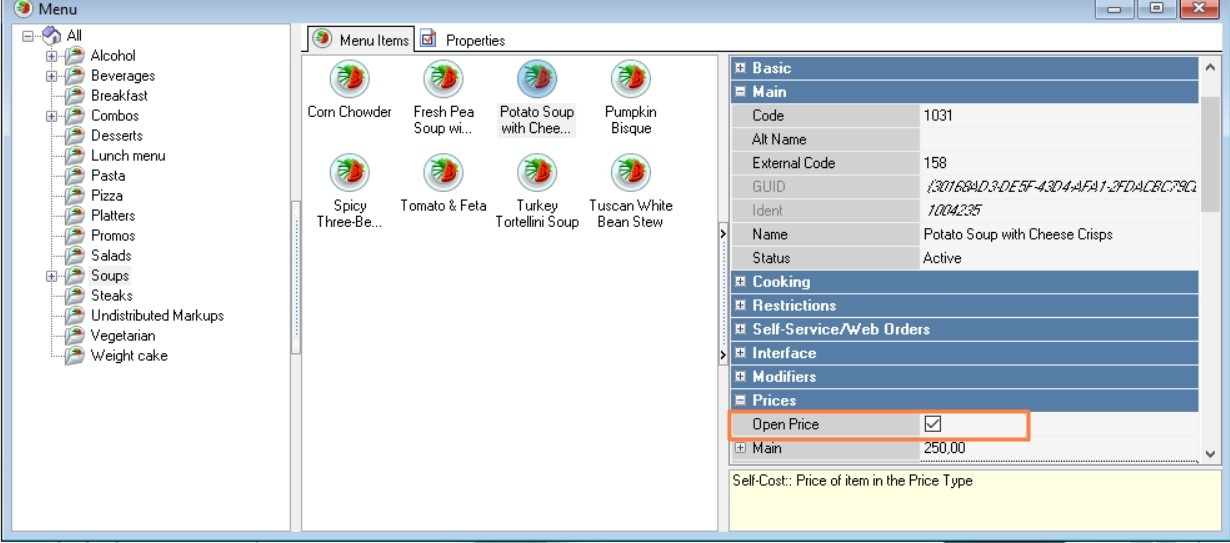
In the item properties, expand the Prices section and find the Open price field. Activate the setting
- In the Basic price, enter a price of "0" or more. When adding an item to an order, the set price will be automatically assigned to the item.
- At the cash register, when adding such an item, you must manually change the price. Read more about this in the article Entering an open price.
Limited items
At the cash register, it is possible to monitor the remaining quantities of items. Once the quantity reaches a threshold value, a reminder document will be printed in the kitchen, alerting the chef to prepare more of the item.
Setting up an item
- Select or create a new item
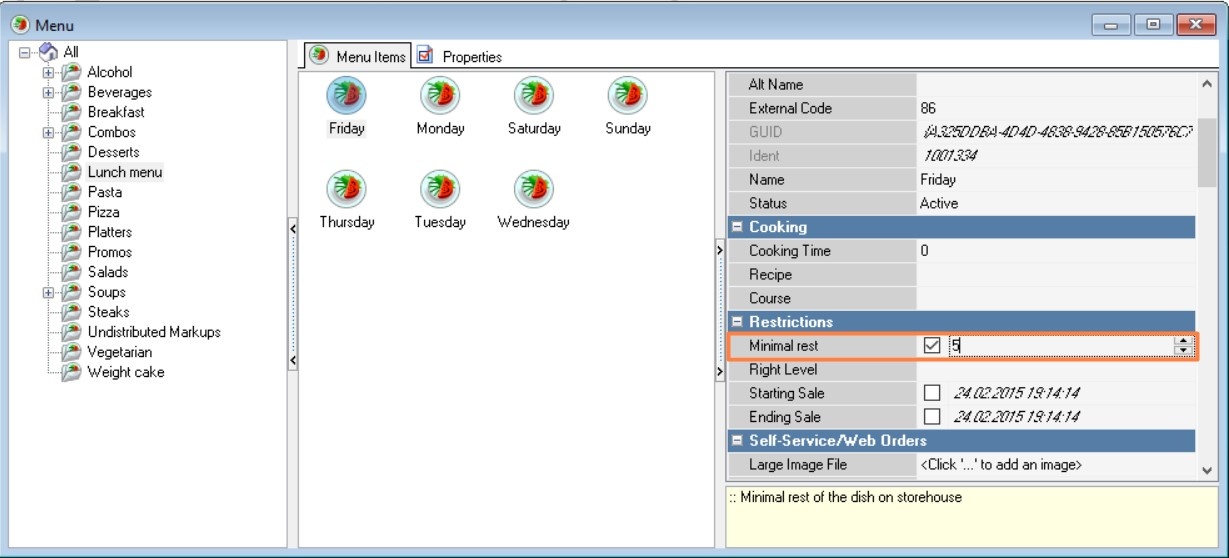
In the item properties, expand the Limits section and locate the MinRestQnt field.
- Activate the setting and specify the minimum quantity for the item
- Check the K.O.T. print settings: the item must belong to one of the K.O.T. print categories
Setting up K.O.T. Scheme
- Go to Settings > Print > K.O.T. Schemes
- Choose your restaurant and K.O.T. scheme.
- Go to the Alerts tab and add a new alert called “Balance Control” and a reminder layout.


Setting up a Role
The employee responsible for updating the list of Limited items must have the Monitor Stock Levels permission. To grant this:
- Go to the menu Personnel > Employees
- Select or create a role that will be given the right to fill the limited items list
- Go to the role properties and expand the Cash Restrictions list.
- Find and activate the Monitor Stock Levels setting

- Save the changes
Setting Parameters
To transfer the list of limited items from shift to shift, you need to make additional settings in the Parameters directory. If you do not do this, the list of limited items will be cleared after the shift is closed.
- Go to Settings > Options
- Expand the Enterprise Operation Parameters section
- Expand the Common Shifts subsection
- Find the Clear item stock levels setting and go to properties
- Uncheck the Boolean option in the Basic section

- Save the changes
Working at the cash register
For information on working at the cash register with limited items, see the article Limited and Prohibited Items.
At the cash register, in the “Monitor stock levels” window, only those items will be available that are included in the trade group specified in the restaurant property “Trade group SH”. If the "Boolean" setting is enabled in the "Limited items: Hide unavailable" parameter, items with zero balance will be hidden from the menu list. These items will not be available for adding to the order. |
Adding an item to an order using a barcode
An item can be added to an order by scanning its barcode. The list of barcodes must be linked to items in advance.
To configure:
- Select or create a new item and open its properties
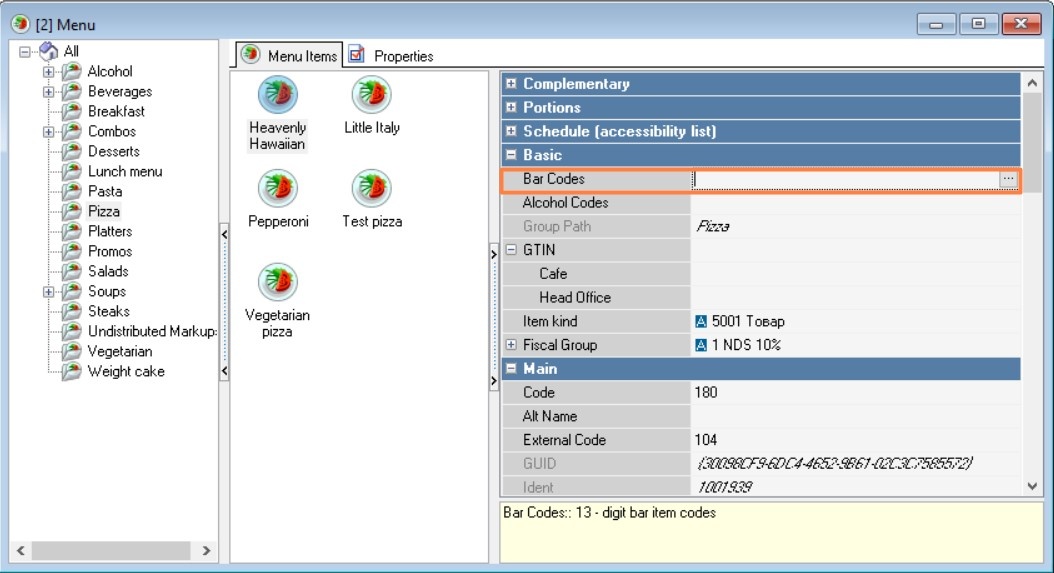
- Expand the Basic section and find the Barcodes field
- Activate the field and click the three dots button

- To add a new barcode, right-click on the left field and select New Barcode from the context menu.
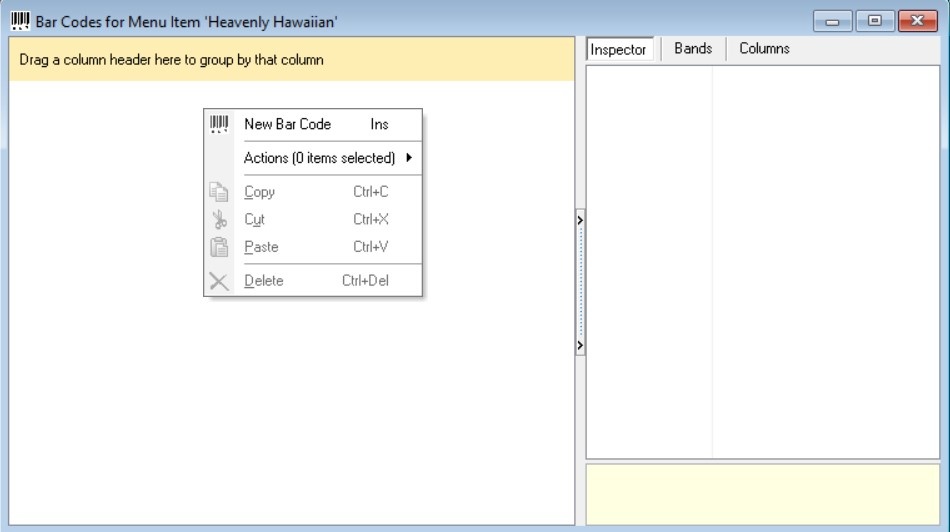
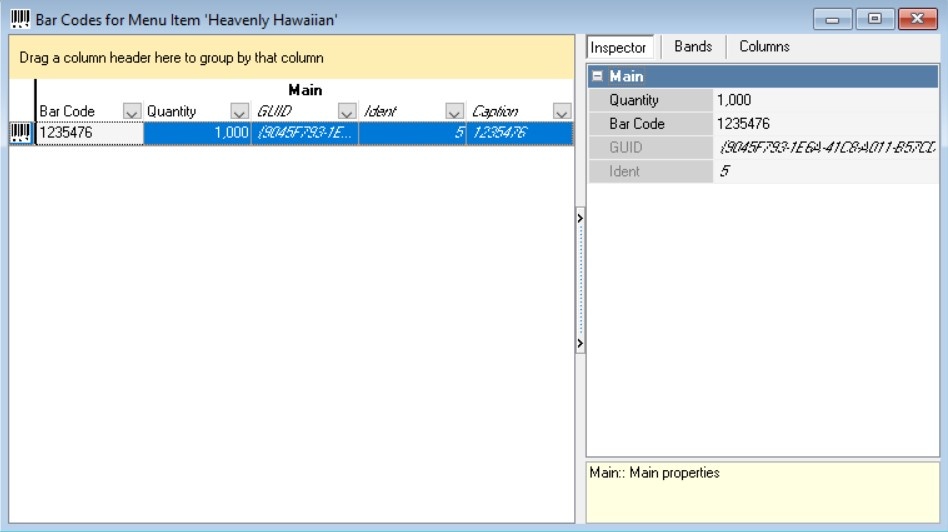
- Enter the data:
- In the Barcodes field, enter the barcode of the item
In the Quantity field, enter the number of servings of the item that will be added to the order when scanning the barcode
- The length of the barcode is no more than 20 characters.
- You can enter multiple barcodes for one item.
- You can enter the barcode by scanning.
|
- Save the changes
- The created barcode will appear in the item properties. If you have created several barcodes, they will all be displayed in the Barcode field.
To remove a barcode:
- Select the desired barcode
- Right click on it to bring up the menu
- Select Delete
- Confirm deletion.
Dialogue mode
In the dialog mode, the guest, when making an order, first names the groups of items, and then specifies specific items from these groups. For example, the guest says that he wants a burger, ice cream and a drink, and then selects specific items that the waiter names.
To be able to work in this mode, you need to set up a group of items for such work. To do this:
- Go to Menu > Menu
- Select a group of items and go to their Properties
- Expand the Additional section
- Activate the Add to order setting
- Save the changes.
At the cash station, when you select such a group, the group name with a question mark will be added to the order. At the same time, you can continue working with the order and add other items.
Once the guest has decided what exactly he wants, the waiter or cashier should return to the order and finish selecting specific items.
Import menu
If you have a menu in the form of a text file, you can import it into r_keeper. The file must be in the Text files (tab-delimited) format (*.txt) and consist of filled columns.

The column names must consist of system names so that the system can recognize the data being loaded. You can find out the system name in the directory Inspector Settings:
- Go to menu Service > Manager Station > Inspector Settings
- In the window that opens, go to the Text Properties tab
- Expand the required folder and find the required names. The main data is stored in the Main folder.
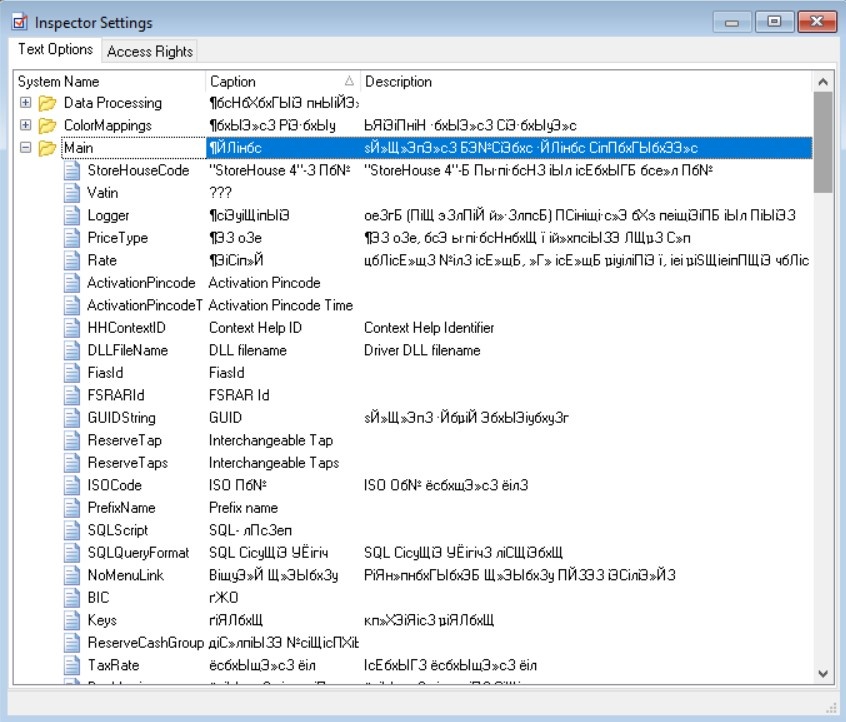
In the first line of the text file, specify the properties of the items. Properties are separated by spaces using the Tab key.
Exceptions:
- In the barcode name of the item, specify BarCodes Text
- In the price type name — Price:Price type name. For example, "Price:Main".
For ease of filling in data, you can create a menu in an Excel table. To do this:
- Create a file in Excel
- In the first line, enter the system names from the Inspector Settings directory
 In our example the following system names are used:
- Name — name of the menu item
- Code — item code in r_keeper. If you do not specify a value, it will be assigned automatically upon import
- Price:Main — main price
- MinRestQnt — minimum restock quantity.
- Fill in the table with the item data.
- Save the file as Text files (tab delimited)

- Close the file in Excel and import it into r_keeper.
- When importing, it is not possible to transfer data about linking an item to a category or trade group.
- Each item and its properties must be listed on a separate line.
|
To import data:
- Go to Menu > Menu
- Select the item group to which you want to import items
- On the Menu items tab, right-click on the field with items to open the context menu and select Actions > Import Menu
- Select the required text file.
The items from this file will be imported into the selected menu group.
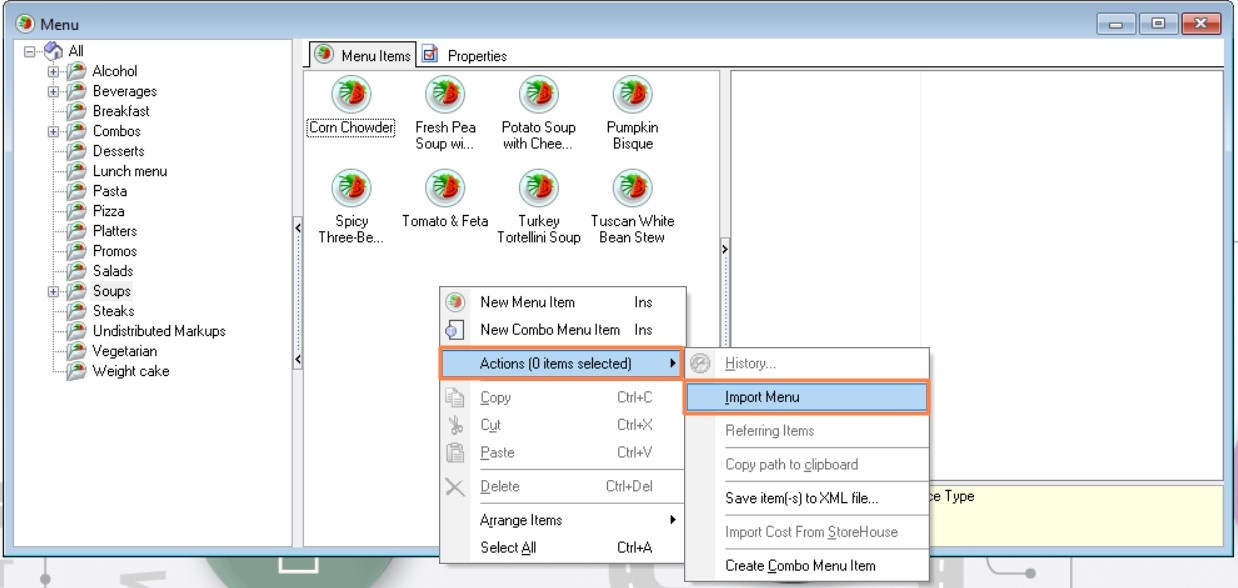
- The items are imported with the Draft status. Change the status of the items so that the items are displayed at the cash register.
Done, items are imported into r_keeper.
Nutritional value
Starting with r_keeper version 7.07.00.158, a new parameter has been added to the item properties, allowing you to add Proteins, Fats and Carbohydrates (PFC) to items.
To add nutritional value to an item:
- Go to Menu > Menu
- Select or create an item
- Go to Menu item Properties
- Expand the Advanced Settings section
- Find the Nutritional Value (PFC) field and double-click on the field
- In the window that opens, enter the nutritional value of the item in a convenient order and click OK
- The entered data will appear in the Nutritional Value (PFC) field.
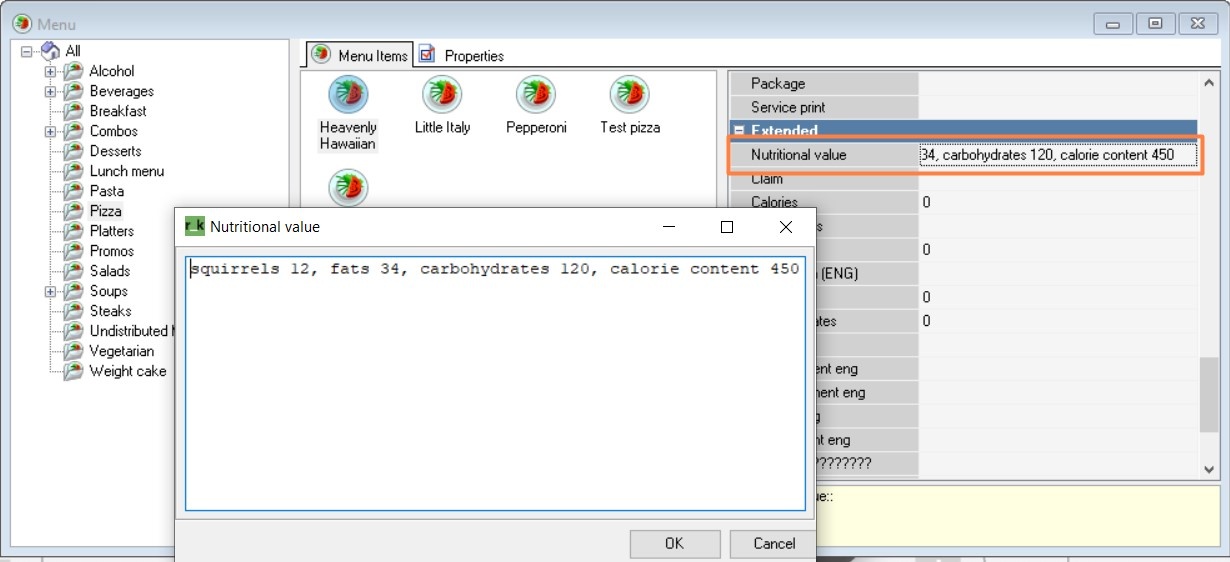
- Save the changes.
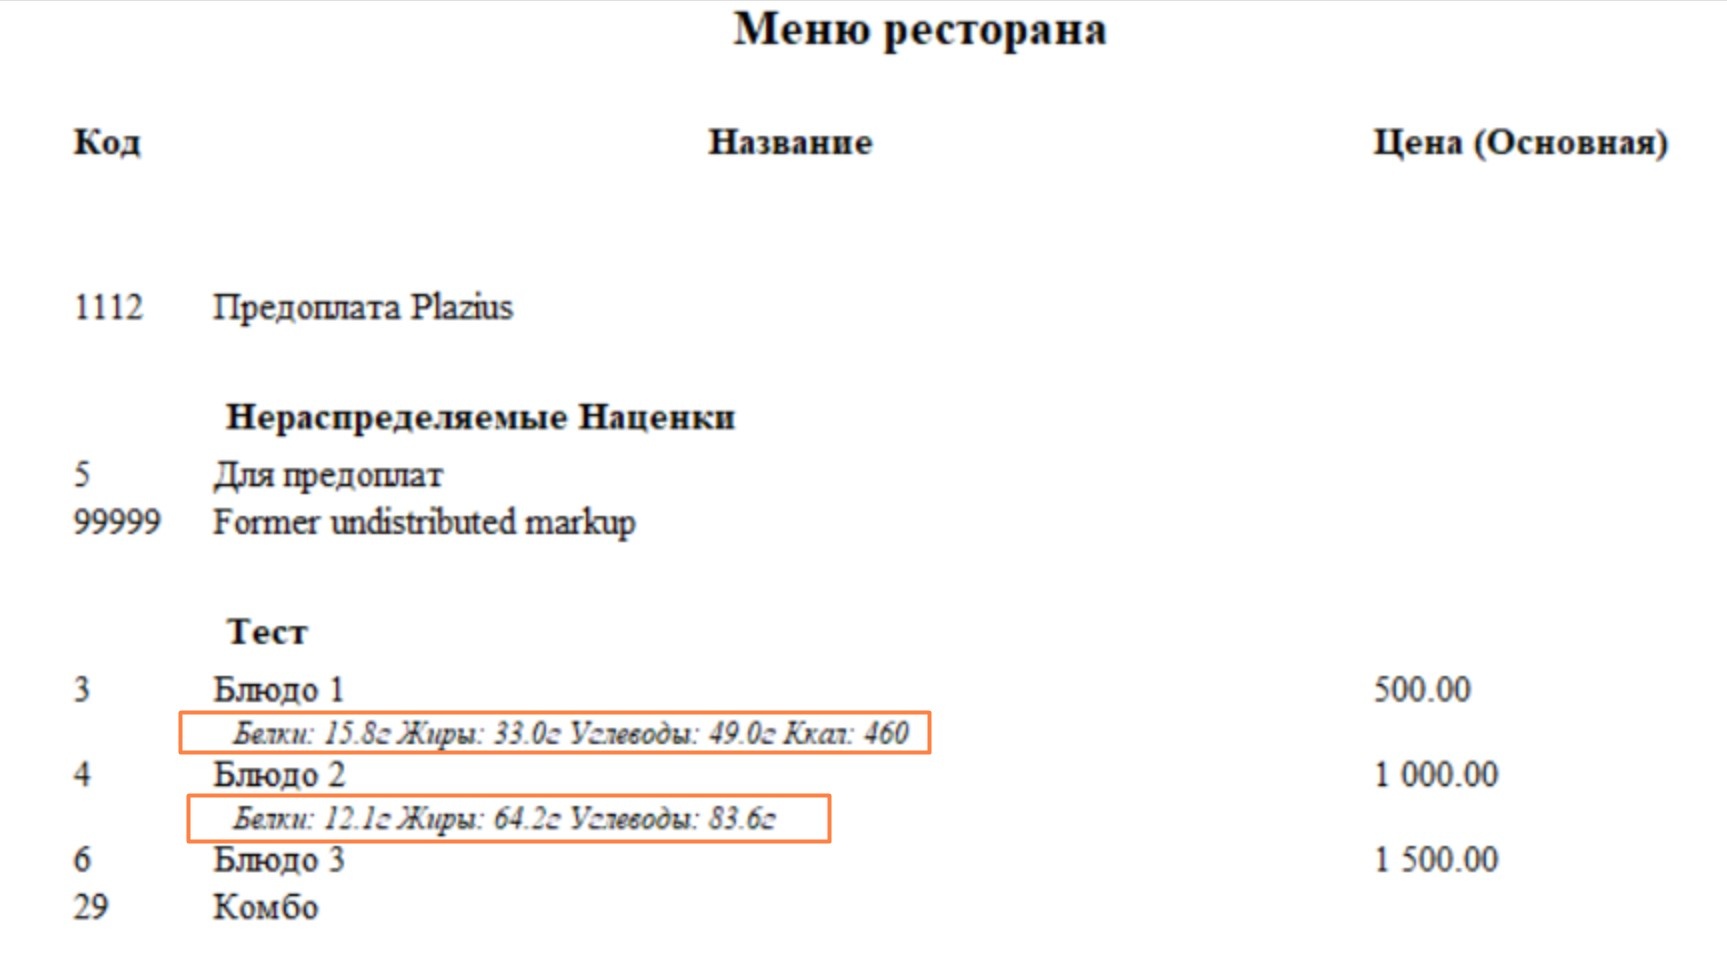
When displaying the Restaurant Menu report, the entered PFC data will be displayed under the items name:
VAT rates and their priority
VAT rates may apply at the cash register depending on the settings for regions, franchisees or concepts.
To do this:
- Create a menu.
- For items, please specify the grouping type:
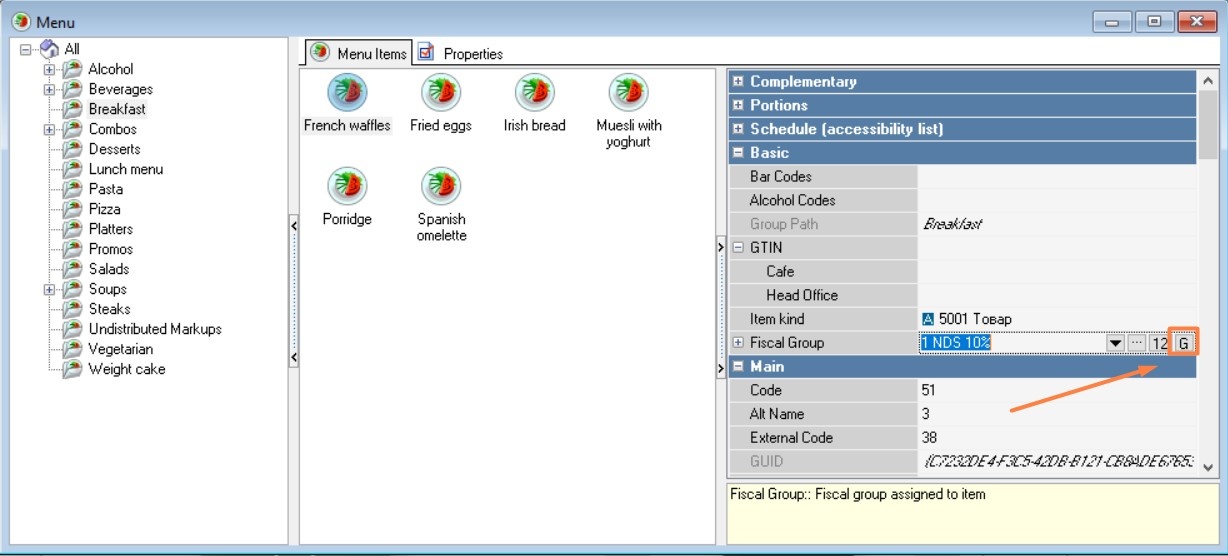
- In the Basic block, click on the Tax Group line field
- Then press the grouping button — G
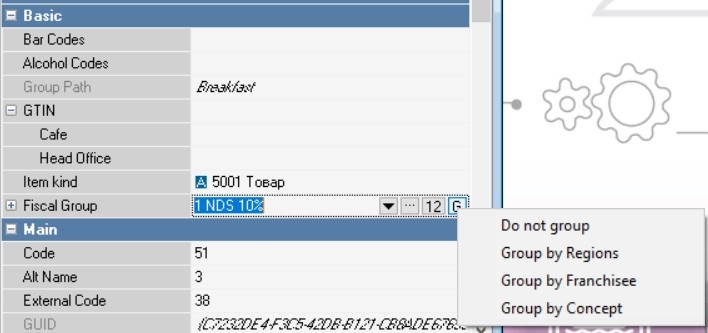
- Select grouping type:
- By Regions
- By Franchisee
- By Concepts
- Specify the tax group. For grouping By Regions, select the tax group for the regions
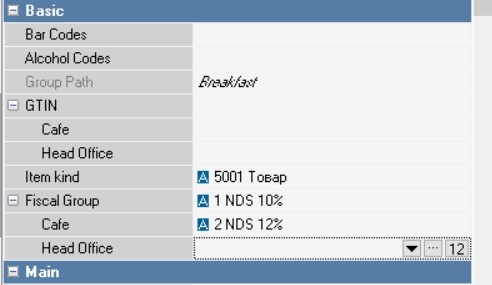
By analogy, specify tax groups in case of grouping by franchisee or by concepts. Only one type of grouping can be applied. - Save the changes.
The cash register selects a tax group according to the following priority (from high to low):
- Restaurant
- Group of elements
- Regions
- Franchisee
- Concepts
- General tax group.


 In our example the following system names are used:


