The approximate zone is drawn in the screenshot:

QMS is a program for displaying the status of orders on the screen in the delivery area. The guest will be able to monitor the status of their dish on the screen.
QMS works only alongside with KDS Pro or VDU. |
To open the program settings, click in the upper-right corner in the main menu.
The approximate zone is drawn in the screenshot:
The letter in the QMS order is the code of the cash station + the number of the letter in the alphabet corresponding to this code. For example, if the code of the station at which the order is made is 1, then the number will be A-01.
The order from the station with code 3 will have number C-02, and so on.
QMS server minimum requirements:
QMS client minimum requirements:
To work with the QMS system, the object must have a master license on the licensing server.
The license is called R-Keeper module QMS and there are 2 types:
The master license is required to activate the software. There is no need to generate an active license on the license server. The program will do it automatically. Find more details in License Activation.
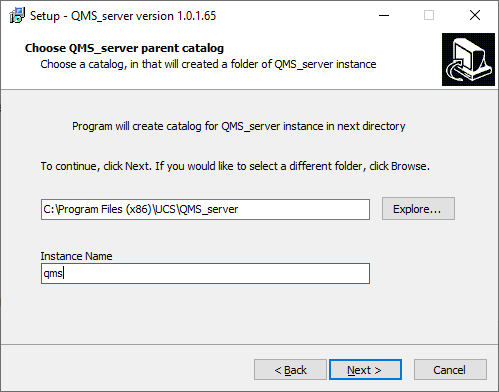
Follow these steps to install the QMS server:
Specify the path to the folder where the QMS server will be installed and specify the name of the instance
Spaces in folder address are not recommended. |

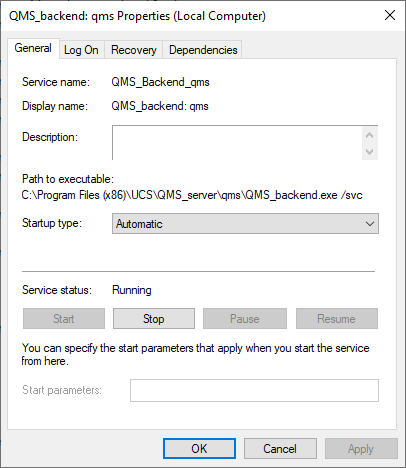
After being installed, the server starts and runs as a service.
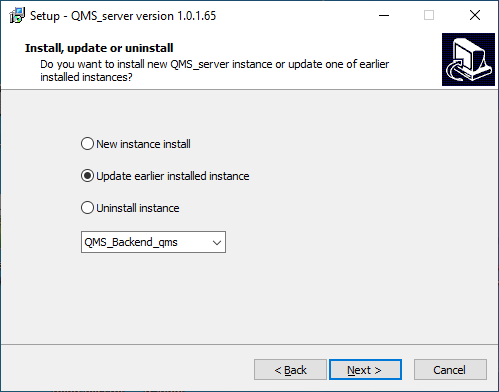
Use the installer to update the server. The server and templates are updated separately.

The installer will update the server and restart the service.
Templates are the appearance of a QMS client. During the initial installation, the server applies standard templates.
If developers change the standard templates, they need to be updated. |
To update the templates, do the following:
To install the QMS client, follow these steps:
First, activate the license in the client.
Run the file QMS_Client.exe and log in with your dealer username and password.
After authorization, select your object.
There are 2 options for activating the license:
Select the appropriate tab. To activate a new license, select the master license in the list under the line New license:
Click Generate.
If the license has already been generated, go to Link tab and select this license.
Click Link.
After the license is activated, the main window of the electronic queue opens.
Go to the website https://kds.ucs.ru and create a new client to display QMS orders from KDS Pro.
Check the box Electronic queue and enter a name.
The created electronic queue will appear in the list Electronic queues:
Open the QMS client and go to settings by clicking in the upper-right corner.
Click the button New KDS server. Specify the IP address, port, and name of the station created in KDS PRO. The station name register should be exactly the same as the name register in KDS PRO.
After that, the server can be selected in the list of available servers. Pay attention to the parameter setting Timeout between requests to the server. The shorter the timeout, the faster the order statuses in QMS will change.
Go to the VDU settings. Go to the section Interfaces > Network Settings > Basic and select VDU 3 protocol. QMS does not work with version 2 of the protocol.
On one of the VDU stations, you should specify the address and port of the QMS server in the settings. The port should match the data exchange port between the QMS server and the client.
Go to the section Interfaces > Third-party programs and specify server the IP and port. Port 8888 is specified for example.
Open the QMS client settings
Select the "Display Type" parameter - VDU
In the main QMS settings, the VDU server will appear in the list of available ones only after the VDU itself sends any order to the QMS server.
You can connect multiple screens to the QMS system. The settings of all screens will be the same and all displayed orders will be the same. To connect a screen with unique settings, you will need to obtain an additional license and configure a separate QMS server.
The first login to QMS is performed automatically from the first connected client. Its default name is Admin. If you fail to log in, then in the settings, right-click and enter client's name manually.
To access QMS from other clients, you need to create them in the main QMS settings, tab Customers.
When creating a client, specify:
Click Save.
To connect the client created in the settings with the ones installed through the installer, you need to perform the activation procedure.
There are two ways to activate the client:
The QMS server supports changing topics. The theme itself is a regular zip archive. It is used in the settings, in the "Display" tab
To change the theme, click the "Select File" button and select the archive with the theme, then click the "Apply" button and wait until the progress icon disappears and the page is refreshed.
Different themes may have additional specific settings.