Installation of the White Server Agent v2
This article describes a separate installation of White Server Agent v2.
In r_keeper, starting with versions 7.6.5.459, it is included in the installer and is installed automatically. The installation process of r_keeper + WSA v2 is described in the article silent installation of r_keeper 7 and WSA v2.
The process of migrating from WSA v1 to WSA v2 is described in a separate article.
To use WSA, it is necessary to purchase licenses.
Minimum system requirements for running WSA v2:
| Operating system | 64-bit version of Windows 7 SP1 or Windows 7 SP2+ For Windows 7 SP1, the following updates must be installed: |
CPU | Intel Core i3 1 GHz |
RAM | 4 GB |
| Hard Drive space | 2 GB |
Internet connection | 1 Mbps, stable communication channel |
| r_keeper | 7.6.0 |
The following updates are required to run on older operating systems:
- KB976932 (~540MB)
- KB2999226 (<1MB) or Visual Studio С++ 2015 Redistributable (~14MB)
- KB3063858 (~1MB)
Also WSA versions newer than 2.8.x.x on Windows 7 (and on Windows Server — if an error occurs when trying to download .net, like: "Unable to download" https://aka.ms/dotnet/3.1... ) require:
- Install four runtimes manually using the links below:
https://download.visualstudio.microsoft.com/download/pr/63b482d2-04b2-4dd4-baaf-d1e78de80738/40321091c872f4e77337b68fc61a5a07/aspnetcore-runtime-3.1.32-win-x86.exe
https://download.visualstudio.microsoft.com/download/pr/3f353d2c-0431-48c5-bdf6-fbbe8f901bb5/542a4af07c1df5136a98a1c2df6f3d62/windowsdesktop-runtime-3.1.32-win-x86.exe
https://download.visualstudio.microsoft.com/download/pr/25974def-24fd-4155-af11-7bf477cc1c7f/21f5291090d9d4040ad8522bbdf00cc6/aspnetcore-runtime-6.0.25-win-x86.exe
https://download.visualstudio.microsoft.com/download/pr/33eced41-f212-46df-bb2f-12d4b891e667/f55a4581dd72a971f21e9562816c7430/windowsdesktop-runtime-6.0.25-win-x86.exe - Run the installer
- If errors also occur in the Windows Event Log related to files:
- api-ms-win-crt-runtime-l1-1-0.dll
- api-ms-win-cor-timezone-l1-1-0.dll
- hostfxr.dll
Install the Windows updates listed here https://learn.microsoft.com/en-us/dotnet/core/install/windows?tabs=net60#additional-deps.
Any operating system newer than Windows 7 SP2 will also work.
Installation
You can install WSA using the installer available at ftp://ftp.ucs.ru/WS/WSAgent/versions/.
- Open the link ftp://ftp.ucs.ru/WS/WSAgent/versions/ in Explorer or FTP client
- Login with Dealer ID
- Select the latest version of the installer and download it to your computer. The easiest way to do this is to sort the files by modification date
- Run the installer and follow the steps in the installation wizard.
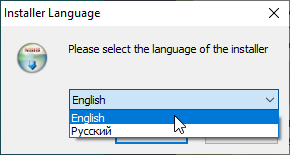
- Select installation language
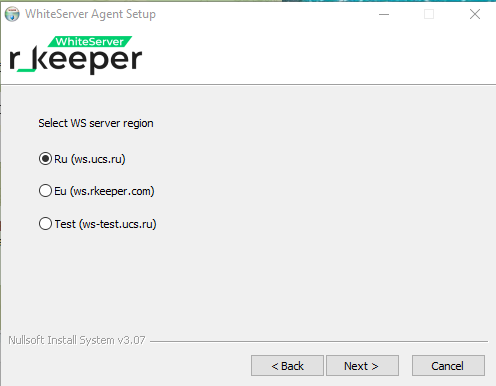
- Select server region:
Ru — to connect to RU server
Eu — to connect to EU server
Test — to connect to the test server.The servers are isolated and not synchronized with each other. When choosing a server, keep in mind that integration solutions, including r_k Delivery and the objects themselves, must operate in the server's hosting zone.
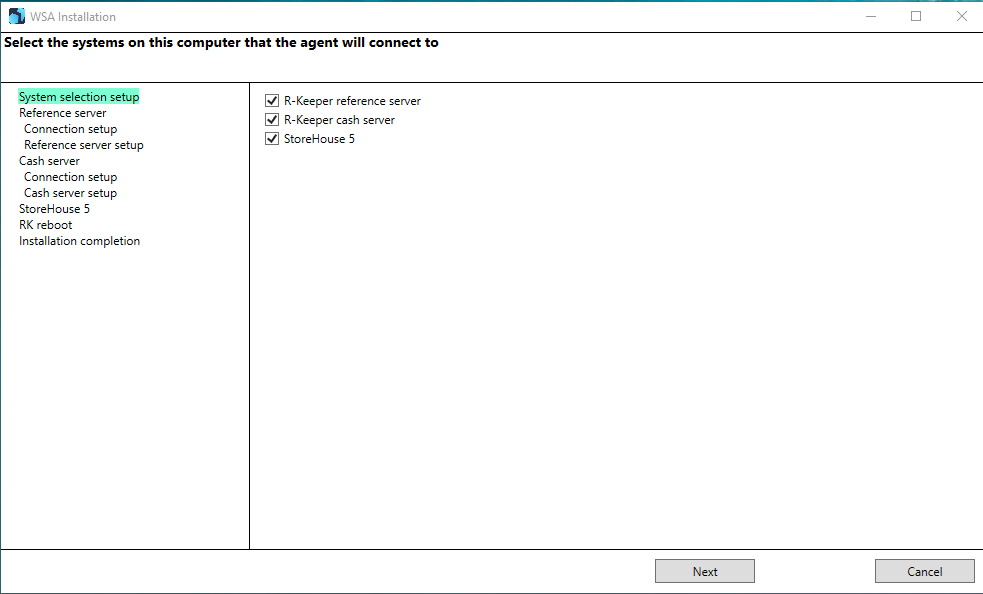
- Select the systems the agent will connect to
Specify the path to the directory server folder. The XML interface port field will be filled in automatically after specifying the correct path.


Please note!
To configure r_k Cloud, in this window, uncheck the "Directory server installed locally" checkbox and fill in the "Directory server IP" field instead of the "Path to installed R-Keeper" field. Specify the desired XML interface port.
- Click Next. The installer will indicate what settings should be made in the manager station:
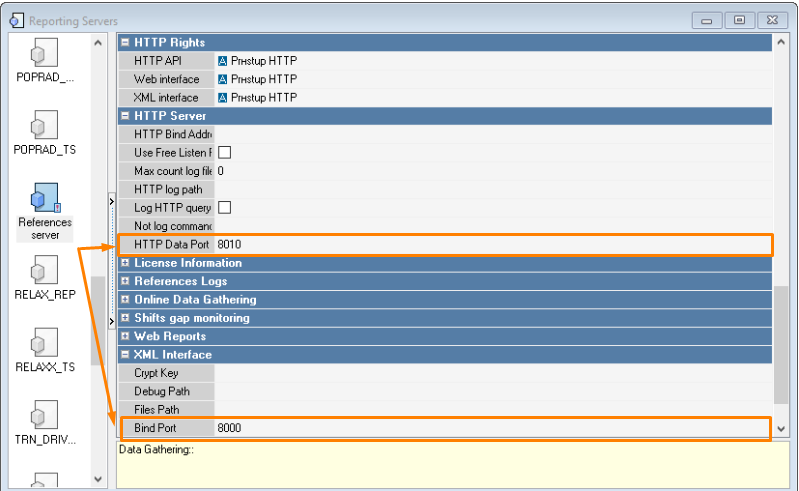
- Open the manager station and go to the menu Settings > OLAP reports > Report servers
- Select the desired report or reference server
- In the XML Interface section, specify the Bind Port. The port must be free and accessible over the network.
- In the HTTP Server section, specify a free port in the HTTP Data Port field, while the Use Free Listen Port setting should be disabled.
- Save the changes and accept the warnings that the server needs to be rebooted.
- In the HTTP Rights section, specify the HTTP Access right in all fields.
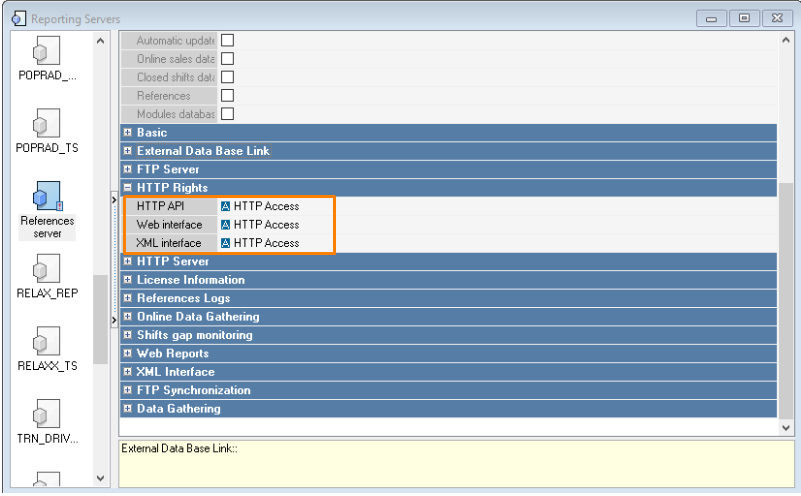
If the HTTP Access privilege does not exist, create a new privilege with this name.
- Restart the reference or reporting server. After the server is restarted, the settings in the WSA v2 json file will be updated.
- Restart the cash server
- In the installer, check the Done box.
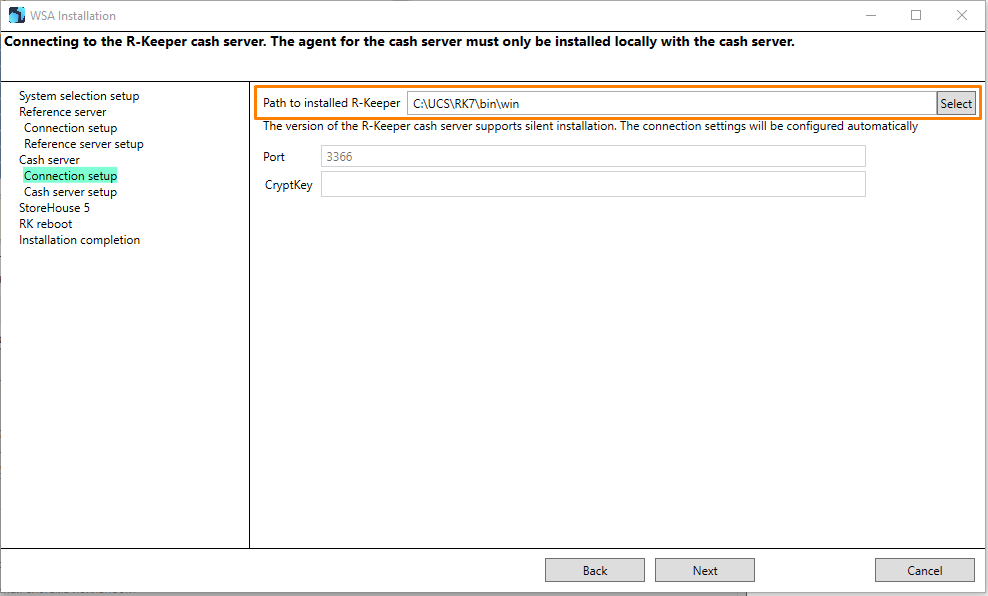
- Specify the path to the cash server folder.
- In the StoreHouse 5 setup step, specify:
- IP — StoreHouse 5 location address
- Port — Web API port
- Пользователь — User login in Store House 5
- Пароль — User password.
Click the Next button.
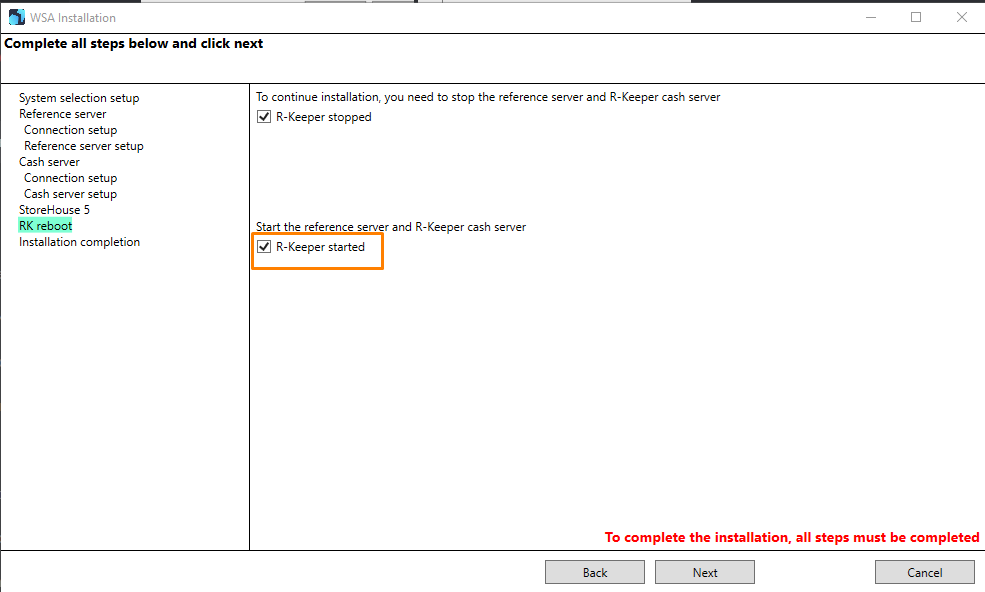
- At the RK restart step:
- Turn off the cash server and check the box R-keeper stopped
- Check the box File copied, no need to copy anything
- Start the cash server and check the box R-keeper started
- Click the Next button
- Click Install
- Wait for WSA to install on your computer.
During installation, WSA will check if r_keeper is licensed. For information on the required licenses, see the Licensing article.
If everything is OK, the agent will be launched after installation.
WSA v2 installation completed successfully.
WSA will connect to the server within 15 minutes and will be displayed in the admin panel. You can check the connection.
Setting up WSA for delivery is described in the article Setting up the agent for Delivery.
After successfully starting WSA, two interfaces will appear on the cash server. To check the interfaces, follow these steps:
- In the r_keeper manager station, go to the menu Service > Stations and devices
- In the Cash Registers and Devices window, select the desired establishment, and then select Cash Register Server
- The Devices window will display PDS and XML interfaces.
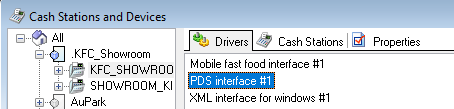
If the interfaces do not appear, restart the cash register server. Without these interfaces, WSA will not work.
For WSA to work properly, you need to check the following parameters:
- HTTP Rights:
- Go to menu Service > Stations and devices
- In the desired restaurant, select the cash register server for which the integration will be configured and go to the Properties tab
- In the HTTP Rights block, set the HTTP Access value in the fields:
- HTTP API
- Web interface
- XML interface.
- Rights:
- Go to menu Personnel > Employees
- Expand the Central Office, select the WSA and go to the Properties tab
- In the Cash Register Restrictions block:
- In the Operations field, allow all operations.
- In the Rights > WSA Rights field, check the box.
- In the Manager Restrictions block:
- In the Object Privileges field, allow all objects.
- In the Privileges field, allow all privileges.