Setup of Second Screen Plugin for Manager Station
Important!
The Second Screen will not be updated and supported from December 31, 2020. Use Guest Screen instead.
Introduction
There is a plugin that allows the user to configure second screen scenes via the manager station. It operates via the Feature Server and automatically writes data in XML. You do not need to adjust INI files, as all settings are made at the manager station. Before reading this article, get acquainted with the main one.
The second screen does not require any licensing.
If you have other plugins installed, which require the Common Server and the Feature Server, install new instances with other ports for the second screen operation!
Summary
The plugin is available at FTP: ftp://ftp.ucs.ru/rk7/INSTALL/RK7_XMLSecondScreen/.
The configuration is identical to the usual second screen configuration, except for two aspects:
- Configure and launch the Common Server and the Feature Server.
Unzip the second screen files to the cash station folder.
Plugin files should be placed in the manager station folder. In the plugin .ini file, specify the Common Server connection URL in the [CS_CONNECTION] section:[CS_CONNECTION] WSDL=http://127.0.0.1:7007/soap/UCSCommonWSCODE
This is all. If the plugin displays and opens without errors at the manager station, everything is configured correctly.
Details
Required Components
For the plugin to operate, you should launch the Common Server (CS), the Feature Server, and r_keeper_7, connected to MS SQL.
CS settings are stored in the CS_service.ini file. Specify the required ports under the [CS_CONNECTION] section:
[CS_CONNECTION]
def_port=11111
SSL_port=11112Plugin Installation
XML Interface Setup
For the second screen operation, create an XML interface at the manager station for the required cash desk. Go to Service > Stations and Devices and select the required cash desk. Right-click in the Devices section and add the Second Screen with XML Interface.
Optionally, you can specify the log file name and the logging level.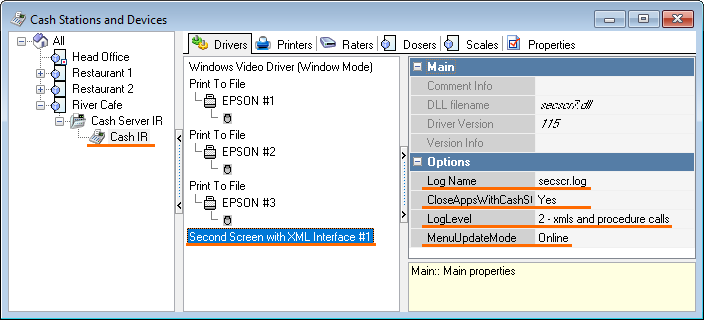
Press Save or Ctrl+S.
Plugin Settings
Download the plugin from FTP: ftp://ftp.ucs.ru/rk7/INSTALL/RK7_XMLSecondScreen/.
The plugin consists of 3 parts, you will need all of them:
- Core — SSXMLAIR_core
- The plugin itself — SSXMLAIR_FS&Plugin. A Feature Server instance is also available in the same archive.
- Design files. They are available in the folder at /FTP SSXMLAIR_Designs/. Select and download the necessary files.
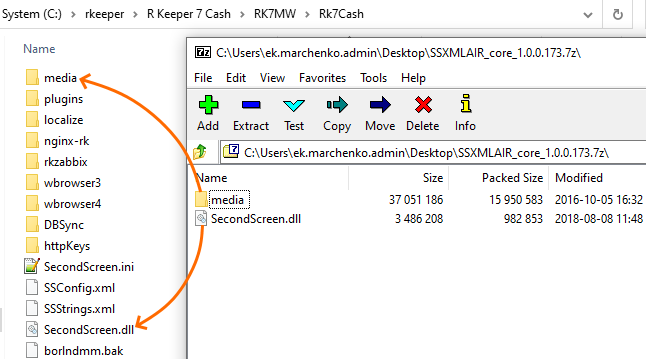
Unzip the SSXMLAIR_core files into the folder of the cash station, where the second screen is connected to. Usually, it is the \Rk7Cash folder. Unzip the design files from the SSXMLAIR_FS&Plugin.7z archive into the same folder.
Keep the folder structure unchanged! The files should be stored on the disk exactly as they are in the archive.
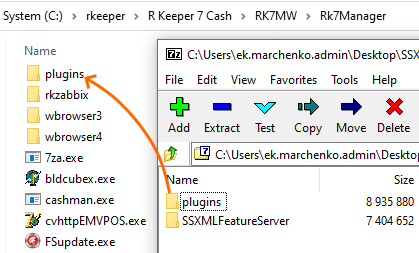
Unzip the plugins folder from the SSXMLAIR_FS&Plugin archive into the plugins folder of the manager station: \Rk7Manager\plugins\
Unzip the design files into the cash station folder: \Rk7Cash\. 3 files should appear in the cash desk root folder:
- SSString.xml
- SSConfig.xml
- SecondScreen.ini
The media folders should contain the second screen executable file and design files. The plugins folder should contain the ssxml_settings folder.
Feature Server Settings
Feature Server can be launched as an application or as a service. To install it:
Unzip the Feature Server files from the SXMLAIR_FS&Plugin archive to any convenient place.
Open the DB connection file udl: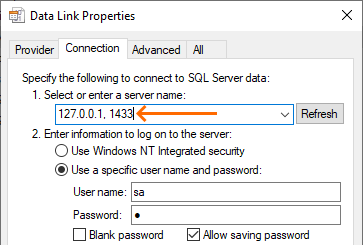

UDL is a plain text file containing the connection line. It can be edited in Notepad.
[oledb] ; Everything after this line is an OLE DB initstring Provider=SQLOLEDB.1;Password=1;Persist Security Info=True;User ID=sa;Initial Catalog=RK7_1803;Data Source=127.0.0.1CODESpecify the following:
- Server IP address. Specify the port, only if it is different from the standard.
- Login and password for DB access.
- Click Test Connection
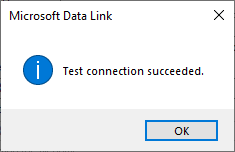
- After the successful test, select the DB from the list:
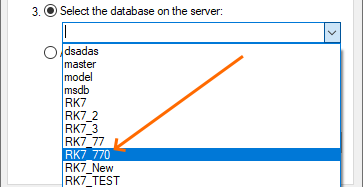
- Click ОК to save the settings
DB connection is configured. Now, you need to specify the FS and CS operation ports. Open the SSXMLFeatureServer.ini file:
[FS_CONNECTION] ; SSXMLFeatureServer operation URL url = http://127.0.0.1:9992/soap/IStructuresInfo urlSSL = start_port = 10000 DB_Connect_Count = 2 FSGuid ={469B5D64-113C-4E24-8621-BB3A76B5DC23} [CS_CONNECTION] ; URL of Common Server connection to SSXMLFeatureServer url = http://127.0.0.1:7007/soap/UCSCommonWS urlSSL =CODEHere, you should change two settings:
- URL used to access SSXMLFeature Server
- URL used to connect Common Server to SSXMLFeature Server
Launch the Feature Server. For the Feature Server to connect automatically to the Common Server, you need to launch the latter in advance.
Open the SSXMLFeatureServer.exe file.
The After registration: code 2, Previously line means that the CS connection is functioning properly.- To install the Feature Server as a service, launch the SSXMLFeatureServer.exe file with the /install key.
Configuration File Example
Below, you can see an example of the functioning SSXMLFeatureServer.ini file configuration with comments.
[FS_CONNECTION]
; SSXMLFeatureServer operation URL
url = http://127.0.0.1:9992/soap/IStructuresInfo
; The same as above, but via SSL
urlSSL =
; SSXMLFeatureServer operation port
start_port = 9992
DB_Connect_Count = 10
; GUID SSXMLFeatureServer FSGuid = {045F8849-E925-4728-A277-6E4A391FFD70}
[CS_CONNECTION]
; URL of Common Server connection to SSXMLFeatureServer
url = http://127.0.0.1:7007/soap/UCSCommonWS
; The same as above, but via SSL
urlSSL =Plugin Settings
Plugin settings are stored in the \plugins\ssxml_settings\ssxml_settings.ini file. It makes sense to change them, only if your CS uses a non-standard address and port. Specify the following in the connection file:
[CS_CONNECTION]
WSDL=http://127.0.0.1:7007/soap/UCSCommonWSAdditionally, you can select the logging level from 1 to 3. Logs are stored in the \Logs\ folder.
The same setting should be specified in the SecondScreen.ini file of the cash station. The section is the same as above — [CS_CONNECTION]. In this file, specify the code (number) of the cash desk, where the second screen should be running.
Example:
[CS_CONNECTION]
WSDL=WSDL=http://127.0.0.1:7007/soap/UCSCommonWS
[STATION]
Code=1Plugin use
The plugin is launched via the manager station. Go to Extensions > SecondScreenXML Configurator (common).
When opened, the plugin should not output any errors. In the operating window, you can configure scenes, scenarios and modes.
See Second Screen configuration details in the main article.
Troubleshooting
Failed to establish server communication
Error: Failed to establish server communication.
Reason: Common Server is unavailable or has not been launched.
Solution: Check the CS settings in the ssxml_settings.ini file and restart the server.
Error when accessing Feature Server
Error: Error when accessing the Feature Server.
Reason: Feature Server is unavailable or has not been launched.
Solution: Check the Feature Server settings and restart it.
There is no available Feature Server for the structure
Error: There is no available Feature Server for the structure
Reason: An incorrect database is selected in the connection settings.
Solution: Select the correct database in the MSSQL_FS.udl file.
FS internal error
Error: FS internal error.
Reason: Wrong database connection parameters.
Solution: Open the MSSQL_FS.udl file and specify correct connection settings.